1106107801 Kenmore Dryer - Overview
Sections of the 1106107801
[Viewing 3 of 3]Keep searches simple, eg. "belt" or "pump".
Light Bulb - 40W
PartSelect #: PS884734
Manufacturer #: 8009
This an authentic OEM 40-Watt replacement light bulb, used in a number of household appliances. It is specially designed to withstand extreme temperatures, which is why these replacement bulbs are mos...
$18.22
In Stock
Dryer Screw
PartSelect #: PS11746840
Manufacturer #: WP90767
This screw is sold individually.
$7.47
In Stock
Air Conditioner Cover Screw
PartSelect #: PS11740701
Manufacturer #: WP308685
Sold individually.
$7.47
In Stock
Front Top Lock
PartSelect #: PS11738705
Manufacturer #: WP18776
This part is used to secure the top panel to the cabinet. Sold individually.
$12.85
In Stock
Refrigerator Screw
PartSelect #: PS11747542
Manufacturer #: WP98165
This screw is a little under an inch long and is made of metal. It is used with a refrigerator's ice maker assembly. Sold individually.
$7.47
In Stock
Range Hex Nut
PartSelect #: PS11742711
Manufacturer #: WP488130
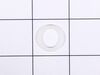
This hex nut is an authentic Whirlpool part that is sourced directly from the original equipment manufacturer, and will fit a variety of appliances including ovens, microwaves, refrigerators, air cond...
$8.55
In Stock
Dryer Screw
PartSelect #: PS11743744
Manufacturer #: WP681414
This screw is sold individually.
$7.47
In Stock
Bearing and Seal Kit
PartSelect #: PS334171
Manufacturer #: 279264
This front bearing and seal kit comes with the adhesive.
$67.82
In Stock
Dryer Clampmotor
PartSelect #: PS11743369
Manufacturer #: WP660658
This clamp is used to secure the drive motor.
$9.62
In Stock
SEAL-DOOR
PartSelect #: PS16744945
Manufacturer #: W11613302
Adhesive sold separately.
$38.96
In Stock
Questions And Answers for 1106107801
Be the first to ask our experts a question about this model!
✖
Ask a Question
Ask our experts a question on this model and we'll respond as soon as we can.
Sorry, we couldn't find a match for "".
Here's a guide for finding your model number.
Something went wrong. Please try again later.
Your Question Has Been Submitted!
Our experts will send you an email as soon as your question has been answered.
Common Symptoms of the 1106107801
[Viewing 5 of 5]Noisy
Fixed by
these parts
these parts
Show All
Will not agitate
Fixed by
these parts
these parts
Show All
Burning smell
Fixed by
these parts
these parts
Show All
Door won’t close
Fixed by
these parts
these parts
Show All
Spins slowly
Fixed by
these parts
these parts
Show All
Keep searches simple. Use keywords, e.g. "leaking", "pump", "broken" or "fit".
Drum was binding because of worn bearing supporting front of dryer drum
First I unplugged the dryer for safety, then I removed the top of the dryer, then removed the 2 hex head screws holding the font door panel onto the dryer. Then I disconnected the door safety switch. the rest was cake. I removed the old bearing and cut the new bearing and seal to the exact size of the old one. I used contact cement to gl
... Read more
ue the new bearing and seal into place. Reassembly was a breeze. End of job. Success!!!
Read less
Parts Used:
-
Leslie from Townsend, GA
-
Difficulty Level:Easy
-
Total Repair Time:1- 2 hours
-
Tools:Nutdriver, Pliers, Screw drivers
23 of 35 people
found this instruction helpful.
Was this instruction helpful to you?
Thank you for voting!
broken clip on top panel hold down
pressed clip into hole on top of front panel. first remove two philip screws that hold filter so you can lift top up.
Parts Used:
-
Mark from Huntington Station, NY
-
Difficulty Level:Easy
-
Total Repair Time:Less than 15 mins
-
Tools:Screw drivers
15 of 26 people
found this instruction helpful.
Was this instruction helpful to you?
Thank you for voting!
Rust marks on clothing
Our dryer was leaving rust marks on our clothes that looked like a brown pencil mark. It turns out that the rear drum seal in our dryer was absorbing gunk over the years and we had to change it. It was a fairly easy fix but did require pulling the dryer almost completely apart. While we had it apart we changed this as well.
Any ... Read more one with a socket stet and screw driver can get it all apart.
On our machine, start by removing the 2 screws that hold the lint filter neck to the top of the machine (under the flap).
Then pry the top of the machine up in the front. It will pop up and you can fold it back.
Then you will need to remove 2 bolts and undo the plug.
From there you can pull the front off and get to the drum.Make sure you note how the belt tensioner comes out (under the drum) and how the belt is routed. It's quite basic.
After you get the drum off, peel the old seal(s) off and put the new seal(s) on as directed.
Pretty easy and our clean clothes stay clean now.
Read less
Parts Used:
-
Patrick from Manor, TX
-
Difficulty Level:Easy
-
Total Repair Time:1- 2 hours
-
Tools:Screw drivers, Socket set
13 of 21 people
found this instruction helpful.
Was this instruction helpful to you?
Thank you for voting!