LG Appliance Parts
Find your part
Enter your model number or a part number and click "Search"
Popular LG Appliance Parts
Your Price
$53.05
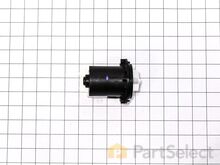
Washing Machine Drain Pump
PartSelect Number PS3579318
Manufacturer Part Number 4681EA2001T
The drain pump and motor assembly may also be known as the washer drain pump and is a part for your washer. The drain pump helps expel water from the washing machine. The drain pump is activated after the spin cycle speed is maintained for a specific period of time. To make this installation you will need a Phillips screwdriver, a small flat-blade screwdriver, a pair of needle-nose pliers, and a pair of slip-joint pliers. Note that the pump casing is not included. This medium-difficulty repair may vary, but can generally be started by disconnecting power, then removing the top of the washer by taking out the four back screws and two small brackets. Then, remove the front panel by taking out the two screws and eight tabs that should be taken from the top. Moving down the front of the washer, remove the door, latch, tub gasket, and drain cover. Disconnect the drain hoses and clip from under the drain assembly, and install new assembly from there. Reassemble parts in direct reverse order -- taking photos during disassembly and keeping parts clearly organized can help here. Despite the number of steps, you will only need a standard Phillips screwdriver to complete this repair.
Fixes these symptoms
- Engine runs but does not pump water
- Leaking
- Noisy
- See more...
Installation Instructions
Jorge from Apple Valley, CA
Washing maching wouldn't drain
Removed the top of the washer by removing the 4 back screws and 2 small brackets. Then I removed the front panel, this was actually the hardest part, 2 screws and 8 tabs that you pop out carefully from the top of the panel. I only disconnected the power button and was able to rest the panel on top of the washer. The rest of the washer came apart quickly just moving down the front of the washer and removing the door, latch, tub gasket, drain cover. Removing the pump was just a mater of disconnecting the drain hoses, and one clip under the drain assembly. 3 screws attach the drain to assembly to the pump and only 2 wires that are clearly marked. Reassembly is just going back through in reverse order of disassenbly. The best thing about this is that it all comes apart with a standard phillips screwdriver.
Read more...
Your Price
$84.45
PARTS ASSEMBLY, SVC
PartSelect Number PS16763594
Manufacturer Part Number AGM75510755
The drum roller for your dryer holds the drum in place while the drum turns on the support wheels. The drum roller is round with a bearing in the middle and measures approximately 3 inches in diameter. Over time, these rollers can become worn, and it may cause your dryer to be noisy during operation. The bearing inside this roller is self-lubricating, so no grease will be required.
Fixes these symptoms
- Noisy
- Will not tumble
- See more...
Installation Instructions
Mark from WAVERLY, OH
Dryer making a thumping and squealing noise when running
Had to replace front drum support rollers. Removed screws underneath top in back that held bracket that keeps top in place. Slid top towards rear and lifted up. Removed 4 screws that hold plastic front panel in place (inside..2 on each corner) Unplugged front panel electric plugs to remove panel. Opened door..removed 2 screws at bottom of door opening. Removed screws on top of front panel. Unplugged door switch plug. Removed front panel. Removed right front roller with 9/16th wrench for nut. Adjustable for back of stud. Lifted up on drum to get roller out. Reversed to install. Left roller a bit harder to get to stud. Removed and installed same as right side. Did not attempt to replace rear rollers. Have them if needed but very much more involved to replace.
Read more...
Your Price
$79.45
PARTS ASSEMBLY,SVC
PartSelect Number PS16878105
Manufacturer Part Number AGM30045804
This dryer thermistor temperature sensor helps monitor and regulate the temperature inside a dryer. This part includes the wire harness. If your dryer overheats, does not produce enough heat, or takes too long to dry, then the thermistor might be defective or damaged. This can cause a fault code and could begin either prolonging or shortening drying time. As a safety precaution, make sure to unplug the dryer from the power source before beginning this installation, and wear gloves to protect your hands. Refer to the installation instructions provided by the manufacturer for further guidance.
Fixes these symptoms
- No heat or not enough heat
- Shuts off too soon
- Takes too long to dry
- See more...
Installation Instructions
Sheryl from SPRINGFIELD, MO
Dryer not heating
I followed video instruction in disassembling and set screws from each section into diferent small bowls in the order they were removed. Hardest part was some of the screws were really hard to get loose without stripping them and my control panel did not match video but I figured it out. Replacing the parts were easy and putting it back together. While it was apart I cleaned everything including fan blower wheel. Thanks for the right parts and your online video. With your help and a prayer this 62 year old woman fixed the problem and dryer runs like new.
Read more...
Your Price
$54.28
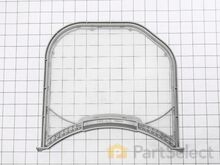
Dryer Lint Filter
PartSelect Number PS3531962
Manufacturer Part Number ADQ56656401
The Dryer's Lint Filter is used to collect lint during the dryer cycle as it passes through the dryer vent, in order to prevent damage to the machine. This manufacturer-approved part comes in gray, measures around 12 inches wide by 11 inches high, and is easy to install. It slides into the lint filter slot in your dryer. If there is visible damage to the screen then it's time to replace the part. We recommend that you thoroughly clean the lint filter before every load, but even with good maintenance, this hard-working part is often damaged or worn over time. If your dryer isn't drying quickly, the filter may be responsible. The manufacturer has made an authorized substitution to the lint filter. Due to the changes, the manufacturer suggests changing the filter guide, part # MEA4905001 and filter cover, part # MCK66787901. The replacement of the entire component including the filter and surrounding area and guide simply involves the removal of a few screws and screwing the new parts back into place.
Fixes these symptoms
- Door won’t close
- Marks left on clothes
- Takes too long to dry
- See more...
Installation Instructions
David from Annapolis, MD
Filter parts chipped - replaced
Removed existing parts using screwdriver, positioned new parts in dryer and re-inserted screws, tightened - done. Piece of cake, even for someone who cannot saw a straight line with a chop saw.
Read more...
Your Price
$21.52
Moisture Sensor
PartSelect Number PS3529161
Manufacturer Part Number 6500EL3001A
The sensor controls the temperature in your dryer and will turn off once your clothes have reached the desired dryness level. If you notice that your dryer is not giving off enough heat to dry the clothes or is taking too long to dry, this may indicate that a repair to the senor is required. To access this part, you will need to remove the front bulk head. To remove this, you will need to remove the screws securing the top. Uninstall the screws that support the control panel and lift. Remove screws holding the support bracket in place so you can detach this piece. Detach the wire harness and remove the wire, then set the bracket aside. You will now open the dryer door and release it by taking out the bottom two screws. Disconnect the wire harness and moisture sensor wire harness, remove screws from front bulk head, and remove screws that secure the duct housing. You should be able to completely remove the bulk head. You will find the sensor underneath the lint filter grill, which will also need to be removed.
Fixes these symptoms
- No heat or not enough heat
- Shuts off too soon
- Takes too long to dry
- See more...
Installation Instructions
Sheryl from SPRINGFIELD, MO
Dryer not heating
I followed video instruction in disassembling and set screws from each section into diferent small bowls in the order they were removed. Hardest part was some of the screws were really hard to get loose without stripping them and my control panel did not match video but I figured it out. Replacing the parts were easy and putting it back together. While it was apart I cleaned everything including fan blower wheel. Thanks for the right parts and your online video. With your help and a prayer this 62 year old woman fixed the problem and dryer runs like new.
Read more...
Your Price
$22.03
Water Inlet Valve - Hot
PartSelect Number PS3527427
Manufacturer Part Number 5220FR2006H
The hot water inlet valve on your washing machine controls the water flow into the washer. This inlet valve has a standard hose fitting inlet and one water outlet. The water inlet valve opens to allow water to enter the washing machine. If the water inlet valve is defective, the washer may leak, fill slowly, or not fill at all. To test your valve, unplug the washer when the symptom occurs. If the washer continues to fill, then your inlet valve is defective. This part is approximately 3 inches long x 3 inches wide.
Fixes these symptoms
- Leaking
- No hot or cold water
- See more...
Installation Instructions
Khanh from CHICAGO, IL
Water continued to fill into the drum slowly after the load was done.
Watched a you tube video and followed the instructions. Even had my 11 and 13 yo old help and do most of the work. Very easy to fix both hot and cold inlet at the same time. Didn't know which one was causing the problem so I decided to replace both.
Read more...
Your Price
$23.42
Thermal Fuse
PartSelect Number PS3530485
Manufacturer Part Number 6931EL3003D
This thermal fuse acts as a high-limit thermostat, and shuts off the heating element when the dryer overheats by cutting off power to the dryer. If the thermal fuse has blown, the dryer will not start. These fuses cannot be reset, so if yours has blown, you will need to replace it. A common reason for the thermal fuse to blow on a dryer is if the exhaust vent on your dryer is restricted or blocked. Hot air will be confined in the dryer and the fuse will trip and stop the electricity from flowing to the gas valve or heating element.
Fixes these symptoms
- No heat or not enough heat
- Shuts off too soon
- Takes too long to dry
- See more...
Installation Instructions
Richard from ORMOND BEACH, FL
Dryer would run with no heat
I actually went to mr fix it on u tube. Great instruction on how to take dryer apart. First I unplugged the dryer. I found I could reach the heating system by removing the lint tube in the back of the dryer. I put my I phone with the light on inside the back of the dryer and tested the connections to see if all were working. The thermal fuse was not working. I removed the two wires , red on top and white on the bottom. Then used a small Phillips screwdriver to remove the two mounting screws and removed the fuse. I then used a vacuum to clear any lint from the back of the dryer and inside the dryer. This took me about an hour and a half. I did it this way because I did not want to disassemble the entire dryer to get to the components. I received the fuse in 3 days and tested it. It was fine. I then put it in the dryer screwed it in place, connected the wires. Replaced the lint tube. This took about 10 minutes. Dryer is running great.
Read more...
Your Price
$16.02
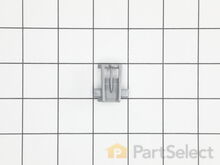
Refrigerator Door Switch
PartSelect Number PS3529268
Manufacturer Part Number 6600JB1010A
The interior light in your refrigerator is controlled by a switch that is activated when the door is opened and closed. If your refrigerator light will not turn on, or stays on when the door is closed, you could have a faulty switch. The switch is spring-loaded and is a generally closed type of switch meaning there should be no continuity when the button is pushed, and continuity through the switch when it is no longer engaged. This plastic, white, OEM switch is sourced directly from the manufacturer, is sold individually and is easy to replace. The repair usually takes less than 15 minutes and requires a flat-blade screwdriver and needle-nose pliers.
Fixes these symptoms
- Light not working
- See more...
Installation Instructions
Debbie from Waltham, MA
Remove and replace light switch
Video makes it look easy. Kenmore refrigerator does not have "groove" along the right hand side of switch that allows for pushing down on release. Used a thin screwdriver to get under to push while holding switch edge with pliers. Kept slipping. Tape sides to avoid scratching inside of refrigerator.
Read more...
Your Price
$22.00
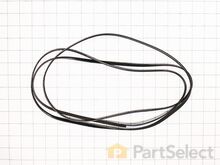
Dryer Drum Belt
PartSelect Number PS11705916
Manufacturer Part Number 4400EL2001F
The belt wraps the length of the dryer drum, secured by a tension pulley and then loops around the motor pulley. If you find that the drum is not turning properly or at all while your dryer is in succession, it might be due to the belt being broken.
Fixes these symptoms
- Noisy
- Will Not Start
- Will not tumble
- See more...
Installation Instructions
Arthur from SOUTHLAKE, TX
Noisy when drying. A bumping noise
Watched the video a couple of times. After that it was a breeze.
Read more...
Your Price
$44.36
Blower Thermostat
PartSelect Number PS8747887
Manufacturer Part Number 6931EL3002M
The thermostat is a part for your dryer, and it is roughly 1 inch long by roughly 1.5 inches wide. The purpose of the thermostat is to measure the temperature of the air inside your dryer drum. As the air is being measured, it will turn the heat on or off in order to maintain a stable temperature within the drum. The most common reason you would need to replace your thermostat is if your dryer is not receiving enough heat, or any heat at all.The tools you will need to complete this repair include a Phillips screwdriver, and a flat-head screwdriver.
Fixes these symptoms
- No heat or not enough heat
- Shuts off too soon
- Takes too long to dry
- See more...
Installation Instructions
Sheryl from SPRINGFIELD, MO
Dryer not heating
I followed video instruction in disassembling and set screws from each section into diferent small bowls in the order they were removed. Hardest part was some of the screws were really hard to get loose without stripping them and my control panel did not match video but I figured it out. Replacing the parts were easy and putting it back together. While it was apart I cleaned everything including fan blower wheel. Thanks for the right parts and your online video. With your help and a prayer this 62 year old woman fixed the problem and dryer runs like new.
Read more...
Appliance Type
- LG Air Conditioner Parts
- LG Cooktop Parts
- LG Dehumidifier Parts
- LG Dishwasher Parts
- LG Dryer Parts
- LG Fridge Parts
- LG Microwave Parts
- LG Oven Parts
- LG Range Parts
- LG Refrigerator Parts
- LG Stove Parts
- LG Washer Parts
- Appliance Parts
- LG Parts
Popular LG Appliance Models
Below are the most popular LG Appliance models we have. Enter your model number in the search box to find your model.
- LFX28978ST Lg Lfx28978st/04 Refrigerator
- LFX28978ST
- LFX28978ST
- LFX28978ST
- LFX28978ST REFRIGERATOR
- LFX28978ST
- LFX28978ST REFRIGERATOR
- WM2016CW Residential WASHER
- WM2016CW WASHER
- WM2016CW WASHER
- LFX28968ST REFRIGERATOR
- LFX28968ST
- LFX28968ST
- LFX28968ST REFRIGERATOR
- LDF6920ST DISHWASHER
- LDF6920ST