General Electric Refrigerator Ice Makers
- Search your model number to find:
- Genuine OEM parts guaranteed to fit
- Free manuals and guides
- Repair instructions and videos

Popular General Electric Refrigerator Ice Makers
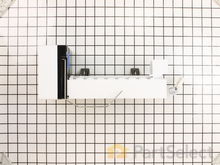
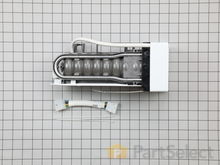
General Electric Refrigerator Ice Maker Assembly
PartSelect Number PS12364147
Manufacturer Part Number 241798231
This 8-cube ice maker is used to create ice for your refrigerator. The ice maker receives water from the water inlet valve and will freeze until ice cubes are formed. Once the water has been frozen the cubes will be ejected from the mold in to the ice bucket. The ice maker will continue the process until the ice bucket has reached the limit. If your ice maker is not making ice you may need to replace this part. Please remember to disconnect the power and water supply before starting your repair. This ice maker is a genuine OEM part.
Fixes these symptoms
- Clicking sound
- Ice maker not making ice
- Ice maker won’t dispense ice
- See more...
Installation Instructions
Juan from Miami, FL
Broken ice maker
Unplugged faulty ice maker, removed two screws holding it to the refrigerator and took it out. Reversed the operation with the new ice maker and after a few minutes presto, we have ice.
Read more...
Your Price
$139.15
In Stock
General Electric Refrigerator Replacement Ice Maker
Unplug appliance.
Remove timer cover by hand pressure @ edge.
Remove single attachment screw & bracket at lower front of icemaker.
Disconnect wiring harness from socket @ rear of compartment.
Tricky part was determining what type of connection held the other two attachment points along the long edge of the icemaker. I did not have repair manual or useful drawing but looked @ PartsDirect pic of side brackets & used a small mirror to confirm that mine were also some sort of "snap in" attachment.
Remove icemaker unit by pushing upward and outward on the unit. I takes a good bit of pressure and will pop loose, but be careful not to break attachment bracket from freezer wall.
Scavenge shut off bar and wiring harness from old icemaker once you have it out & attach to new one before installing it back in freezer.
Again, you might find a mirror useful to align those pesky snap-in brackets with the new unit.
Since you probably kept your freezer running while waiting for the part, the plastic snap-ins will be cold and brittle. I warmed them up first by applying a dampened cloth heated in the microwave to make them a little more pliable.
A good push of the new unit towards the snap-ins along with some upward force will get it stable.
Reattach the metal screw in bracket & connect the wiring harness to rear plug... and don't forget to plug the whole thing back in.
It will take awhile for the first batch of cubes dump as the timer may need to cycle completely around to get to the fill cycle... be patient.
Dump the first couple of batches of cubes just to make sure you're free of any residue. Read more...
PartSelect Number PS2121513
Manufacturer Part Number D7824706Q
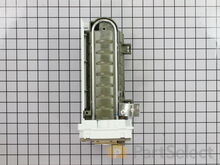
This ice maker (Ice Maker Assembly, Refrigerator Ice Maker) produces ice cubes that are ejected into the storage bucket. It is located in the freezer section of your appliance, mounted on the freezer wall. The ice maker can break from normal wear and accidental damage. If this happens, your refrigerator may no longer make ice cubes, or may not make enough cubes, and the part should be replaced. This model measures approximately 11 inches long and 5 inches wide. It’s constructed of plastic and metal, and comes in black/white/silver. This assembly includes the ice mold and the control device.
Fixes these symptoms
- Clicking sound
- Doesn’t stop running
- Ice maker dispenses too little ice
- See more...
Installation Instructions
Bernie from Diamond Bar, CA
Icemaker producing few or no cubes and often leaving "kling-ons" on ice tray
Interior surface of ice tray felt rough & flaky (coating deteriorated) so cubes would not release.Unplug appliance.
Remove timer cover by hand pressure @ edge.
Remove single attachment screw & bracket at lower front of icemaker.
Disconnect wiring harness from socket @ rear of compartment.
Tricky part was determining what type of connection held the other two attachment points along the long edge of the icemaker. I did not have repair manual or useful drawing but looked @ PartsDirect pic of side brackets & used a small mirror to confirm that mine were also some sort of "snap in" attachment.
Remove icemaker unit by pushing upward and outward on the unit. I takes a good bit of pressure and will pop loose, but be careful not to break attachment bracket from freezer wall.
Scavenge shut off bar and wiring harness from old icemaker once you have it out & attach to new one before installing it back in freezer.
Again, you might find a mirror useful to align those pesky snap-in brackets with the new unit.
Since you probably kept your freezer running while waiting for the part, the plastic snap-ins will be cold and brittle. I warmed them up first by applying a dampened cloth heated in the microwave to make them a little more pliable.
A good push of the new unit towards the snap-ins along with some upward force will get it stable.
Reattach the metal screw in bracket & connect the wiring harness to rear plug... and don't forget to plug the whole thing back in.
It will take awhile for the first batch of cubes dump as the timer may need to cycle completely around to get to the fill cycle... be patient.
Dump the first couple of batches of cubes just to make sure you're free of any residue. Read more...
Your Price
$216.23
In Stock
General Electric Refrigerator Ice Maker
PartSelect Number PS1993870
Manufacturer Part Number WR30X10093
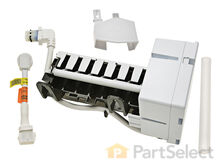
This 10 by 5 inch ice maker (Electromechanical Icemaker Kit, Ice Maker Assembly) produces ice. This particular model will produce seven crescent shaped cubes every cycle. It is constructed of plastic and metal, and comes in black/white. This kit includes a set of installation instructions, a 4-pin round plug-in connector, 6 post plug-in connectors, tube and fill cup. The ideal temperature of a freezer is zero degrees Fahrenheit. If the temperature in your freezer is at an appropriate level yet ice is still not being made, it could be an issue with the water inlet valve or your ice maker assembly. If you determine it is the ice maker, this is the replacement you need. The ice maker can break from normal wear and accidental damage. Ice makers will need to be replaced every 3-10 years depending on the frequency of usage and water quality. This model is mounted on the freezer wall.
Fixes these symptoms
- Ice maker dispenses too little ice
- Ice maker dispenses too much ice
- Ice maker not making ice
- See more...
Installation Instructions
Michael from Bradenton, FL
ice maker not working properly and door seal worn
Two screws held the icemaker on. You do not even have to take them all the way out to remove the IM. Replacement of the water valve was just as easy except they (parts manufacturer) updated the flange nut with a compression fitting and it took me a minute looking at it before I realize what was going on. The door seal could not be easier, no tools just a few minutes of time
Read more...
Your Price
$184.60
In Stock
General Electric Refrigerator Ice Container and Auger Assembly
I really did not know what was wrong with the unit, so I was pleased to find an entire assembly for a lot less that an in-home repair would have cost. The part arrived early in it's estimated time table. I simply pulled out the old unit slid in the new, transferred the ice into the new unit and that was it. I was up and running, my wife was thrilled and I was a hero. THANKS!!! Read more...
PartSelect Number PS1991430
Manufacturer Part Number 241860803
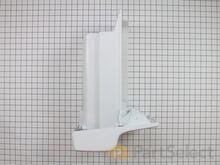
This assembly includes the auger and blades.
Fixes these symptoms
- Ice maker dispenses too little ice
- Ice maker not making ice
- Ice maker won’t dispense ice
- See more...
Installation Instructions
Richard from Bristol, CT
Ice dispencer would not work
At first I took our apart, and tried to fix the feed wheel. I did something wrong putting it back together because even though it feed ice, it would not crush ice. Less that a week later the whole thing jammed.I really did not know what was wrong with the unit, so I was pleased to find an entire assembly for a lot less that an in-home repair would have cost. The part arrived early in it's estimated time table. I simply pulled out the old unit slid in the new, transferred the ice into the new unit and that was it. I was up and running, my wife was thrilled and I was a hero. THANKS!!! Read more...
Your Price
$105.42
In Stock
General Electric Refrigerator Replacement Ice Maker
PartSelect Number PS735469
Manufacturer Part Number 5303918277
This replacement icemaker may also be known as the ice maker assembly and is compatible with your refrigerator/freezer. This assembly replaces the heat-release ice maker unit only. The kit comes with four round female connectors at the end of the wire harness. It also comes with the adaptor that converts the harness to three round female, and one round male connectors. The tools you will need in order to make this installation include a 1/4-inch nut driver, and a Phillips screwdriver. Before starting this repair make sure to unplug your refrigerator and shut off the water supply.
Fixes these symptoms
- Ice maker not making ice
- Ice maker won’t dispense ice
- Leaking
- See more...
Installation Instructions
JACK from MESA, AZ
Ice Maker Stopped Working
It was pretty straight forward. Remove the two screws that hold the unit to the wall of the freezer. In my case, I had to use a different ice maker than what came with the frig. In order to install the replacement unit they sent a wire adaptor so it would attach to the existing wiring. That too was all fine and dandy. The only problem was that the end of the wire adaptor did not fit through the existing hole in the rear of the frig. I used a utility knife to cut through the thin metal lining. That worked just fine. However, I could not cut through the insulation because I could not reach it through the small hole. The excess wire was supposed to be pulled through the hole and out through the back of the unit. So now the excess is between the wall of the freezer and the insulation. The unit is working wonderfully. In fact, it is making more ice than I can use. I am very pleased with the replacement unit. This is the 3rd ice maker that has been in this frig. All the others had a design flaw that had a leak in the rear of the unit. This caused all the ice to form into a big block. The replacement unit has not had this problem so far. Thank you for allowing me to explain my situation so that maybe others may benifit from my experience. Thank you. Jack
Read more...
Your Price
$64.56
In Stock
General Electric Refrigerator Dispenser Crusher Housing
PartSelect Number PS2378689
Manufacturer Part Number 241885001
This dispenser crusher housing may also be known as a refrigerator ice crusher housing, and is compatible with your refrigerator. The function of the dispenser crusher housing is to shield the ice crushing blades within the ice container. To make this repair you will need a Phillips screwdriver, a flat blade screwdriver, a quarter-inch nut driver, and a pair of channel lock pliers. For this installation, work gloves are recommended. Note that this piece may look different or be a different color than the original, but this part will fit and function in the same way as the original part.
Fixes these symptoms
- Ice maker dispenses too little ice
- Ice maker dispenses too much ice
- Ice maker not making ice
- See more...
Installation Instructions
Lawrence from Wichita, KS
The plasticdrum was broken and would no longer crush or feed the ice through the door
removed screws,removed broken parts and installed new parts.
Read more...
Your Price
$176.58
In Stock
General Electric Refrigerator Ice Bucket and Auger Assembly
PartSelect Number PS11701245
Manufacturer Part Number WR17X23191
This part includes the blades/cutting assembly.
This ice container assembly is for refrigerators.
Ice container assembly stores the ice until needed and comes with the auger that rotates to move the ice into the dispenser chute. The assembly may include multiple parts; refer to your parts diagram for a complete list of parts included.
Fixes these symptoms
- Ice maker dispenses too little ice
- Ice maker not making ice
- Ice maker won’t dispense ice
- See more...
Installation Instructions
Marshall from Yuma, AZ
auger was not working
This happened once before. The plastic auger broke. I had a local repair store order the auger and then install it into the bucket. The cost was much more than I paid PartSelect for the entire assembly. What could be easier--pop the old one out and put in the new--for a cheaper price.
Read more...
Your Price
$27.46
In Stock
General Electric Refrigerator Dispenser Crusher Cover
This was a simple fix. The solenoid had stopped working, so it would not automatically close the door flap. I read some posts on this site that suggest that you had to remove the trim around the entire dispenser to get at the solenoid. My fridge may be a newer model, but in any event it was much easier than that. Just below the touch pad for choosing water, ice, or crushed ice (above where the ice/water dispenses) there are three very small holes spaced about an inch a part. After unplugging the fridge, I stuck a small philips-head screw driver in each, freeing spring clips. That allowed the touch pad to come off. I then removed four screws to remove a plastic piece covering the chute, giving me access to the flap and solenoid. I just unplugged the solenoid from the circuit board on the back of the touch pad and then removed three screws to remove the old solenoid. I replaced it with the new solenoid and plugged it into the circuit board. The touch pad then snapped back into place.
The hardest part was figuring out how to get at the solenoid. After I found that pushing the clips in those three holes allowed me to remove the touch pad, it could not be any easier. Read more...
PartSelect Number PS964165
Manufacturer Part Number WR17X11497
This part is white in color.
Fixes these symptoms
- Ice maker dispenses too little ice
- Ice maker dispenses too much ice
- Ice maker not making ice
- See more...
Installation Instructions
Bill from Cleveland Heights, OH
flap to ice dispenser would not close
The flap to the ice dispenser would not close, which allowed the ice dispenser to frost up, freezing the water dispenser.This was a simple fix. The solenoid had stopped working, so it would not automatically close the door flap. I read some posts on this site that suggest that you had to remove the trim around the entire dispenser to get at the solenoid. My fridge may be a newer model, but in any event it was much easier than that. Just below the touch pad for choosing water, ice, or crushed ice (above where the ice/water dispenses) there are three very small holes spaced about an inch a part. After unplugging the fridge, I stuck a small philips-head screw driver in each, freeing spring clips. That allowed the touch pad to come off. I then removed four screws to remove a plastic piece covering the chute, giving me access to the flap and solenoid. I just unplugged the solenoid from the circuit board on the back of the touch pad and then removed three screws to remove the old solenoid. I replaced it with the new solenoid and plugged it into the circuit board. The touch pad then snapped back into place.
The hardest part was figuring out how to get at the solenoid. After I found that pushing the clips in those three holes allowed me to remove the touch pad, it could not be any easier. Read more...
Your Price
$83.62
In Stock
General Electric Refrigerator Ice Container/Bucket
Replacing the water valve was a simple process:
1. Turn off the water to the fridge at the household shutoff valve.
2. Move the fridge away from the wall.
3. Unplug the mains power (AC) plug from the wall power outlet.
4. Remove the 5 screws with a nut driver that hold the cardboard backing off the refrigerator.
5. (This is a great time to vacuum off the coils and underside of the fridge.) Disconnect the water supply from household plumbing with a box end wrench or channel lock pliers. I kept a large plastic cup and rag handy for the left over water in these hoses.
6. Remove the two screws from the water valve bracket on the right hand side and pull the water valve straight back from the fridge and line up the new valve in the same orientation.
7. Remove all the color coded electrical connectors (3 of them) and attach them to the new water valve.
8. Remove the remaining water hoses and attach them to the corresponding connectors on the new valve.
9. Dispose of the old valve and reinstall the new valve in reverse order.
The problem with the ice maker not making ice was because water was flowing so slowly from the valve that it was stopping in the fill tube at the back of the freezer and freezing stopping all water flow into the ice maker. I pulled the fill tube out of the back of the freezer from behind by rotating it 45 degrees counter clockwise and pulling straight out removing the ice blockage and drying the fill tube before I reinstalled.
Since I replaced the valve I had to take the cover off of the icemaker and set the water fill level down (screw toward the minus sign) and then adjusted it by checking the ice after each time it dropped and increasing the fill amount by 1 full turn (roughly 0.7 ounces) until it was just enough to make fully formed ice cubes. Read more...
PartSelect Number PS1526586
Manufacturer Part Number 241734001
Bucket only. All other parts sold separately.
Fixes these symptoms
- Ice maker not making ice
- Ice maker won’t dispense ice
- Leaking
- See more...
Installation Instructions
Cory from Lincoln, NE
Water Dripping from through the door water outlet and Ice Maker doesn't make ice.
I had two problems, the first was that water was dripping from the through the door outlet and the second problem is that the ice maker wasn't making ice.Replacing the water valve was a simple process:
1. Turn off the water to the fridge at the household shutoff valve.
2. Move the fridge away from the wall.
3. Unplug the mains power (AC) plug from the wall power outlet.
4. Remove the 5 screws with a nut driver that hold the cardboard backing off the refrigerator.
5. (This is a great time to vacuum off the coils and underside of the fridge.) Disconnect the water supply from household plumbing with a box end wrench or channel lock pliers. I kept a large plastic cup and rag handy for the left over water in these hoses.
6. Remove the two screws from the water valve bracket on the right hand side and pull the water valve straight back from the fridge and line up the new valve in the same orientation.
7. Remove all the color coded electrical connectors (3 of them) and attach them to the new water valve.
8. Remove the remaining water hoses and attach them to the corresponding connectors on the new valve.
9. Dispose of the old valve and reinstall the new valve in reverse order.
The problem with the ice maker not making ice was because water was flowing so slowly from the valve that it was stopping in the fill tube at the back of the freezer and freezing stopping all water flow into the ice maker. I pulled the fill tube out of the back of the freezer from behind by rotating it 45 degrees counter clockwise and pulling straight out removing the ice blockage and drying the fill tube before I reinstalled.
Since I replaced the valve I had to take the cover off of the icemaker and set the water fill level down (screw toward the minus sign) and then adjusted it by checking the ice after each time it dropped and increasing the fill amount by 1 full turn (roughly 0.7 ounces) until it was just enough to make fully formed ice cubes. Read more...
General Electric Refrigerator Ice Dispensing Drive Cup
Once I received the shipment, I placed the Cup Drive into position and used the flat edge of a knife to allow the Cup Drive to slide into the tight-fitting position necessary. After positioning into place, I placed the ice collection bin back into the freezer...turned the ice-maker back on...and waited for ice to be made. A day later, the ice maker had produced enough ice to test the ice maker's dispensing mechinism. The cup drive worked perfectly...and ice began to be dispensed. The dispensor has been working ever since.
I also replace the ice and water filter...another very easy task...of unscrewing the old and replacing with the new filter. After replacing the filter, I let the water dispensor run for 2 minutes to flush all air out the system. The water dispensor work perfectly. Read more...
PartSelect Number PS964134
Manufacturer Part Number WR17X11459
This part is found at the end of the auger in the ice container - replace this part when the icemaker doesn't dispense ice.
Fixes these symptoms
- Clicking sound
- Ice maker dispenses too little ice
- Ice maker not making ice
- See more...
Installation Instructions
Fred from River Ridge, LA
Ice Maker stopped dispensing ice through Ice Maker Dispensor.
After taking Ice Maker's ice collection container out, I noticed that the plastic cup drive was broken. I did a websearch for repair and replacement parts for our GE refrigerator. I found PartSelect website easy to navigate and find the replacement part necessary...and placed an order.Once I received the shipment, I placed the Cup Drive into position and used the flat edge of a knife to allow the Cup Drive to slide into the tight-fitting position necessary. After positioning into place, I placed the ice collection bin back into the freezer...turned the ice-maker back on...and waited for ice to be made. A day later, the ice maker had produced enough ice to test the ice maker's dispensing mechinism. The cup drive worked perfectly...and ice began to be dispensed. The dispensor has been working ever since.
I also replace the ice and water filter...another very easy task...of unscrewing the old and replacing with the new filter. After replacing the filter, I let the water dispensor run for 2 minutes to flush all air out the system. The water dispensor work perfectly. Read more...
Related General Electric Refrigerator Parts
- All General Electric Refrigerator parts
- General Electric Refrigerator Brackets and Flanges
- General Electric Refrigerator Caps and Lids
- General Electric Refrigerator Circuit Boards and Touch Pads
- General Electric Refrigerator Compressors
- General Electric Refrigerator Dispensers
- General Electric Refrigerator Door Shelves
- General Electric Refrigerator Doors
- General Electric Refrigerator Drawers and Glides
- General Electric Refrigerator Drip Bowls
- General Electric Refrigerator Ducts and Vents
- General Electric Refrigerator Elements and Burners
- General Electric Refrigerator Fans and Blowers
- General Electric Refrigerator Filters
- General Electric Refrigerator Grates
- General Electric Refrigerator Grilles and Kickplates
- General Electric Refrigerator Handles
- General Electric Refrigerator Hardware
- General Electric Refrigerator Hinges
- General Electric Refrigerator Hoses and Tubes
- General Electric Refrigerator Knobs
- General Electric Refrigerator Lights and Bulbs
- General Electric Refrigerator Motors
- General Electric Refrigerator Panels
- General Electric Refrigerator Power Cords
- General Electric Refrigerator Seals and Gaskets
- General Electric Refrigerator Springs and Shock Absorbers
- General Electric Refrigerator Switches
- General Electric Refrigerator Thermostats
- General Electric Refrigerator Trays and Shelves
- General Electric Refrigerator Trims
- General Electric Refrigerator Valves
- General Electric Refrigerator Wheels and Rollers


