Estate Washer Parts

Popular Estate Washer Parts

Your Price
$4.39
   In Stock
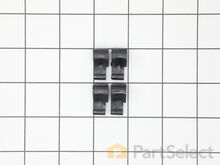
Estate Washer Agitator Directional Cogs
★★★★★
★★★★★
360 Reviews
PartSelect Number PS388034
Manufacturer Part Number 80040
This kit is used for replacing the agitator directional cogs (Agitator Dogs, Agitator Repair Kit, Washer Agitator Dogs, Agitator Dog Ears). The agitator is what creates the thrusting motion in your washer to tumble your clothes during the washer cycle. Your agitator will rotate one way, and not the other. The agitator dogs are what prevent the agitator from rotating in both directions, while allowing it to rotate in one direction. Your agitator cogs may be malfunctioning if you can manually rotate the agitator in both directions. If broken they will need to be replaced. Cogs can be found by simply removing the softener dispenser and then removing the agitator cap. The are attached to the agitator. This replacement part features 4 agitator directional cogs. There are 4 cogs per package that are made up of high-quality plastic. This part comes in white/beige.
Fixes these symptoms
  • Does not dispense fabric softener or detergent
  • Marks left on clothes
  • Not cleaning dishes properly
  • See more...
Installation Instructions
mike from Kent, WA
washer wouldn't agitate
First pry off the cap of the agitator. Then using a socket remove the bolt that holds the plastic cup in place. Remove this cup by prying it loose from the two tabs that hold it in place. Once this cup is removed you can get to the broken cogs.
Slip the new cogs into the underside of the cup, and slide the cup back down in the agitator housing using the slots on the side for a guide. (You may want to remove the entire agitator and assemble everything upside down, then flip it all back over to mount, so the cogs don't fall out).
Tighten the bolt, snap the cap back in place on top of the agitator and your'e done. Easy repair.
Read more...
Your Price
$8.00
   In Stock
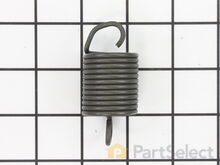
Estate Washer Suspension Spring
★★★★★
★★★★★
27 Reviews
PartSelect Number PS11743345
Manufacturer Part Number WP63907
The suspension spring supports the outer tub and keeps the tub steady during loads that could cause an unbalance. If this part breaks, is worn down or has stretched out and lost its spring, it could cause the load to be off-balance which can lead to excessive shaking, moving, noise, and leaks. For this repair, you will need a 1/4 nut driver, a putty knife, a flat blade screwdriver, and a pair of needle-nose pliers. Disconnect the power supply, fill hoses, and drain hose to give you safe and easy access (have a container nearby for water left in drain hose). This item is sold individually, which is important as you may need to repair multiple springs in your appliance, which carries three suspension springs. As an inexpensive part, we recommend purchasing several at a time, as they can be very useful to have on-hand.
Fixes these symptoms
  • Leaking
  • Shaking and Moving
  • Spinning Issues
  • See more...
Installation Instructions
Brian from Seattle, WA
Washer tub slammed into washer body during spin cycle
If you load a washing machine unevenly, it will spin out of balance. But our washer seemed to make noise during the spin cycle regardless of how the load was distributed. I suspected that the suspension or balancing springs were getting tired, and ordered a replacement set.

First I disconnected the washer from the water and power supply, then I laid it on its back.

The tub rested on the back of the washer, making two of the three suspension springs relax, and they were pretty easy to pull out with pliers. After the first two were out, I had to support the tub with a couple 2x4s to relax the third suspension spring.

Installation was the reverse of removal - install the lower suspension spring, remove the 2x4s, then install the two other suspension springs.

The tub balancing spring was easy to replace, and probably wasn't the cause of the problem.

With $25 in parts and about 15 minutes, my washer spins much more quietly.
Read more...
Your Price
$14.01
   In Stock
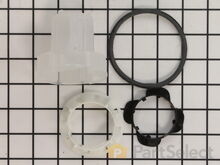
Estate Washer Agitator Repair Kit
★★★★★
★★★★★
203 Reviews
PartSelect Number PS334650
Manufacturer Part Number 285811
This kit (Medium Cam Agitator Repair Kit, Washer Agitator Cam Repair Kit, Cam Agitator) is used to repair the agitator. These parts are located inside the agitator auger near the top. You will need to remove the softener dispenser first if your model is equipped with one. This part is driven by the output shaft of the transmission to move the clothes during a wash cycle. The agitator auger rotates one way but not the other, which forces the laundry down and out for a constant tumbling during the wash cycle. The agitator is subjected to a lot of force during the washer wash cycle. Constant and frequent use of the appliance can cause damage, especially during heavy loads. If you’re experiencing a noisy agitator, or an agitator that spins freely in both directions, then it may be in need of repairs. If your agitator is no longer agitating properly, your clothes will not tumble, and will not be washed properly. The agitator repair kit includes an agitator cam, 4 directional cogs, a bearing, thrust spacer, inner cap seal, and a washer. It is constructed of plastic and rubber, and comes in black/white.
Fixes these symptoms
  • Does not dispense fabric softener or detergent
  • Leaking
  • Marks left on clothes
  • See more...
Installation Instructions
Matt from Pawtucket, RI
Upper portion of agitator, no longer pushing clothing down.
The instructions came with the repair kit, it was fairly simple and straight foward.

One bolt held the entire agitator unit in the washer, as well as held the upper and lower halves together. Once that nut was removed the two halves seperated and the plastic clutch pieces could easily be replaced wtih the new onces in the repair kit.

Very easy do-it-yourself repair! Took about 20 minutes because I was being cautious. Next time I could do it in 5 minutes.
Read more...
Your Price
$27.84
   In Stock
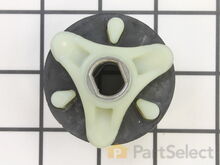
Estate Washer Direct Drive Motor Coupling
★★★★★
★★★★★
160 Reviews
PartSelect Number PS1485646
Manufacturer Part Number 285753A
This direct drive motor coupling (Direct Drive Washer Motor Coupling, Motor Coupling, Washer Motor Coupling, Coupling Kit) provides a cushioned connection between the transmission and the motor shaft. It attaches to the direct-drive transmission and the motor shaft. If this part is defective it will affect the agitator in your washer because of its direct connection with the motor. Your washer may not agitate, spin slowly, or not spin at all. The coupling must be replaced when there is no longer a consistent connection between the transmission and the motor shaft. The coupling can wear over time because of its location between two major parts of the dryer. It is subject to material fatigue over time from normal use, or breakage caused by frequent overloading. The part measures approximately 2 inches in diameter, and is constructed of plastic and metal. This model comes in black/white.
Fixes these symptoms
Installation Instructions
Jeff from Wayne, NJ
No movement from Basket & agitator
The job looked intimidating but turned out to be very easy.
First take off the water pump by removing the two clips that hold it in place. Place a shallow pan under the pump to catch the water that is in the pump and hoses. Open the hose clamps with a pair of pliers or channel locks (better) and slide the hoses off of the water pump.
The motor comes off next. Unplug the electrical connector from the motor and two wires from the capacitor. Remove the two screws holding the clamps in place and then pop off the two clamps. You will need to hold up the motor with one hand while you remove the clamps or it will fall to the floor once the clamps are removed.
One piece of the coupling assemble will be attached to the motor and the other will be attached to the gearcase drive shaft. If you want to clean up the mess created by the shredded rubber center piece of the coupling assembly you will have to take off the motor mounting plate. It is held on by two bolts and removing it makes installing the coupling easier but probably not necessary.
Push the back half of the coupling on to the gearcase drive shaft until the shaft is flush with the face of the coupling. Install the new rubber center piece on to the coupling then re-install the motor mounting plate. Install the other half of the coupling on to the motor shaft and lift the motor up to the coupling. You have to rotate the motor shaft by spinning the fan blades until the coupling lines up so you can slide it into the other half of the coupling. Then just reattach the motor, connectors and water pump in the reverse order of disassembly.
Read more...
Your Price
$27.55
   In Stock
Estate Washer Clutch Assembly
★★★★★
★★★★★
79 Reviews
PartSelect Number PS334641
Manufacturer Part Number 285785
A clutch assembly (Clutch, Washer Clutch) is found in your washing machine and is responsible for spinning the basket during the spin cycle. The clutch lining can wear over time. If the clutch lining is worn out, the clutch assembly will not rotate properly to release the brake. If you notice a burning smell, or the machine shaking and moving more than normal, this could indicate there is an issue with your clutch. If the washer spins when the washer basket is empty but not when it’s full, or if the assembly begins to turn blue, you may need to replace the clutch assembly. This assembly includes a brake cam driver, blue springs for large capacity washers, a black spring for compact washers, and the installation instructions. It’s constructed of plastic and metal, and comes in beige/silver.
Fixes these symptoms
  • Burning smell
  • Spinning Issues
  • Spins slowly
  • See more...
Installation Instructions
Andrew from SLC, UT
spin cycle did not engage
researched potential causes, found cluch dust under the washer and determined that it wouldn't engage because clutch was too worn. ordered the assembly, removed agitator from inside the tub as it is connected to the gear shaft, turned washer on it's back for access to motor, unattached the direct drive water pump from the motor drive, unbolted the 3 gearcase mounting bolts and took the entire gearcase, shaft, motor, etc... together, out from under the washtub. the clutch slides off the gearshaft with a little fidgeting and the new assembly is easily installed where the previous was. put everything back together... then... spin spin! worked perfectly Read more...
Your Price
$48.71
   In Stock
Estate Washer Direct Drive Water Pump
★★★★★
★★★★★
101 Reviews
PartSelect Number PS11741239
Manufacturer Part Number WP3363394
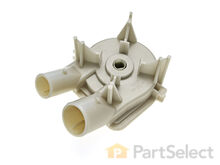
The direct drive drain pump (Whirlpool Direct Drive Washer Pump, Drain Pump, Washer Drain Pump, Water Pump) removes water from the washer during the drain cycle without the use of a belt. The pump is supposed to drain the water from the washer; if the water isn’t draining or if there is a leak, you may have a problem with your pump. You must replace this part if there is a blockage or clog. Although the symptoms may point to a malfunctioning drain pump, there could actually be a problem with one of the connecting hoses. This pump connected directly to the motor, and comes in white plastic. This replacement part features 1 direct drive water pump with 2 ports for water to pass through: a large one and a smaller one.
Fixes these symptoms
Installation Instructions
RICHARD from PHILA, PA
Replace Water Pump Coupling
Removed casing tip over washer disconnected water pump. Disconnected motor then replace coupling then reassemble motor then replaced water pump. Read more...
Your Price
$35.25
   In Stock
Estate Washer Water Inlet Valve with Mounting Bracket
★★★★★
★★★★★
134 Reviews
PartSelect Number PS334646
Manufacturer Part Number 285805
The water inlet valve on your washing machine is used to fill the tub with cold, warm, or hot water for the wash and rinse cycles. This part could have either a blue or green-colored valve body. There are two ports for water to enter and this valve is compatible with a half-inch ID hose. It has two 3/4-11x1/2 NHT hose threads. You may have a faulty valve if your washer is leaking, has no hot or cold water, will not stop filling with water, will not fill with water, fills and drains at the same time, or is noisy. To confirm that the valve is faulty, unplug the washer when the symptom occurs. If the washer continues to fill, then the inlet valve is defective.
Fixes these symptoms
  • Leaking
  • No hot or cold water
  • Water Filling Issues
  • See more...
Installation Instructions
Don from Wyoming, MN
Washer stopped at rinse cycle
Removed the top and back panels. Replaced
compoments and reassembled.
Test run machine. Ran like new!
Read more...
Your Price
$10.03
   In Stock
Estate Washer Agitator Cam Kit
★★★★★
★★★★★
52 Reviews
PartSelect Number PS334648
Manufacturer Part Number 285809
This kit included the cam, 4 dogs and bearing.
Fixes these symptoms
Installation Instructions
shawn from la jolla, CA
Dog ears worn down; upper agitator not moving
Pulled off the dispenser. Used socket set to remove bolt. Removed entire agitator out of washer. Placed both feet on bottom of agitator and then pulled up on the upper agitator. It took some muscle due to the years of washer use. I used a flat-head screwdriver to weaken the plastic clips holding down the old bearing-driven cam. Once I got the upper agitator off, the guts were easy to pull out. Then I just re-assembled with the 3 new parts (the Cam Driven, the Dog Ears, and the Bearing-Driven Cam). Read more...
Your Price
$7.03
   In Stock
Estate Washer Tub Spring
★★★★★
★★★★★
19 Reviews
PartSelect Number PS11751118
Manufacturer Part Number WPW10250667
This tub spring is also known as suspension spring, balance spring, or counterweight spring. It is sold individually. The function of the part is to counterbalance the weight of the motor on the front of the front-load washer so the washer tub sits straight and even during the spin cycle. You may need to replace the spring if tub is sitting tilted forward. A broken spring will result in the tub being off-balance during the spin cycle which can cause further damage to washer parts. It is recommended to check all suspension springs as they often wear at the same rate. Tools needed for repair are a Phillips screw driver, flat blade screw driver, and a pair of pliers.
Fixes these symptoms
  • Leaking
  • Shaking and Moving
  • Spinning Issues
  • See more...
Installation Instructions
RICHARD from PHILA, PA
Replace Water Pump Coupling
Removed casing tip over washer disconnected water pump. Disconnected motor then replace coupling then reassemble motor then replaced water pump. Read more...
Your Price
$7.03
   In Stock
Estate Washer Agitator Bolt
★★★★★
★★★★★
10 Reviews
PartSelect Number PS11741866
Manufacturer Part Number WP358237
This kit contains one screw with rubber gasket and threaded sealant. The screw head is 7/16".
Fixes these symptoms
  • Leaking
  • Marks left on clothes
  • Spinning Issues
  • See more...
Installation Instructions
Dexter from Milwaukie, OR
Washer made a loud banging noise at end of spin cycle, leaked water and agitator seemed loose
After entering the model number of your appliance you will be taken to a page where all of the parts are displayed by sections. On that page about in the middle there is a heading called "Find Part By Symptom." I figured out from there which symptom the washer had and read what other people were saying and how they made the repairs. Basically I had three problem areas, Noise, Leaking and a problem with the agitator. I focused on the loud noise first and decided I needed to replace the clutch/brake assemblies. I found the clutch parts page and on that page there was a video on how to make this repair. This video is all you need to gain access to all moving parts located under the cabinet. Which ever part you are replacing, I recommend watching this video! After removing the console, back panel and cabinet then laying the machine on its back just as seen on the video, I had access to the water pump, motor, transmission and related clutch/brake parts. As it turned out I did not need the clutch/brake assembly but as a precaution and because the parts were cheap, I replaced the motor coupling, water pump and tub wear pads. I decided to replace the agitator assembly because of several worn parts associated with the dog ears/drive shaft ETC. I put the machine back upright and took off the top cap on the agitator, then there is an inner cap with seal that gives access to the 7/16" bolt you must remove to remove the agitator. However once the agitator was removed I noticed metal shavings and play in the shaft. I used a spanner wrench to remove the spanner nut. I removed the Plastic Tub Ring (has several clips around the outer tub), then removed the inner washer tub to replace the Drive Block. Replacing the Drive Block stopped the loud noise at the end of the spin cycle. Now just reverse the order to put the machine back together and your done. For my situation it was best to take the machine apart and decide which parts I needed before ordering to minimize errors. These machines are made very cheaply and are designed to brake at some point in time and it is very easy to determine which parts are worn because most are made of plastic. In this process I also noticed where my leaks (did I say Leaks) were coming from. There were two hose clamps installed improperly from the factory, so check all clamps, hoses ETC. and you should be good to go. Read more...

Estate Washer Appliance Types

Related Estate Washer Parts

Popular Estate Washer Models

Below are the most popular Estate Washer models we have. Enter your model number in the search box to find your model.