Maytag Refrigerator Motors
- Search your model number to find:
- Genuine OEM parts guaranteed to fit
- Free manuals and guides
- Repair instructions and videos

Popular Maytag Refrigerator Motors
Your Price
$66.47
In Stock
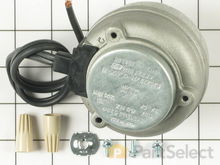
Maytag Refrigerator Evaporator Fan Motor
PartSelect Number PS11740359
Manufacturer Part Number WP2315539
This evaporator fan motor is located in the back of the freezer, and circulates air over the refrigerator coils. These coils will convert the heat into cool air, which is then circulated.
Fixes these symptoms
- Freezer not defrosting
- Freezer section too warm
- Fridge and Freezer are too warm
- See more...
Installation Instructions
William from Middletown, NY
Evaporator Fan failure
The reason I repaired it myself was because the repairman that diagnosed the problem.didn't come back in two weeks. The evaporator fan sits behind a vented wall in the freezer and directs cold air into freezer and refrigerator.I removed the ice make assembly first and then the freezer wall held in place by two sheet metal nuts. Then removed wires from fan motor. Removed the fan blade from fan motor,which was press fitted on,then removed fan motor from bracket assembly(make sure and retain the two vibration rubber washers on back and front of motor. Reinstall new motor with vibration washers and press fan blade on new motor. Install in bracket assemble and reassemnble.
Read more...
Your Price
$63.18
In Stock
Maytag Refrigerator Condenser Fan Motor Kit
Removed the screws holding the back panel.
Removed the fan blade.
removed 3 screws holding the condenser fan.
Remove the 3 metal brackets attached to the fan.
(First note which studs the brackets are attached to. Attach the 3 metal brackets to the new fan. (New screws were supplied)
Cut and strip the wire about two inches from the fan.
Cut and strip the new wire. I cut the new wire in half (about 6 inches.) Connect the two wires, twist and used 2 wire nuts. Tie wrap the wire to the wire harness. Mount the new fan (three screws)
Screw the back panel back on.
Mount the new Read more...
PartSelect Number PS395284
Manufacturer Part Number 833697
This condenser fan motor kit is designed for use with refrigerators. This fan draws air through the condenser coils and over the compressor. It does this with the goal of cooling the warm refrigerant before it enters the evaporator. When your fan or fan motor is not working your refrigerator will not cool properly. This is a 2-Watt, 115 Volt motor that rotates the fan in a counter clockwise direction. This kit includes the hardware needed for installation, and a set of instructions. Before you begin any repair work make sure to unplug your appliance.
Fixes these symptoms
- Freezer section too warm
- Fridge and Freezer are too warm
- Fridge runs too long
- See more...
Installation Instructions
Tom from Franklin, WI
Sometimes the condenser fan would start causing the refrigerator to overheat.
Unplug the appliance.Removed the screws holding the back panel.
Removed the fan blade.
removed 3 screws holding the condenser fan.
Remove the 3 metal brackets attached to the fan.
(First note which studs the brackets are attached to. Attach the 3 metal brackets to the new fan. (New screws were supplied)
Cut and strip the wire about two inches from the fan.
Cut and strip the new wire. I cut the new wire in half (about 6 inches.) Connect the two wires, twist and used 2 wire nuts. Tie wrap the wire to the wire harness. Mount the new fan (three screws)
Screw the back panel back on.
Mount the new Read more...
Your Price
$127.54
In Stock
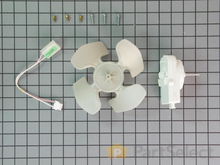
Maytag Refrigerator Condenser Fan Motor Kit
PartSelect Number PS1957416
Manufacturer Part Number W10124096
This condenser fan motor kit includes a motor, fan blade, wire harness, and screws. Used in a refrigerator, the condenser fan motor moves the condenser fan blade to direct and move air across the condenser coil. Please note: The manufacturer has changed the appearance of the product from the original. The kit still functions the same as the original part. It is an OEM factory replacement. Make sure to unplug the refrigerator from the power source and wear gloves to protect your hands. Also, a helpful tip is to store food to prevent deterioration when the power is off.
Fixes these symptoms
- Clicking sound
- Freezer section too warm
- Fridge and Freezer are too warm
- See more...
Installation Instructions
Josue from Jacksonville, NC
Seven year old condenser fan was making noise when it was running.
The process to repair was very simple, I removed the back of the refrigerator to expose the motor area. I then removed three screws that held the condenser motor in place. once it was loose I detactched the electrical harness and removed the old motor. I then placed the new motor in place and secured it with the screws and reattached the new electrical harness that came with the new part. Once completed I reviewed it to make sure I didn't miss anything. I then replaced the cover over the motor area and enjoyed my success in repairing my own appliance with no added cost for labor, which would have been expensive I'm sure. The part purchased came with clear and consice instructions very easy to follow.
Read more...
Your Price
$74.15
In Stock
Maytag Refrigerator Evaporator Fan Motor - 60Hz 120V
PartSelect Number PS11749890
Manufacturer Part Number WPW10189703
This is a 60 Hertz, 120-volt evaporator fan motor for your refrigerator. This part is located in the back of the freezer, and circulates air over the refrigerator coils. These coils will convert the heat into cool air, which is then circulated. The most common reason for needing to replace the motor is if the temperature in your freezer and fridge are inconsistent, or there is no air circulating at all. You will need a quarter inch nut driver and a pair of needle nose pliers for this repair. Note: This motor uses 2 brackets, which are sold separately.
Fixes these symptoms
- Freezer not defrosting
- Freezer section too warm
- Fridge and Freezer are too warm
- See more...
Installation Instructions
Brian from Smock, PA
Fridge was warm. No air circulating at all. Food was spoiling Fridge was just over 1 year old
First I removed the two screws that secure the guard in bottom back of the freezer and removed it . Next I removed the two screws that secure the guard on the back wall of the freezer and removed it. There are three wires connected to the motor, I unplugged those and removed the two screws that secure the motor and removed it. I swapped the grommets, blade and support bracket from the old motor. I put it back together in reverse steps and its working great. My mother-in-law can,t stop thanking me ! I saved her at least $400 to buy a new fridge. Thank You, Brian Miner
Read more...
Maytag Refrigerator Auger Motor
PartSelect Number PS12349163
Manufacturer Part Number W11202789
This auger motor is for refrigerators.
The auger motor turns the auger that pushes the ice cubes through the dispenser chute.
Safely store any food that could deteriorate while the power is off. Unplug the refrigerator before installing this part. Wear work gloves to protect your hands.
Fixes these symptoms
- Ice maker won’t dispense ice
- See more...
Maytag Refrigerator Ice Bucket Auger Motor
PartSelect Number PS11723175
Manufacturer Part Number W10822606
This auger motor is for refrigerators.
Auger motor turns the auger that pushes the ice cubes through the dispenser chute.
Safely store any food that could deteriorate while the power is off. Unplug the refrigerator before installing this part. Wear work gloves to protect your hands.
Fixes these symptoms
- Ice maker won’t dispense ice
- See more...
Installation Instructions
Blye from Victoria, VA
Ice dispenser motor burnt out, water got inside.
Purchased new motor from Partselect.com. When it arrived it came with a new rubber washer that fitted on top of new motor that was not on old motor, that how water got into old motor. However, the instruction sheet did not give info on how to access the proper way to the motor that is the door. Not wanting to damage the freezer door assy. called in a tech who made it look easy, but even he had a little problem locating access panel that was directly under the motor in the freezer side of the door. After that it was a piece of cake.
Read more...
Your Price
$85.31
In Stock
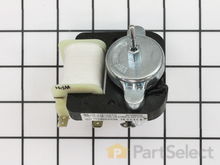
Maytag Refrigerator Evaporator Fan Motor - 120V 60Hz
2) disconnected the three electrical connections.(30sec)
3) removed the fan of the the old evaporator fan motor (5sec)
3) removed the fan motor (1")
4) put in the new fan motor (1")
5) put on the old fan on the new fan motor(5sec)
6) reconnected the three electrical connections (30sec)
7) replaced the face plate on the back of the freezer (6")
Had re-frozen meat within 1 hour. Read more...
PartSelect Number PS557957
Manufacturer Part Number 4389144
This part is located in the back of the freezer, and circulates air over the refrigerator coils. These coils will convert the heat into cool air, which is then circulated. Fan blade not included.
Fixes these symptoms
- Freezer section too warm
- Fridge and Freezer are too warm
- Fridge too warm
- See more...
Installation Instructions
Antoni from vail, AZ
evaporator fan stopped working
1) removed the face plate that runs 3/4 way up the back of the freezer side. a total of 8 screws. (6")2) disconnected the three electrical connections.(30sec)
3) removed the fan of the the old evaporator fan motor (5sec)
3) removed the fan motor (1")
4) put in the new fan motor (1")
5) put on the old fan on the new fan motor(5sec)
6) reconnected the three electrical connections (30sec)
7) replaced the face plate on the back of the freezer (6")
Had re-frozen meat within 1 hour. Read more...
Your Price
$64.38
In Stock
Maytag Refrigerator MOTOR-EVAP
PartSelect Number PS11773024
Manufacturer Part Number W11024089
Fixes these symptoms
- Fridge too warm
- See more...
Installation Instructions
Edward from Muncie, IN
Refrigerator section wasn't getting cold.
Took out the drawer and upper rack out of freezer removed back wall from freezer took out fan motor housing and replaced motor and thermostat. Works like new now.
Read more...
Your Price
$116.11
In Stock
Maytag Refrigerator Icemaker Motor Kit
1.) Went to KitchenAid website to look at Parts List for my side-by-side refrigerator and ice maker assembly (a PDF file, easily downloadable) . The illustrations helped me visualize the assembly and various parts involved.
2.) Removed cover on front of ice maker.
3.) Removed hex-head screw on undersurface of icemaker on the right, which stablilizes a plastic cover for the electrical connector to the ice maker. Once this is off, it's then possible to slide the ice maker out.
4.) Slide the ice maker out from it's 'shelf' in the freezer. You won't be able to completely remove it until you disconnect the power supply.
5.) Disconnect the multi-pin power connector. (It's probably safest to unplug the refrigerator altogether before doing this, but I did not. No exposed metal wiring or connectors. No problems when I did it this way.)
6.) Once the ice-maker was out, remove the white cover from the motor assembly (on the left side of the unit).
7.) Remove the three screws from the black housing of the motor assembly. (This is where I discovered that the connector between the motor and drive-train was broken and needed to be replaced.)
8.) Remove and replace the drive system for the ice cube ejector.
9.) Then reverse the steps to reassemble.
This may seem a bit vague, but it's really quite straightforward once the ice maker is out of the freezer. The replacement motor assembly includes the motor, the motor housing, the drive-train, and the ice-cube ejector. Very easy to re-asemble.
Shopping for and ordering the part took some time since there are so many different after-market parts dealers. In all honesty, I'm glad I decided on PartSelect.com. They had a decent price, safe checkout, and timely delivery. All the essentials of a good online store.
Thanks, and good luck to the next guy who has to deal with a KitchenAid snafu. Read more...
PartSelect Number PS733947
Manufacturer Part Number 8201515
This kit includes the module motor, ejector arm, and ice stripper arm. The complete icemaker is sold separately.
Fixes these symptoms
- Ice maker not making ice
- Ice maker won’t dispense ice
- See more...
Installation Instructions
ANDREW from DURANGO, CO
KITCHEN AID SIDE-BY-SIDE REFRIGERATOR ICE-MAKER stopped working due to a broken motor assembly.
Changing the KITCHENAID MOTOR ASSEMBLY TO THE ICE-MAKER was fairly straightforward. The hardest part was figuring out WHAT was broken and how to fix it. I was determined to save myself hundreds of dollars by doing it myself and avoiding a visit by the 'repairman'. 1.) Went to KitchenAid website to look at Parts List for my side-by-side refrigerator and ice maker assembly (a PDF file, easily downloadable) . The illustrations helped me visualize the assembly and various parts involved.
2.) Removed cover on front of ice maker.
3.) Removed hex-head screw on undersurface of icemaker on the right, which stablilizes a plastic cover for the electrical connector to the ice maker. Once this is off, it's then possible to slide the ice maker out.
4.) Slide the ice maker out from it's 'shelf' in the freezer. You won't be able to completely remove it until you disconnect the power supply.
5.) Disconnect the multi-pin power connector. (It's probably safest to unplug the refrigerator altogether before doing this, but I did not. No exposed metal wiring or connectors. No problems when I did it this way.)
6.) Once the ice-maker was out, remove the white cover from the motor assembly (on the left side of the unit).
7.) Remove the three screws from the black housing of the motor assembly. (This is where I discovered that the connector between the motor and drive-train was broken and needed to be replaced.)
8.) Remove and replace the drive system for the ice cube ejector.
9.) Then reverse the steps to reassemble.
This may seem a bit vague, but it's really quite straightforward once the ice maker is out of the freezer. The replacement motor assembly includes the motor, the motor housing, the drive-train, and the ice-cube ejector. Very easy to re-asemble.
Shopping for and ordering the part took some time since there are so many different after-market parts dealers. In all honesty, I'm glad I decided on PartSelect.com. They had a decent price, safe checkout, and timely delivery. All the essentials of a good online store.
Thanks, and good luck to the next guy who has to deal with a KitchenAid snafu. Read more...
Your Price
$121.60
In Stock
Maytag Refrigerator Freezer Evaporator Fan Motor - 115V 60Hz
PartSelect Number PS11748697
Manufacturer Part Number WPW10128551
This is an evaporator fan motor, it is 115 volts and 60 hertz and it is for your refrigerator/freezer. You will need to replace this part if your appliance is too warm or getting noisy. This evaporator fan motor is located in the back of the freezer. This part circulates air over the refrigerator coils. These coils will convert the heat into cool air, which is then circulated throughout your appliance. To replace this part you will need a 1/4-inch nut driver and a pair of needle nose pliers.
Fixes these symptoms
- Freezer section too warm
- Fridge and Freezer are too warm
- Fridge too warm
- See more...
Installation Instructions
jarrett from PALM DESERT, CA
refrigerator not cold but freezer was cold
removed ice maker and wire shelf. removed back panel screws and tilted forward. removed 2 screws holding motor bracket. swapped fan blade and reassembled
Read more...
Related Maytag Refrigerator Parts
- All Maytag Refrigerator parts
- Maytag Refrigerator Brackets and Flanges
- Maytag Refrigerator Caps and Lids
- Maytag Refrigerator Circuit Boards and Touch Pads
- Maytag Refrigerator Compressors
- Maytag Refrigerator Deflectors and Chutes
- Maytag Refrigerator Dispensers
- Maytag Refrigerator Door Shelves
- Maytag Refrigerator Doors
- Maytag Refrigerator Drawers and Glides
- Maytag Refrigerator Drip Bowls
- Maytag Refrigerator Ducts and Vents
- Maytag Refrigerator Elements and Burners
- Maytag Refrigerator Fans and Blowers
- Maytag Refrigerator Filters
- Maytag Refrigerator Grilles and Kickplates
- Maytag Refrigerator Handles
- Maytag Refrigerator Hardware
- Maytag Refrigerator Hinges
- Maytag Refrigerator Hoses and Tubes
- Maytag Refrigerator Ice Makers
- Maytag Refrigerator Insulations
- Maytag Refrigerator Knobs
- Maytag Refrigerator Lights and Bulbs
- Maytag Refrigerator Power Cords
- Maytag Refrigerator Seals and Gaskets
- Maytag Refrigerator Switches
- Maytag Refrigerator Tanks and Containers
- Maytag Refrigerator Thermostats
- Maytag Refrigerator Trays and Shelves
- Maytag Refrigerator Trims
- Maytag Refrigerator Valves
- Maytag Refrigerator Wheels and Rollers
- Maytag Refrigerator Wire Plugs and Connectors


