Frigidaire Range Switches
- Search your model number to find:
- Genuine OEM parts guaranteed to fit
- Free manuals and guides
- Repair instructions and videos

Popular Frigidaire Range Switches
Your Price
$43.86
In Stock
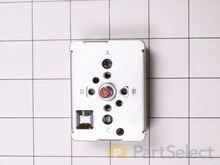
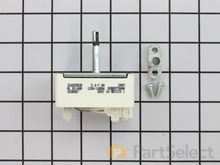
Frigidaire Range Infinite Burner Switch
I didn't want to call a repair man because I didn't want to be charged a $150 to have him come out and they to pay extra for parts (and of course a 2nd visit). So I went to www.Partselect.com and typed in the model of my range. Found the diagrams for my range and saw that from the switch ran a pair of wires to a Universal Receptacle (aka Terminal Block Kit). I figured since the Red light turns on when I turn the switch on it has to be the Terminal Block.
I ordered the part from www.Partselect.com ($14.00 including shipping) and replaced the part. The burner still would not get hot. I decided to test the switch. I removed the Control Panel cover (which is secure by 2 screws just below the digital clock). Once the cover was off, I saw the Blue wires going from the switch to the Terminal Block. To test the switch, I disconnected the two Blue Wires from connectors H1 and H2 and temporarily connected them to H1 and H2 of another switch. Sure enough, when I turned the other switch the element got hot.
So I placed another order from www.Partselect.com for a replacement switch ($50 including shipping). When that part came, I flipped the electrical circuit going to the range. I then removed the Control Panel cover again. With the new switch in hand (holding it near the old switch still attached to the Control Panel, I used the pliers to pull out each wire from it's connector and place it to it's corresponding connector on the new switch. Once all the wires were connected to the new switch, I pulled the knob of the switch off then used a phillips screwdriver to remove the two screws holding the switch to the control panel. I replaced the old switch with the new one put the screws back in, replaced the knob. Turned the circuit back on and tested to make sure that the element got hot. When it did, then I replaced the Control Panel cover and enjoyed a nice dinner that was cooked in less time than we're accustomed to because of the new burner. So I spent a total of $64.00 to fix our range. Less than half the amount I would've spent if I called for a technican. And far less then buying a new range.
Partselect is a great resource for information. They have diagrams and schematics available to view and/or download. And when ordering it's a snap because there's an "Add to Cart" button next to each part it lists. So there's no confusion. I've already recommended Partselect.com to about 5 people. And will continue to do so!! Read more...
PartSelect Number PS1145040
Manufacturer Part Number 316436001
The infinite burner switch controls the stove top eight-inch surface burner, which is the large surface element. If your surface element is not warming up, the element can be tested to determine whether or not it is defective. If your element is not defective, then it is more than likely that the infinite burner switch is the issue. Before you install the infinite burner switch you will need to unplug your range from the power supply, or shut off the home circuit breaker. The tools you will need to do this repair include a number one square head screwdriver and a pair of needle nose pliers.
Fixes these symptoms
- Element will not heat
- Little to no heat when broiling
- Oven is too hot
- See more...
Installation Instructions
William from Burke, VA
Back Burner didn't function
We moved into our townhouse about 6 yrs ago. During the home inspection we checked the range and saw the Red light come on when we turned on each burner. After moving in we realized the large back burner did not work. The light came on but the element never got hot. I of course replaced the element but that did not work. Several years passed and we just ignored the issue. We just got by with 3 burners. Lately we realized how much easier it would be to have all four burners working. Knowing that we will be selling our townhome soon we figured we should either fix the problem or replace the range. I didn't want to call a repair man because I didn't want to be charged a $150 to have him come out and they to pay extra for parts (and of course a 2nd visit). So I went to www.Partselect.com and typed in the model of my range. Found the diagrams for my range and saw that from the switch ran a pair of wires to a Universal Receptacle (aka Terminal Block Kit). I figured since the Red light turns on when I turn the switch on it has to be the Terminal Block.
I ordered the part from www.Partselect.com ($14.00 including shipping) and replaced the part. The burner still would not get hot. I decided to test the switch. I removed the Control Panel cover (which is secure by 2 screws just below the digital clock). Once the cover was off, I saw the Blue wires going from the switch to the Terminal Block. To test the switch, I disconnected the two Blue Wires from connectors H1 and H2 and temporarily connected them to H1 and H2 of another switch. Sure enough, when I turned the other switch the element got hot.
So I placed another order from www.Partselect.com for a replacement switch ($50 including shipping). When that part came, I flipped the electrical circuit going to the range. I then removed the Control Panel cover again. With the new switch in hand (holding it near the old switch still attached to the Control Panel, I used the pliers to pull out each wire from it's connector and place it to it's corresponding connector on the new switch. Once all the wires were connected to the new switch, I pulled the knob of the switch off then used a phillips screwdriver to remove the two screws holding the switch to the control panel. I replaced the old switch with the new one put the screws back in, replaced the knob. Turned the circuit back on and tested to make sure that the element got hot. When it did, then I replaced the Control Panel cover and enjoyed a nice dinner that was cooked in less time than we're accustomed to because of the new burner. So I spent a total of $64.00 to fix our range. Less than half the amount I would've spent if I called for a technican. And far less then buying a new range.
Partselect is a great resource for information. They have diagrams and schematics available to view and/or download. And when ordering it's a snap because there's an "Add to Cart" button next to each part it lists. So there's no confusion. I've already recommended Partselect.com to about 5 people. And will continue to do so!! Read more...
Your Price
$62.84
In Stock
Frigidaire Range Infinite Burner Switch - Small Element - 240V
PartSelect Number PS1145039
Manufacturer Part Number 316436000
This is a part for your range. This switch controls the stovetop surface burner. If you notice that your stove top is not turning on or is not adjusting to the corresponding desired heat, it is mostly likely due to the burner switch needing to be replaced. You will need a #1 square-head screwdriver and needle-nose pliers. Disconnect the power from the range. You will need to move the range out from the wall to remove the upper back panel to access to this part. This is an OEM genuine part.
Fixes these symptoms
- Element will not heat
- Oven is too hot
- Will Not Start
- See more...
Installation Instructions
Gerald from Paris, TN
Switch Was Making A Arcing Sound When Burner Was On
Removed the back cover of the range. Removed the knob from the front of the switch. Removed 2 screws holding switch to range. Removed wires one at a time and connected to proper poles on replacement switch and reinstalled new switch on range
Read more...
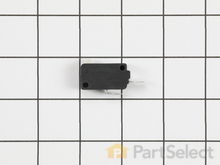
Frigidaire Range SWITCH
PartSelect Number PS12071303
Manufacturer Part Number 5304509460
Fixes these symptoms
- Won’t turn on
- See more...
Installation Instructions
Arthur from LUTZ, FL
Microwave tripped circuit breaker when turned on
Remove vent cover then remove touch screen control panel. When you remove control panel take photo of where everything is plugged in then unplug and remove control panel. 3 door switches located next to door in a plastic chassis. Test each switch with current tester. Remove the bad switch and replace with the new one. You tube DIY helped.
Read more...
Your Price
$155.72
In Stock
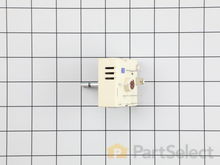
Frigidaire Range Dual surface element switch
PartSelect Number PS3504401
Manufacturer Part Number 316238201
This switch controls the stove top surface burner. This surface element control switch is for ranges.
Surface element control switch turns the surface element on and off and controls how much heat the element produces.
Unplug the range or shut off the house circuit breaker for the range before installing this part.
Fixes these symptoms
- Element will not heat
- See more...
Installation Instructions
Miguel from PLANT CITY, FL
The front left dual element stopped regulating temperature
Replaced the dual element switch and that fixed it up
Read more...
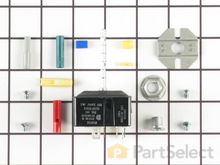
Frigidaire Range Burner Switch Kit
Use a nut driver or Phillips screwdriver. Remove rear panel.
Pull out control knob. If it is stuck, wrap a small rag around the back of it and pull the rag steadily.
Carefully match marked terminals on the replacement switch with those on original. Switch terminals may not be in the same location. Replace wires one for one, one at a time.
Carefully select the correct knob filler for the switch post. Several are supplied. Proceed with logic and measure the shaft length and the filler length and type to match. Read more...
PartSelect Number PS470145
Manufacturer Part Number 5303935086
This is a burner switch kit, also known as the surface element control switch repair kit, for ranges. This burner switch kit sends voltage to the surface element coil and it controls the stove top surface burner. If the following symptoms occur, installing the switch could be the solution to the problem: surface element not heating, overheating, or inconsistent heating. Usually, if the element is not defective, that is a sign there is an issue with the switch. The kit comes with several insert sizes, and includes screws as well. The tools needed for this project are a nut driver, pliers, and screwdrivers.
Fixes these symptoms
- Element will not heat
- See more...
Installation Instructions
George from New Port Richey, FL
High heat reluctant to turn down.
Most of the job is simple fastener mechanics.Use a nut driver or Phillips screwdriver. Remove rear panel.
Pull out control knob. If it is stuck, wrap a small rag around the back of it and pull the rag steadily.
Carefully match marked terminals on the replacement switch with those on original. Switch terminals may not be in the same location. Replace wires one for one, one at a time.
Carefully select the correct knob filler for the switch post. Several are supplied. Proceed with logic and measure the shaft length and the filler length and type to match. Read more...
Frigidaire Range Surface Burner Infinite Switch - 240V
2. Unscrew all four plastic "nuts" found under each knob holding front
panel to stove.
3. Lift front panel off.
4. Removed all Phillips screws holding metal shield to which control
switches are fastened.
5. Lift entire assembly up.
6. Remove two screws holding bad switch to metal shield.
7. BEFORE REMOVING ANY WIRES LABEL EACH WIRE
ACCORDING TO CODE EMBOSSED ON BACK OF BAD
SWITCH. These will be H1, H2, L1, L2 and P. They are not in
the same place on the new switch as they are on the old one.
The reason for labeling is that in case you make a mistake you
have this back-up to go by. Also to double check your finished
job.If just one wire is connected to the
wrong terminal a disaster will happen.
8. Remove each wire, one at a time from the old switch and connect
it to the correct terminal on the new switch as indicated by the
codes on the back of the new switch. When done double check
to be certain the labels on each wire match the code for the
connected terminal.
9. Slide furnished bushing onto the new switch.
10. Insert new switch through the back of the metal shield and attach
with the supplied screws. The old screws were too short in my
case so be certain to use the ones supplied with the new switch.
11. Re-attach the shield assembly to the stove.
12. Install the front panel back over the switch stems.
13. Secure the front panel with the four plastic nuts.
14. Install the control knobs.
15. Test the new switch. Read more...
PartSelect Number PS2350014
Manufacturer Part Number 903136-9020
This is a 240-volt surface burner infinite switch for a range or oven. It is for an 8-inch element. This part turns your surface element on and off, and regulates the desired heat of your element. The switch is made of off-white plastic and metal.
Fixes these symptoms
- Element will not heat
- Oven not heating evenly
- Will Not Start
- See more...
Installation Instructions
Ronald from FRENCH VLG, MO
No power to burner until after dial setting 3 reached and would not reach highest setting.
1. Remove all four control knobs.2. Unscrew all four plastic "nuts" found under each knob holding front
panel to stove.
3. Lift front panel off.
4. Removed all Phillips screws holding metal shield to which control
switches are fastened.
5. Lift entire assembly up.
6. Remove two screws holding bad switch to metal shield.
7. BEFORE REMOVING ANY WIRES LABEL EACH WIRE
ACCORDING TO CODE EMBOSSED ON BACK OF BAD
SWITCH. These will be H1, H2, L1, L2 and P. They are not in
the same place on the new switch as they are on the old one.
The reason for labeling is that in case you make a mistake you
have this back-up to go by. Also to double check your finished
job.If just one wire is connected to the
wrong terminal a disaster will happen.
8. Remove each wire, one at a time from the old switch and connect
it to the correct terminal on the new switch as indicated by the
codes on the back of the new switch. When done double check
to be certain the labels on each wire match the code for the
connected terminal.
9. Slide furnished bushing onto the new switch.
10. Insert new switch through the back of the metal shield and attach
with the supplied screws. The old screws were too short in my
case so be certain to use the ones supplied with the new switch.
11. Re-attach the shield assembly to the stove.
12. Install the front panel back over the switch stems.
13. Secure the front panel with the four plastic nuts.
14. Install the control knobs.
15. Test the new switch. Read more...
Frigidaire Range Spark Ignition Switch Assembly with Wire Harness
PartSelect Number PS3409148
Manufacturer Part Number 316580611
Four switches are included with the assembly.
Fixes these symptoms
- Will Not Start
- See more...
Installation Instructions
Joseph from VAN HORNESVLE, NY
Gas stove burners would not ignite.
Ordered spark ignition assembly and followed directions found on YouTube. Went very easy.
Read more...
Frigidaire Range Dual Infinite Switch
and unplug wires and plug new switch in... Saftey first gentlemen, there is no ifs and buts or maybes when it comes to your life.. make sure you turn your power off.. works like a charm , can adjust heat from 1 to hi..thanks for partselect great price and speedy shipping...James K. Luper Read more...
PartSelect Number PS820835
Manufacturer Part Number 318191023
This switch allows you to choose which size burner you require according to the size of the pots and pans you're using.
Fixes these symptoms
- Element will not heat
- See more...
Installation Instructions
James from Kentwood, LA
range has inner and outer eye(hot plate) . outer eye would turn wide open and off
ordered switch for on, off. Turned power off at breaker.opened oven door, underneath top console there are four philip screws.. remove top and take slotted screwdriver and unscrew four plastic nuts. I used pocket knife..remove plastic cover , and then remove four more philip screws to remove metal plate that holds all four control switchs. remove two screws that held switch in placeand unplug wires and plug new switch in... Saftey first gentlemen, there is no ifs and buts or maybes when it comes to your life.. make sure you turn your power off.. works like a charm , can adjust heat from 1 to hi..thanks for partselect great price and speedy shipping...James K. Luper Read more...
Frigidaire Range Surface Burner Infinite Switch Kit
disassembly than actually necessary. Turns out, simply removing the
threaded plastic securing rings around the bases of the controls frees
up the faceplate, and allows access to the phillips screws that hold down
the bracket. Then it's a simple matter to replace the control unit by
swapping out the leads one at a time from old to new. Be careful when
re-attaching those plastic securing rings, they can cross-thread pretty
easily. Read more...
PartSelect Number PS2350013
Manufacturer Part Number 903136-9010
This is a surface burner infinite switch kit for your range or oven. This replacement part activates and deactivates your burner, and controls the burner heat. If you are not getting any heat to your burner or it is not the right temperature, you may need to replace this part. It is about 2.75 inches wide and 1.5 inches tall.
Fixes these symptoms
- Element will not heat
- Will Not Start
- See more...
Installation Instructions
David from AVON, NY
Burner control failed, needed replacement
Drawings on web site somewhat hard to read, resulting in moredisassembly than actually necessary. Turns out, simply removing the
threaded plastic securing rings around the bases of the controls frees
up the faceplate, and allows access to the phillips screws that hold down
the bracket. Then it's a simple matter to replace the control unit by
swapping out the leads one at a time from old to new. Be careful when
re-attaching those plastic securing rings, they can cross-thread pretty
easily. Read more...
Frigidaire Range Infinite Burner Switch - 8" - 240V
George Ritz Read more...
PartSelect Number PS1529262
Manufacturer Part Number 318293811
This switch controls the stove top surface burner.
Fixes these symptoms
- Element will not heat
- See more...
Installation Instructions
George from WYOMING, MI
Controller fails to hold a constant heating element tempature
The replacement of this part is simple enough, out with the old, in with the new. At issue here is the way the controller fails. The heating element goes to the highest temperature. The original controller on this Kenmore oven failed after about two years and the first replacement that I got from you lasted about a year and a half. The defective controllers seem to be working properly once the controller has been turned off and then restarted, but the frequency of failure increases with time until you hardly dare to step away from the oven. This controller should open on failyor, not close. George Ritz Read more...
Related Frigidaire Range Parts
- All Frigidaire Range parts
- Frigidaire Range Brackets and Flanges
- Frigidaire Range Caps and Lids
- Frigidaire Range Circuit Boards and Touch Pads
- Frigidaire Range Cooktops
- Frigidaire Range Deflectors and Chutes
- Frigidaire Range Doors
- Frigidaire Range Drawers and Glides
- Frigidaire Range Drip Bowls
- Frigidaire Range Ducts and Vents
- Frigidaire Range Elements and Burners
- Frigidaire Range Grates
- Frigidaire Range Handles
- Frigidaire Range Hardware
- Frigidaire Range Hinges
- Frigidaire Range Hoses and Tubes
- Frigidaire Range Igniters
- Frigidaire Range Insulations
- Frigidaire Range Knobs
- Frigidaire Range Lights and Bulbs
- Frigidaire Range Motors
- Frigidaire Range Panels
- Frigidaire Range Racks
- Frigidaire Range Seals and Gaskets
- Frigidaire Range Springs and Shock Absorbers
- Frigidaire Range Thermostats
- Frigidaire Range Trims
- Frigidaire Range Valves
- Frigidaire Range Wire Plugs and Connectors


