Enter the code DIYDAD10 at checkout to apply your discount. Discount will be applied at checkout when the code is entered & applies to all parts. Cannot be combined with any other coupon or special offer & cannot be applied to a previously placed order. Not valid toward tax or shipping & handling. Discount has no cash value. Discount expires on June 17 at 11:59pm EST.
You've Got 10% Off Your First Order!Save 10% with code at checkout *click to copy coupon code
This is an OEM replacement ice and water filter for your refrigerator. In side-by-side refrigerators, it is found in the top right corner or the bottom left grille. In bottom-freezer refrigerators, th...
Sold individually. This door bin is for refrigerators.
The door bin attaches to the inside of the refrigerator door and typically holds jars and bottles.
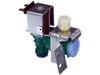
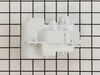
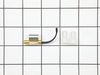
This light switch may also be known as a refrigerator door switch or a light switch kit, and is compatible with your refrigerator. The function of the refrigerator door switch is to turn on the light ...
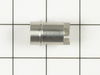
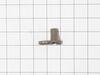
This mounting screw is a genuine OEM replacement part for the door handle in your refrigerator. If you are having trouble shutting the refrigerator door, or opening it, replacing this screw can help s...
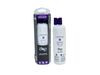
This touch-up paint can be used on a wide variety of household appliances. It is most often used on washers, dryer, refrigerators, dishwashers, ranges, freezers, trash compactors, or microwaves. It is...
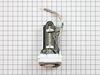
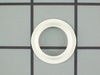
This part is a replacement refrigerator drive shaft seal for your refrigerator. The drive shaft seal protects the auger motor from water and condensation that may leak down the drive shaft from the ic...
If your refrigerator or freezer is too warm, or making noises, you may need to replace the fan blade. The fan blade attaches to the evaporator motor, which is in the freezer section, to help circulate...
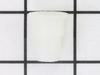
This is a genuine replacement light bulb for a refrigerator. The inside of your refrigerator should illuminate when you open the door. If your fridge does not illuminate, you may need to replace this ...
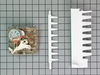
This kit includes the module motor, ejector arm, and ice stripper arm. The complete icemaker is sold separately.
$116.33
In Stock
Questions And Answers for WRS586FLDM01
Ask our experts a question about this model and we'll get back to you as soon as possible!
2 questions answered by our experts.
Sort by:
< Prev
1
Next >
Search filter:
Clear Filter
Your search term must have 3 or more characters.
Keep searches simple. Use keywords, e.g. "leaking", "pump", "broken" or "fit".
Sorry, we couldn't find any existing answers that matched.Try using some different or simpler keywords, or submit your new question by using the "Ask a Question" button above!
Tim
December 29, 2019
Seems to leak water out the freezer from the defrost cycle. Fills the bottom below the bottom freezer drawer. Is there a drain in the rear that could be plugged that drains water to a pan? How is it cleaned?
For model number WRS586FLDM01
Hello Tim, Thank you for the question. I suggest pulling the Drain Tube PartSelect Number PS3505907 out to clean and check for a blockage. We hope this helps!
Will not defrost. Heat Element measures 31 ohms. Does it have a timer to activate or how can I put it into defrost manually? A board that controls this function?
For model number WRS586FLDM01
Hello Tim, thank you for contacting us. Based on our research, you may need to check the control board, part number PS11773174, to fix the issue. It manages the functions of the refrigerator, such as cooling and defrosting times. Before replacing the board, you may need to test the thermistor. We hope this solves your problem!
I used a flat-head screwdriver to pop out the old light rocker switch. Then, I unplugged the wires, plugged them into the new light rocker switch, and then popped the new switch into the hole. That's it! Lights began working again.
First I removed the old lightbulb from the socket and replaced it with a new one to confirm that the bulb was not the problem. I then pryed the socket out with a flat-head screwdriver. I could tell that the socket was anchored in its hole with clips so it was relatively easy to pry it out. Once the socket was out, I disconnected the le
... Read moread wires and ordered a replacement socket kit from Partselect. When the new one arrived, I reconnected the lead wires to it, snapped it back into its hole, screwed in a new lightbulb, and presto!! The light was back on with no further problem. Thank you, Partselect!! A $15.00 part saved me what probably would have been at least a $100. service call and heaven knows what the technician would have told me I needed!!!
Changing the KITCHENAID MOTOR ASSEMBLY TO THE ICE-MAKER was fairly straightforward. The hardest part was figuring out WHAT was broken and how to fix it. I was determined to save myself hundreds of dollars by doing it myself and avoiding a visit by the 'repairman'.
1.) Went to KitchenAid website to look at Parts List for my
... Read more side-by-side refrigerator and ice maker assembly (a PDF file, easily downloadable) . The illustrations helped me visualize the assembly and various parts involved. 2.) Removed cover on front of ice maker. 3.) Removed hex-head screw on undersurface of icemaker on the right, which stablilizes a plastic cover for the electrical connector to the ice maker. Once this is off, it's then possible to slide the ice maker out. 4.) Slide the ice maker out from it's 'shelf' in the freezer. You won't be able to completely remove it until you disconnect the power supply. 5.) Disconnect the multi-pin power connector. (It's probably safest to unplug the refrigerator altogether before doing this, but I did not. No exposed metal wiring or connectors. No problems when I did it this way.) 6.) Once the ice-maker was out, remove the white cover from the motor assembly (on the left side of the unit). 7.) Remove the three screws from the black housing of the motor assembly. (This is where I discovered that the connector between the motor and drive-train was broken and needed to be replaced.) 8.) Remove and replace the drive system for the ice cube ejector. 9.) Then reverse the steps to reassemble.
This may seem a bit vague, but it's really quite straightforward once the ice maker is out of the freezer. The replacement motor assembly includes the motor, the motor housing, the drive-train, and the ice-cube ejector. Very easy to re-asemble.
Shopping for and ordering the part took some time since there are so many different after-market parts dealers. In all honesty, I'm glad I decided on PartSelect.com. They had a decent price, safe checkout, and timely delivery. All the essentials of a good online store.
Thanks, and good luck to the next guy who has to deal with a KitchenAid snafu.


 Diagram and Parts List for Whirlpool Refrigerator")