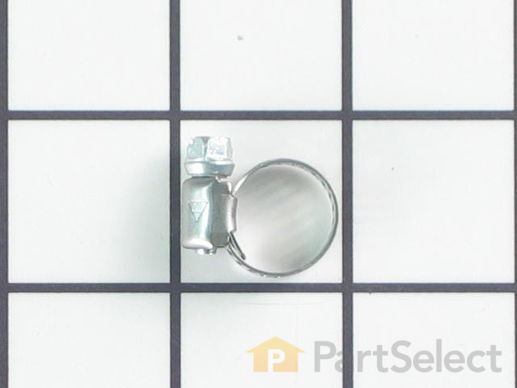
Fill Tube Clamp WR2X4754
Rated by 3 customers
Easy
30 - 60 mins
Ratings submitted by customers like you who bought this part.
Get this part fast! Average delivery time for in-stock parts via standard shipping: 1.8 days.
Fill Tube Clamp Specifications

How Buying OEM Parts Can Save You Time and Money
- < Prev
- 1
- Next >
For this repair, I not only replaced the cracked Icemaker Line, I replaced the Incoming Water Line with copper, and replaced the Dispenser Water Reservoir. If you have a leak in one of the plastic water lines around the Valve Assembly, I recommend you do the same.
The Icemaker Water Line instructions from Stephen from Raleigh was very helful and complete.
I found Scot from Fort Collin's instructions on replacing the Reservoir very helpful too. Although I found his comment that one line was too short, to not be the case. In fact I had to trim both lines because they were too long.
Scott from South Lake Tahoe's suggestion to use the old Reservoir Lines to fish the new ones is good. I used duct tape to attach them together instead of drip irrigation fittings, and it worked fine. It helps to have somebody at the back of the fridge to pull the line while you push it from inside the fridge.
The line to the door connection can be accessed by removing the grill at the bottom of the front of the fridge.
Pretty easy repair. Thanks to the other contributors for the help!
-
Joe from Glenmoore, PA
-
Difficulty Level:Easy
-
Total Repair Time:30 - 60 mins
-
Tools:Nutdriver, Pliers, Screw drivers, Wrench (Adjustable), Wrench set
-
William from Katy, TX
-
Difficulty Level:Easy
-
Total Repair Time:15 - 30 mins
-
Tools:Nutdriver, Wrench (Adjustable), Wrench set
1. Turn off water supply.
2. Unplug power cord.
3. Remove bottom Panel to access the Solenoid valve.
4. Remove the water lines from the Valve.
5. Remove the Valve from the refrigerator.
6. Remove the electrical connectors from the valve.
(make sure the new valve has the connector adap ... Read more tors included) you will need them during installation.
7.Bend the new valve bracket inward about 45 degrees to clear the compressor coolant line.
8.Use a pair of pliers to braek away the plastic on the new valve for clearance.
9.If needed remove the compression fitings from the old water line installation as the new valve comes with the push and lock feature.
10.Install the bottom 2 water lines they are different sizes
11.Mount the new valve to refrigerator and tighten.
12.Install the ice maker water line to the top fitting on the valve.
13.Plug the power cord in & turn on the water supply,check for leaks and proper operation on the valve.
-
Louis from Kingwood, TX
-
Difficulty Level:Easy
-
Total Repair Time:30 - 60 mins
-
Tools:Nutdriver, Pliers, Screw drivers, Wrench (Adjustable)
- < Prev
- 1
- Next >
Be the first to ask our experts a question about this part!


Manufacturer Part Number: WR2X4754

Item is in stock and will ship today if your order is placed before 4:00 PM Eastern Standard Time.
If your order is placed after 4:00 PM EST, the in stock items will ship on the next business day.
Item is not in stock and usually ships 3-5 business days from the time you place your order.
Item is not in stock and usually ships 10-15 business days from the time you place your order.
This item is no longer being made by the manufacturer, and cannot be added to your shopping cart.


