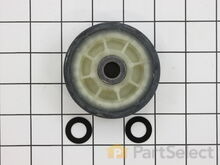
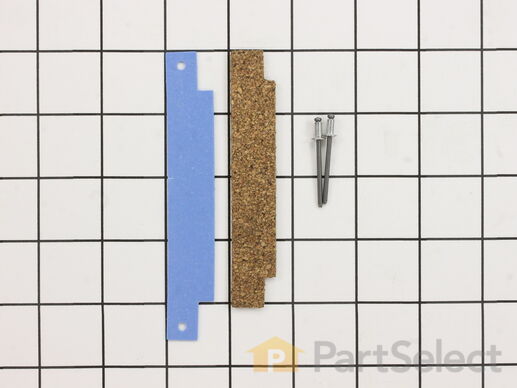
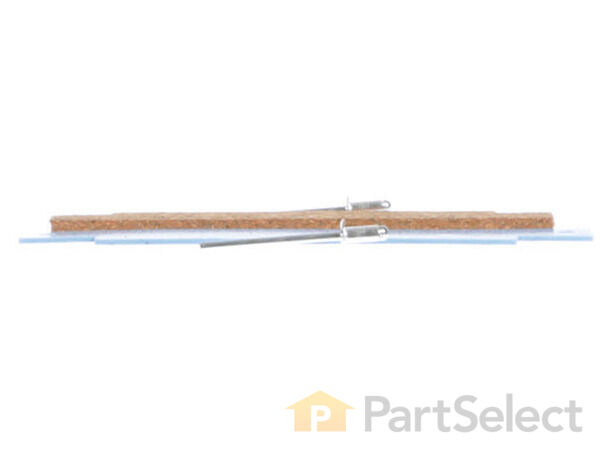
The front glide is located at the front of the dryer, the drum rides along it. If you hear a metal-on-metal noise when your dryer is running, your front glide may be worn out and require replacing. This front glide kit comes with a blue plastic glide, a brown cork pad, and two metallic rivets. Two kits are required per appliance. While you have the front bulkhead removed for this repair, you may want to inspect the felt that lines it. If the felt is damaged, it is recommended that you replace it at the same time. You will need a rivet tool for this installation, as well as a stubby Phillips screwdriver, a 5/16 nut driver, and a drill with a 1/8-inch bit.
How Buying OEM Parts Can Save You Time and Money
Troubleshooting
This part fixes the following symptoms:
Noisy | Marks left on clothes | Will not tumble | Will Not Start
Keep searches simple. Use keywords, e.g. "leaking", "pump", "broken" or "fit".
Sorry, we couldn't find any existing answers that matched.Try using some different or simpler keywords, or submit your new question by using the "Ask a Question" button above!
Trey
July 20, 2017
My tumbler is sticking which is causing the dryer to stop. I think my front tumbler bearings are worn down based on the symptoms and sounds Im experiencing but Im not sure. Does this sound about right? If that is the case do I need this part to fix it? Is this a normal thing for driers to do or is there something wrong with mine? Thanks in advanced!
Hi Trey, it sounds like you need to replace your front tumbler bearings 306508. Do not panic as this is normal wear and tear for your dryer to experience. Also, the heavier loads you put in your washer, the more wear the tumbler bearings will have. I hope this helps.
16 people found this helpful.
Was this helpful?
Thank you for voting!
Jason
August 12, 2017
Hi, i'm having problems with my dryer. It seems to be snagging the clothes. They come out of the dryer with small snags. Any help would be greatly appreciated.
For model number Maytag
Hi Jason,
Thank you for your inquiry. There are three parts that may fix the issue. The front and rear seal, the dryer drum glides and the drum support rollers.
Front and Rear Seal
A worn, torn, or missing front or rear seal could be the reason your clothes are coming out of the dryer torn. The seal is designed to keep clothes from getting between the drum and the front or rear wall of the dryer. If this seal becomes worn or torn, your clothing may become lodged between the two parts. Because the dryer drum keeps turning, the clothes get ripped. Before you can examine and replace a dryer drum's seals, you have to remove the drum.
Dryer Drum Glides
Torn clothing could mean that the glides in your dryer have become defective. The glides support the drum towards the front of the dryer. They can wear over time, causing the drum to slump or sag toward the front of the dryer. When this happens, a pinch point is created at the top of the drum. It is this pinch point that can tear clothing. If this happens in your dryer, you will have to open it up and replace the entire set of glides.
Drum Support Rollers
Another possibility for torn clothing could be defective drum support rollers. The rollers support the drum in the back of the dryer. These too can wear over time, causing the drum to slump or sag in the back. Again, a pinch point is created, causing clothing to tear. If it is the drum support rollers in your dryer that have become defective, you will have to replace the entire set of rollers. You will have to open up your dryer's cabinet and remove the drum before you can replace your drum support rollers.
I hope this helps. Thank you and have a great day!
12 people found this helpful.
Was this helpful?
Thank you for voting!
Ralph
February 10, 2018
I have repleced the front guides. I watched the video twice before making the installing, but after two cycles the squealing sound is back. Does have a break-in period before the sound is silenced?
For model number LDE8416ACM
Hello Ralph, Thank you for your inquiry. Usually they do not, so we would recommend checking the drum rollers, the roller shaft/axle, the idler pulley, the drive belt, the drive motor and the felt seal. Hope this helps!
10 people found this helpful.
Was this helpful?
Thank you for voting!
Penny
July 20, 2017
My dryer could be almost empty but it sounds like theres a huge load inside with occasional thumping during drying cycle. Where should I check first?
Hello Penny, based on your symptoms the most common reason this happens is worn rollers, which are found here 12001541. Before ordering this assembly, we suggest checking your rollers to see if they have excessive visible wear to the point that they look damaged. If that is the case you should replace them. Please let us know if you have any further questions.
8 people found this helpful.
Was this helpful?
Thank you for voting!
Clint
January 9, 2018
Just changed front drum guides on dryer should blue plastic part wear away for coating on cork pad if not what could be the cause
For model number Lde8410acw
Hi Clint,
Thank you for your question. It is normal for the blue plastic piece and the drum glides to wear down through use of the dryer. I hope this helps. Thank you and have a great day!
5 people found this helpful.
Was this helpful?
Thank you for voting!
Kathleen
March 8, 2018
My dryer has started leaving small black swipe marks on the clothes. We have repeatedly cleaned the drum but it is still happening. One of the drum baffles has a worn hole in it but we have cleaned that and there is no black in or on it. Do you have any idea what could be causing the black mark problem?
For model number DE412
Hi Kathleen,
Thank you for your question. If one of the baffles in your dryer is broken, you will need to replace it. Sometimes while the clothes are drying, the clothes may become caught on the baffle and as the clothes are heating, the area of the clothing where it is hooked on to the baffle can become black with scorch marks. I hope this helps. Thank you and have a great day!
4 people found this helpful.
Was this helpful?
Thank you for voting!
Andre`
July 20, 2017
When my dryer is on and running the clothes seem to be catching on something and it is ruining them, theres black marks on them as well. Based on what ive been reading and experiencing it sounds like I need a bearing kit. Thoughts?
Hi Andre`, you are correct. Based on your symptoms it sounds like you need to order a tumbler bearing kit 306508. Best of luck with this repair.
4 people found this helpful.
Was this helpful?
Thank you for voting!
Odette
May 14, 2019
Dryer noisy drum runs rough worse when starting
For model number Maytag
Hello Odette, thank you for inquiring. For this symptom you will want to replace either the Drum Glides, the Drum Bearings or the Drum Support Rollers & Shaft. If you could provide the model number for the appliance, we can confirm the correct compatible parts.
2 people found this helpful.
Was this helpful?
Thank you for voting!
Fran
July 2, 2019
Does this model have drumglides if so where are they
For model number led7304ace
Hello Fran, thank you for writing. The Front or Rear Drum Felt Seal for your model is part PS11740771. We have a video for it showing what you need to know to install it. Here is a link: https://www.partselect.com/PS11740771-Whirlpool-WP314820-Front-or-Rear-Drum-Felt-Seal.htm?SourceCode=4&SearchTerm=LDE7304ACE&ModelNum=LDE7304ACE#RepairVideo. We hope this helps.
1 person found this helpful.
Was this helpful?
Thank you for voting!
Douglas
May 10, 2019
Front panel for selecting water or ice, change temps just beeps can't select or change anything, fridge is working it's like it has a child lock on, only my manual says this model doesn't have it
For model number MFI2266AEB
Hi Douglas,
Thank you for your question. The temperature for your refrigerator is preset at the manufacturers. If the refrigerator is locked, there should be green light lit just above the button. If the controls are locked press and hold the Lock/Unlock button for three seconds until the green light turns off. If the temperature alarm light is flashing, press and hold the Temp Alarm button for 3 seconds to turn it off. If this is not the issue, you may need to check the connections between the touchpad and the electronic control board. I hope this helps. Thank you and have a great day!
Keep searches simple. Use keywords, e.g. "leaking", "pump", "broken" or "fit".
Sorry, we couldn't find any existing installation instruction that matched.
Belt broke on old machine.
1. Removed front of machine (2 screws at the bottom). 2. Removed 4 screws from inside the dryer, to take off the blower housing. 3. Removed 4 screws and took out the large metal piece which supports the drum at the front. Removed the drum. 4. Replaced the two rollers that support the drum in the rear. Cleaned the pins they run on, and oiled very lightly. Also replaced the idler roller. I was surpirsed to see that these rollers use plain bearings, not ball bearings. 5. On the front support piece, drilled out the rivets for the glides, and replaced the worn out glides with new parts. Applied a little glue (3M weatherstrip adhesive) to the cork pieces, to glue them to the metal. Attached the plastic pieces over the cork pieces, and riveted in place using rivets that came with the glide kits. 6. Replaced front and rear felt seals. This was not as tricky as I expected it to be. They were held in by metal tabs. Glued the ends where they came together. 7. Replaced the felt blower seal. Glued to the blower housing. 8. Reinstalled the drum, installed new belt, which came with good instructions (luckily). 9. Reassembled front support piece and the front of the cabinet.
I also cleaned the lint from the cabinet and from the vent hose.
In general, the job went without a hitch, and the machine probably has quite a few years left, despite the fact that it's 18 years old. This gives me a good feeling.
I'd say this would be challenging, though, for someone who is not pretty experienced with machinery repair. Also, the cost of the parts was significant enough that it would not have been unreasonable to have opted for a new machine.
I received my parts promptly and had no problems, they were accurate and fit well.
After removing the screws to the front door and panel I removed the wires to the door switch. Carefully I removed the belt and removed the drum. I took the time to vacuum all of the lent from the inside and and remove from all the wiring, motor and heating elements, etc. I replaced the drum rollers, belt, front glides and a buzzer that was on the blink. I reassembled the dryer and unforetunately the dryer was still squeeking. I later repeated the process and found that the tensioner wheel for the belt was the culprit. I cleaned then greased the bearing portion and replaced it. I reassembled the dryer a second time and now it's quiet as a mouse. By the way, you will need a rivet gun to replace the front glides and I recommend you give the belt tensioner wheel a good inspection the first time.
If your dryer is squeeking, go ahead and order the tensioner wheel also, it's a little money spent toward making sure you get rid of the noise! It might save you a lot of time and trouble.
Motor buzzed and dryer drum would not spin when pressing start
From the first time the motor buzzed (but dryer tumbler then started to turn), 2 weeks elapsed for the dryer drum to stop turning altogether. If this occurs, DO NOT continue to push the start button because the motor armature wiring will heat up and the insulation will begin to melt and smell - a SAFETY HAZARD. Unplug dryer and lockout/tagout as appropriate.
Through basic troubleshooting, discovered the motor had seized up. Since the unit was about 10 years old and it had to be disassembled for replacement, the decision was made to replace "likely to fail mechanical components including motor, belt, both rear drum rollers/shafts, idler arm pulley/assembly/wheel, associated washers, snap rings and both front glides. Reviewed the PartSelect website and drawings, ordered the parts and they delivered on time. Buy the correct sized snap rings at a local hardware, they're much less expensive. Also once inside your dryer, you'll likely find alot of lint to vacuum out...have fun.
I went online and Googled several resources that showed how to remove the front dryer panels, as well as PartSelect repair stories. From that point on, I took photos as I was disassembling so I would know how to put it back together. Utilize pictures or whatever system you prefer to keep track of taking something apart and putting it back together.
Remove the dryer door, then the front panel Disconnect wires to the light, dryness sensor and door switch. Note belt and pulley configuration that is near the motor-this will help you later when reinstalling the belt. Also note if the ribbed side or the flat side of the belt is against the outer drum wall. Remove the door shroud.
Slip the belt off the idler pulley wheel. Remove front drum support, then dryer drum Note which end of the dryer drum is the front and the orientation of the glides on the drum support. Discard old belt. Drill out and remove the old front glide supports, then install/rivet the new glides.
Remove both old rear drum rollers/shafts, washers, etc. The rear drum roller shafts are secured to a back bracket by a hex nut....feel around you'll figure it out. Replace new roller shafts. Lightly grease using a high quality silicon grease, then replace new washers, roller, snap ring, etc
Carefully unplug wiring harness on motor, there are fragile clips on each end. Don't forget a separate ground wire from the harness is attached to the motor mount bracket. Carefully release tension on the idler arm spring. Using the correct size nut driver, remove three screws (on this model) then take out the motor/idler arm assembly. Remove the old idler arm/pulley assembly. Remove the motor mount clips on each end of the mount (I used a wide blade screwdriver). Remove and replace the motor. Motor configurations changed after Whirlpool bought Maytag, so orient it correctly insuring mounting gasket "nubs" on each end of the motor correspond to the cutouts on the motor mount. Reinstall the motor mount clips. Replace the new idler arm assembly/pulley wheel; grease moving parts with high quality wheel bearing grease. Replace motor/mount bracket assembly back into the dryer. Replace ground wire to motor mount bracket and plug wiring harness back in. Reinstall idler arm spring.
Place belt back on the dryer drum and move into place on rear rollers. Reinstall front drum support. Dryer drum should turn relatively easy. Insure belt is oriented on the drum correctly before connecting belt to motor shaft end and idler arm wheel pulley (the picture you took comes in handy here).
1 Disconnect dryer from electrical outlet 2 remove vent pipe 3 Tilt dryer backwards and remove front cover bottom 2 philips screws. 4 remove lint assembly and then the fan blower housing with nut driver. 5 with pliers remove retainer clip from fan 6 remove snap ring with pliers or a flat blade screw driver will also work. 7 remove fan at the same time I replaced the front glides if you do not want to do this then reinstall in reverse order and job is complete.
for glide replacement 1 remove the 4 screws holding the outer ring to the frame of the dryer. 2 drill out old rivits from the back side and then knock out. be careful to only drill rivit and not into metal frame 3 install new new glides makesure you install in correct direction. 4 install pop rivets with stud end on top side of glide. pushing rivet through glide and into the frame ring. 5 pop rivits and make sure they are secure. 6 reinstall ring making sure seal is around ring correctly 7 reintal 4 screws. 8 follow reassembly of blower and lint housing if you changed the fan. if not then just the lint assembly.
good luck the job is really easy and you will save yourself some money
Loud squealing followed (eventually) by total stopage
After much coercement from my wife, I listened to the squealing noise she kept telling me about. Then it quit working completely and I had no choice. Probably the motor. Not being one to want to do this more than once and figuring after 16 years all of it could be bad, I ordered all moving parts, as well as new front and rears felt seals for the drum and the blower seal. Everything in taking the dryer apart was straight forward and obvious. The tricky part was getting the belt back on the tensioner. Working from the front of the dryer, I did this one-handed via the lower left side around the motor while my wife held the drum in place.
1. Unplugged dryer, removed front (2 phillips screws near bottom) set aside with wires attached 2. Removed front support (4 hex head screws) 3. Drilled out pop-rivets, discarded old glides (why didn't Maytag use rollers?) 4. Riveted new glides in place. 5. (Oops!) trimmed cork pads, smeared with glue, shoved under glides, held down until firm 6. Removed drum (pushed belt back to groove, pulled drum off rollers, lifted belt off drum, worked drum out) Left belt on pulley and tension wheel as pattern when I replace it. 7. Scraped old gasket felt off back chassis and front support 8a. Folded gasket lengthwise and glued into front support channel with fold on outside diameter. It was too short. 8b. (Oops! Why didn't this come with instructions?) Pulled it out, reversed it and replaced it with fold to inside diameter. It fit. Glued ends together. 9. Glued other felt gasket into back chassis. (Good ventilation needed here!) 10. Replaced rollers. (This did have instructions, despite being easy. I didn't use any grease. Experience as a locksmith says don't lube anything that isn't sealed from dust. I also vacuumed out 15 years of dust.) 11. Replaced belt. (The old one looked fine, but I was advised to do the belt and rollers along with the glides.) The grooves touch the drive pulley, the flat goes around the tensioner, and the belt exiting to the left seems like it will rub the pulley, but it doesn't once the drum is installed. 12. Turn the drum around (Nice, it's symmetrical!) and work it back in. 13. Lift the belt around the drum edge (I used bull clips to hold it in place.) 14. Check the belt on the pulleys, move the drum in more, take off clips, move the belt to the groove. 15. put the drum on the rollers, lift the belt out of the groove, and spin the drum a little while watching the pulleys to check it. 16. Screw the front support back in place. 17. Screwed the front on and plugged it in. It works!
Utilizing the online schematics, I disassembled the dryer, marked and disconnected all wires, and removed the drum. Once the drum was removed, I thoroughly cleaned the inside of the dryer and removed all lint accumulation from the heating element, motor, and blower fan areas. I replaced the front guides and drum support rollers/shafts, belt and idler pulley. I reassembled the dryer and it worked! Be sure to lay all the screws and parts in a logical sequence as you disassemble the dryer, it makes reassembly much easier.
Nutdriver, Pliers, Screw drivers, Socket set, Wrench set
28 of 705 peoplefound this instruction helpful.
Was this instruction helpful to you?
Thank you for voting!
Very loud intermittent squeeling when running
Remove top two front cover screws. Disconnect wiring. Set aside front cover - door assembly.
Remove two screws at top of the vertical riser cover to expose entire dryer interior. Remove filter. Remove screws to blower cover plate. Remove 4 screws that fasten front drum guide assembly. Remove drum. remove and replace 2 drum support rollers . Replace one rusted drum roller shaft. Replace both drum rollers and non-metalic washers.
Drill out 4 rivets holding two front drum glides. Replace and rerivet new drum glides.
Pry back slighty the many retention points around the front drum assembly which hold the front drum felt seal. Refit the new front drum felt, pressing the retaining clips back in place with a screwdriver.
Replace tumbler motor belt.
Install Drum. Install front drum retention assembly. Install new blower seal with reassembly of blower cover.
I watched all of the video provided for repairing each of the parts and used them several times! They were excellent and beneficial! I used the suggestions provided and found the involved correction to do exactly as planned. The end result was very good and the dryer now works like it is supposed to without any noises. I thank you for all of your help.
Pliers, Screw drivers, Wrench (Adjustable), Wrench set
22 of 700 peoplefound this instruction helpful.
Was this instruction helpful to you?
Thank you for voting!
the dryer was making a loud noise that sounded like it was about to quit, it was!
My husband and a friend decided to take the dryer apart to see what the problem might be and if it could be repaired. I had already decided the dryer is about 14 years old, it is history. They discovered the roller was broken, and other parts such as the belt, a pulley and so on. I went online to www.partselect.com. I was surprised to see diagrams of the inside of my dryer. That helped us order the right parts. I ordered the parts for a total of 68.00 (including shipping) The parts came, the dryer was fixed and runs like new. I saved 400.00, because I did not have to buy a new dryer. I am very proud that we were able to use this site to locate our needs and fix the dryer. The diagrams helped us perform the task without calling a repair person. Thank you for this opportunity!
Keep searches simple. Use keywords, e.g. "leaking", "pump", "broken" or "fit".
Sorry, we couldn't find any existing reviews that matched. Try using some different or simpler keywords.
★★★★★
★★★★★
George W - 6 days ago
Verified Purchase
Easy repair after the video
The video was a great help!
★★★★★
★★★★★
Cindy W - 24 days ago
Verified Purchase
Front Glide Kit
This part was exactly what I needed. The old part had completely worn away and I had metal shavings inside the basket! The instruction video was a perfect example of how to replace it. Thank you so much for including the link in the email!!!!!
★★★★★
★★★★★
Howard S - May 26, 2022
Verified Purchase
Squealing dryer
This fixed part of the problem part fit great purchased drum rollers also now there is no more squealing
★★★★★
★★★★★
John F B - April 13, 2022
Verified Purchase
Involved but not difficult
Very happy to still be able to get parts for a 22 year old dryer. So while it was apart I replaced the wheels, the belt, and the front felt seal. It is a wonderful sound to hear it purr when running like the day it was installed. The only extra effort needed was to get the felt to seat down before putting everything back together.
★★★★★
★★★★★
Greg R - May 5, 2021
Verified Purchase
Just as advertised
Thanks for the video training pretty funny though I couldn’t do the repair in 7 minutes ??
★★★★★
★★★★★
Ravi K - January 19, 2021
Verified Purchase
Great part, easy repair, fast shipping
Our Maytag dryer front glide kit and drum rollers were worn out. Completed the job in 90 minutes, and very happy with the parts from PartSelect. Had no issues doing the replacement. Ensure you have a riveting gun for installing the front glide kit. It costed me $10 from local hardware store
- RK
★★★★★
★★★★★
Joseph H - November 3, 2020
Verified Purchase
Perfect fit, easy to install with rivet tool
Part was perfect replacement for my maytag de7600. NOTE: I didn't have a rivet tool, so I purchased one at my local hardware store. Attaching the glides was easy. The dryer is very quiet now.
★★★★★
★★★★★
Pierre D - June 23, 2020
Verified Purchase
couldn't be easier
using the video to get an understanding of the job made all of the difference to make it a breeze.
An with the included rivets made it better, the dryer is nice and quite now
★★★★★
★★★★★
Rodney L - January 18, 2020
Verified Purchase
Works good. No problems
Parts was exact fit no problems. Dryer works like new
The Fix App makes it easy to manage all your stuff in one place. Just snap a photo and we'll find and store your user manuals, receipts, and product information in one easy-to-find place!
"Like magic. I took a picture of the model number on my refrigerator, and the app identified it right away … Very convenient. I'm impressed." ★★★★★ - Clever Jeff