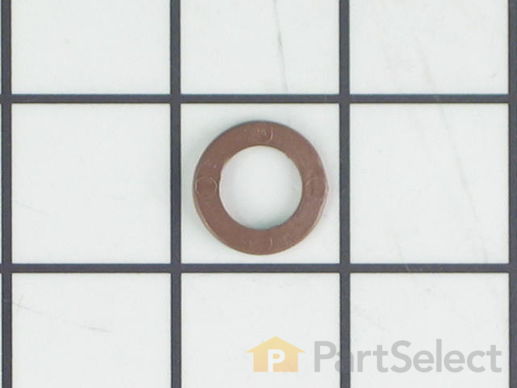
Door Hinge Nylon Washer
$
6.68
In Stock


Get this part fast! Average delivery time for in-stock parts via standard shipping: 1.8 days.


PartSelect Number PS12344581
Manufacturer Part Number WR01X27364
Manufactured by
GE
You May Also Need?
Product Description
Door Hinge Nylon Washer Specifications
This is the replacement hinge washer for your refrigerator. The hinge washer is mounted on the top of the door hinge pin, and supports the refrigerator door, allowing it to open and close easily. The main reason you would need to replace the hinge washer is if it is worn out, causing the refrigerator door to be more difficult to open and close. You may also hear an unpleasant noise when you open your refrigerator door. The washer is a little less than an inch in diameter and is sold individually. This is an authentic OEM part sourced directly from the manufacturer.

How Buying OEM Parts Can Save You Time and Money
Troubleshooting
This part fixes the following symptoms:
Door won’t open or close
This part works with the following products:
Refrigerator.
This part works with the following products:
General Electric, Hotpoint, Kenmore.
Part# WR01X27364 replaces these:
AP6277920, WR01X10146
Questions and Answers
Ask our experts a question about this part and we'll get back to you as soon as possible!
Search filter:
Clear Filter
Your search term must have 3 or more characters.
Keep searches simple. Use keywords, e.g. "leaking", "pump", "broken" or "fit".
Sorry, we couldn't find any existing answers that matched.Try using some different or simpler keywords, or submit your new question by using the "Ask a Question" button above!
Oswyn
April 18, 2019
How do you replace part #281 and part# 285 attach to the door hung.
For model number Gth17jbd4rww

Hello Oswyn, Thank you for the question. The door will need to be removed in order to install the items. They can not be installed while the door is still hung.Hope this helps, good luck with this repair!
1 person found this helpful.
Was this helpful?
Thank you for voting!
✖
Ask a Question
Ask our experts a question on this part and we'll respond as soon as we can.
Something went wrong. Please try again later.
Your Question Has Been Submitted!
Our experts will send you an email as soon as your question has been answered.
Customer Repair Stories
Average Repair Rating: 3.1 / 5.0, 2 reviews.
What's this?
Search filter:
Clear Filter
Your search term must have 3 or more characters.
Keep searches simple. Use keywords, e.g. "leaking", "pump", "broken" or "fit".
Sorry, we couldn't find any existing installation instruction that matched.
The condensor fan in the unit appeared to have been chewed by a mouse and would not function and the lower door was too low.
The condensor fan in the unit appeared to have been chewed by a mouse and would not function. We had a service call to verify this and ordered the parts. Delivery was extremely quick and we were able to complete the repair and place the unit back into service within 2 hours.
All that was necessary was to remove the bottom cardboard cover, replace the fan and grommets, and replace the door bushings.
Thanks!!
All that was necessary was to remove the bottom cardboard cover, replace the fan and grommets, and replace the door bushings.
Thanks!!
Other Parts Used:
-
Eugene from Marion, TX
-
Difficulty Level:Easy
-
Total Repair Time:1- 2 hours
-
Tools:Screw drivers, Socket set
20 of 31 people
found this instruction helpful.
Was this instruction helpful to you?
Thank you for voting!
Both doors wouldn't self close, the freezer door would also stick in the open position.
Another post that said you don't need to buy the whole metal mounting bracket with these cam risers is right. Also, I found 3 different parts that seemed the same ranging from $1.27 up to the mid $20's. I bought 4 of the cheap ones and 2 of the washers. Worked perfectly! Also, the reason this happens is because no one lubricates the cams, like everything else. Add some grease when you put it back together.
I used a 5/16 nut driver to take off the top hinge bracket. Lift off the door after emptying it. Place the door on something so you can work on it. Unscrew the cam attached to the bottom of the door with your nut driver. Remove the bottom hinge bracket with the nut driver and drill out the rivet holding on the cam piece. Attach the new cam plastic piece and place the washer in the space under the plastic where the hinge post will go. Put grease on both cams! Place the door back on the hinge post. Reattach the top bracket. Adjust the top bracket by sliding the door around until it is straight. Then tighten the top screws.
$10 in parts to get a new working door. The seal even grabs better!
Other Parts Used:
-
Jeff from Elk, CA
-
Difficulty Level:Easy
-
Total Repair Time:15 - 30 mins
-
Tools:Nutdriver
8 of 10 people
found this instruction helpful.
Was this instruction helpful to you?
Thank you for voting!
Customer Reviews
Filter By Rating:
Search filter:
Clear Filter
Your search term must have 3 or more characters.
Keep searches simple. Use keywords, e.g. "leaking", "pump", "broken" or "fit".
Sorry, we couldn't find any existing reviews that matched. Try using some different or simpler keywords.
Harry K - November 12, 2018

Great. Did the job.
Great. Did the job.
William C - August 2, 2018

Many, Many Parts
I know that it is just a "washer" in association with a hinge pivot, but, Partsselect, their instructions (also YouTube videos) have saved me thousands of dollars in household appliance repairs. Remember, unplug your appliances before working on them and don't work on anything with a capacitor or electrical power storage source. Safety First.
Model Cross Reference
This part works with the following models:
PartSelect Number: PS12344581
Manufacturer Part Number: WR01X27364
Brand
Model Number
Description