Roper Range Parts

Roper Appliance Parts
Shop By Appliance Type Shop By Part Type

Popular Roper Range Parts

Your Price
$5.16
  In Stock
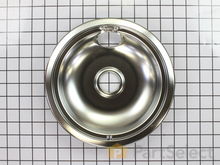
Drip Bowl - 6 Inch
★★★★★
★★★★★
83 Reviews
PartSelect Number PS11750108
Manufacturer Part Number WPW10196406
This drip bowl is used for electric cooktops and ranges, it is designed to sit under a 6-inch surface burner. It catches the drips and spills coming from the cookware on the surface burner. This drip bowl is chrome, and it has a diameter of 8 inches. You need to remove the burner element to replace this part. Line the hole up with the element terminal blocks, and ensure the new bowl is flush with the surface of the cooktop before replacing the burner element. Drip bowls need to be replaced when they are lost, damaged, or you are no longer able to clean them adequately. This replacement part is sold individually.
Fixes these symptoms
Installation Instructions
Joe from Greeley, CO
oven wouldn't heat
First I removed the two screws that hold the element in place. I then pulled the element out about 3 inches and disconnected the two wires, then removed element and replaced with new
.
Read more...
Your Price
$7.44
  In Stock
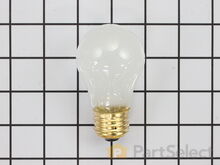
Light Bulb - 40W
★★★★★
★★★★★
63 Reviews
PartSelect Number PS884734
Manufacturer Part Number 8009
This an authentic OEM 40-Watt replacement light bulb, used in a number of household appliances. It is specially designed to withstand extreme temperatures, which is why these replacement bulbs are most often used to light the inside of refrigerators and ranges. It features a standard socket base, which means you simply unscrew the burnt-out bulb and screw in the replacement. Depending on the appliance you may require a screwdriver or nut driver to access the light bulb. We recommend you wear work gloves while handling this replacement part. It is constructed of glass and metal and is sold individually. Depending on the appliance and location of the bulb within it, you may want to consider disconnecting power and using a flashlight for easier access to unscrewing and re-screwing in your bulb during this repair.
Installation Instructions
judie from mays landing, NJ
interior drawers were off their rollers
pulled the washer out and replaces the top roller system on both sides and the replaced the weels and brackets on the bottom drwaer. however i had trouble putting the dish washer back correctly and had to call a repairman to adjust the dishwasher and alighn it to open and close properly. but i did do good inside. i feel it was easy and a success. thank you for having the supplies for us to attempt to repair it on our own. Read more...
Your Price
$2.72
  In Stock
Chrome Drip Bowl - 8 inch
★★★★★
★★★★★
41 Reviews
PartSelect Number PS11750107
Manufacturer Part Number WPW10196405
This manufacturer-certified drip bowl is also known as a drip pan, and it is designed for use with cooktops and ranges. It sits below 8-inch burner elements and catches drips and spills from the cookware on the burner. The diameter of the drip bowl is approximately 10 inches. This replacement might appear slightly different, but it will fit your appliance. You will need no tools to complete this repair. Simply remove the burner element, remove the old bowl, line up the hole on the new bowl with the terminal block and drop it into place. Make sure the bowl is flat before reinstalling the element. While you have the element out you should inspect the terminals for corrosion, damage, or discolouration. If you notice any of those things you should also replace the element and terminal block. You will need to replace your drip bowl if it is lost, damaged, or can no longer be cleaned. This replacement part is sold individually. To extend the life of your new drip bowl we recommend you clean it regularly with soap and water. We recommend only using the recommended drip bowl for your appliance; generic versions will not fit properly which could affect the performance of your elements and cause long-term damage.
Fixes these symptoms
Installation Instructions
Joe from Greeley, CO
oven wouldn't heat
First I removed the two screws that hold the element in place. I then pulled the element out about 3 inches and disconnected the two wires, then removed element and replaced with new
.
Read more...
Your Price
$12.96
  In Stock
Surface Burner Plug-In Block Kit
★★★★★
★★★★★
17 Reviews
PartSelect Number PS340571
Manufacturer Part Number 330031
The surface burner plug-in block kit features a newer-style terminal block. This kit is designed for use with ranges and cooktops. This terminal block is how the coil element on your stove connects to the inner wiring of your appliance. Without this connection your burner element would not get the electrical current it needs to heat up. When your element will not heat at all, or if it is not heating properly it is likely an issue with the terminal block. You need to remove the element to replace this part. While you have the element out, inspect the element and the terminal for any corrosion, arcing, or discoloration. If you notice any damage to the element or the terminals we recommend you replace this part as well. This kit includes two metal brackets, two pre-crimped high-temperature wire leads, two ceramic wire nuts, two heat-shrinking insulators, and a mounting screw. Before you begin this repair, make sure you have unplugged your appliance.
Fixes these symptoms
Installation Instructions
Jon from Oakley, CA
Surface elements quit working
Drilled out old and broken hold down clips, installed new ones(4). Cut old wires attached to surface plug in block, striped wires, and attached new plugin kit(4), warmed up heat shrink with a hair dryer, put in new drip bowels, the stove is like new.
I ordered the parts on line early one morning, the next day they were at my door and installed that day, everything that I ordered was there, and fit properly.

Way to go Part Select.com

Jon
Read more...
Your Price
$10.42
  In Stock
Drip Bowl - 8 Inch
★★★★★
★★★★★
17 Reviews
PartSelect Number PS2366563
Manufacturer Part Number W10196405RW
This part is located beneath the element and catches any spills.
Fixes these symptoms
Installation Instructions
Michael from Kings Park, NY
Drip bowls were rusty and rotting through
I simply removed the elements and replaced the drip bowls with new ones. Put the elements back in and my stove looks %1000 better! Read more...
Your Price
$55.06
  In Stock
Insulation
★★★★★
★★★★★
7 Reviews
PartSelect Number PS11750415
Manufacturer Part Number WPW10208653
This insulation is also known as oven wrap insulation, and is used in conjunction with your range. Its purpose is to be installed in between the oven and the cabinets that surround it. This will help prevent the heat from escaping while cooking and essentially keep it locked inside the oven. The most common reason for needing to replace the insulation in your oven is that it becomes a comfy place for vermin to nest. Before making this installation, it would be best to disconnect the electrical power to your appliance, and to make sure that your range is cool to the touch.
Installation Instructions
Wendy from Red Hook, NY
mice had made nests in the insulation wrap in the range
I numbered every part. ex: 1 L., for first part removed left side. I used a magic marker to circle the holes and wrote the number of screws used on the part, set the srews in a separete place, so that I new where these screws went to. The cleanup was pretty time consuming, but I was able to keep my stove, when every repairman I called to fix my stove told me I was better off buying a new stove. ($600.00 stove 2 years old)Please Note: The insulation blanket needed for the entire stove is two pieces, the sides and top are one part # and the bottom and back, are another part #. I did not know this. I just purchased the top and sides. I got lucky, the back and bottom were still in good shape. So I guess I should have read the description of the part more carefully to see what it covers, before I ordered it. It took two people two hours to do the work, it was really nice to have an extra set of eyes, to remember what direction pieces of metal from the stove went. I would do it all over in a heart beat instead of buying a new stove. Read more...
Your Price
$50.32
  In Stock
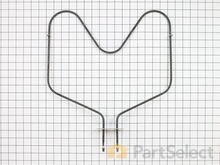
Bake Element - 2600W 240V
★★★★★
★★★★★
76 Reviews
PartSelect Number PS11740695
Manufacturer Part Number WP308180
The bake element in your oven is the part that provides heat when cooking. If your oven is too hot, or not hot enough, or does not heat evenly, you may need to replace the bake element. This part is 2600 Watts and 240 Volts. It is a closed hinged style bake element which is 15-3/4 inches long and 16-5/8 inches wide. The terminal depth is three inches and they are 1-3/4 inches apart. This part is made of metal and is black in color. Be sure to disconnect power to the oven before completing this repair.
Fixes these symptoms
  • Element will not heat
  • Little to no heat when baking
  • Oven is too hot
  • See more...
Installation Instructions
Joe from Greeley, CO
oven wouldn't heat
First I removed the two screws that hold the element in place. I then pulled the element out about 3 inches and disconnected the two wires, then removed element and replaced with new
.
Read more...
Your Price
$64.83
  In Stock
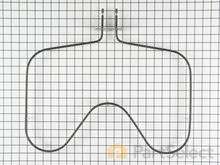
Oven Bake Element
★★★★★
★★★★★
72 Reviews
PartSelect Number PS11752501
Manufacturer Part Number WPW10308477
This bake element is located at the bottom of the oven to supply heat and it has push-on terminals. If your baking element is burnt out, the heat is not consistent, or is defective, then replacing the element could be a solution to your appliance problem. The tools needed for this replacement are: a screwdriver and needle-nose pliers. The first step in is to unplug the range or shut off the house circuit breaker before starting. Unscrew the black of the oven cavity to pull out wires from the defective element. Reconnect wires to the new element and screw it back on. Make sure the element is sitting flat.
Fixes these symptoms
  • Element will not heat
  • Little to no heat when baking
  • Oven is too hot
  • See more...
Installation Instructions
Esther from San Antonio, TX
heating element burnt up
first I pulled the stove from the wall. Then unplugged the stove from the wall (electric stove) for safety. then I removed the middle back panel screws(2) and then the panel. I then pulled the wires off the heating element that was bad. I took the screws (2) off the heating element inside the oven. I had to use WD-40 to loosen the screws because with the heat they were really stuck. I removed the heating element and replaced it with the one I got through partselect.com. Put everything back and walla finished. Partselect.com sent me the right part at the right price and fast. No hassles at all. Read more...
Your Price
$16.88
  In Stock
Drip Bowl - 6 Inch
★★★★★
★★★★★
29 Reviews
PartSelect Number PS2366565
Manufacturer Part Number W10196406RW
If your element will not heat, there could be an issue with your drip bowl. This chrome drip bowl is 8 inches in diameter, and fits most electric ranges. Before you replace the drip bowl, make sure the element is turned off and cool to the touch. Installation is easy, just remove the element, replace the current drip bowl, and replace the element. Make sure the small hole on the bowl lines up with the element socket. The manufacturer has substituted this part, it now has a hole in the center, and no longer has a solid bottom. For a step by step guide, click the video below.
Fixes these symptoms
Installation Instructions
Michael from Kings Park, NY
Drip bowls were rusty and rotting through
I simply removed the elements and replaced the drip bowls with new ones. Put the elements back in and my stove looks %1000 better! Read more...
Your Price
$65.67
  In Stock
Surface Burner Element Switch, Large Burner
★★★★★
★★★★★
36 Reviews
PartSelect Number PS11740783
Manufacturer Part Number WP3149400
This surface burner element switch is for an 8-inch surface burner on an oven, stove, or range. The element switch controls the heat of the surface burner. Disconnect power to your range before completing this repair because you will be working closely with electrical circuits. Remove the screws from back panel and the console, and remove the console to expose the switch. It is recommended to check for overheating or arcing on the wiring harness in case they need to be replaced as well. The harness that connects to the switch features a slip-on terminal for easy installation.
Fixes these symptoms
  • Element will not heat
  • Oven is too hot
  • Will not program
  • See more...
Installation Instructions
chaz from fairplay, CO
the element did not turn compleatly off, the on light stayed on.
removed the screws holding the back metal panel, this exposed the wires to the switch. tested the wires to find that they were live when the switch was in the off position. ordered a new switch. UNPLUGED THE STOVE. removed the knob on the front of the stove. this exposed 2 screws, removed screws and the switch came away from the stove. removed each wire from the old switch and replaced them in the same position on the new switch. inserted new switch into the stove and attached the 2 screws. replaced back panel and pluged in stove. all tested well Read more...

Appliance Type

Related Parts

Popular Roper Range Models

Below are the most popular Roper Range models we have. Enter your model number in the search box to find your model.