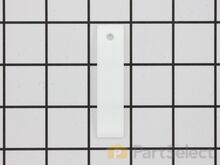
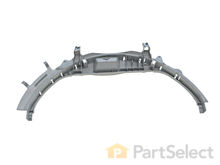
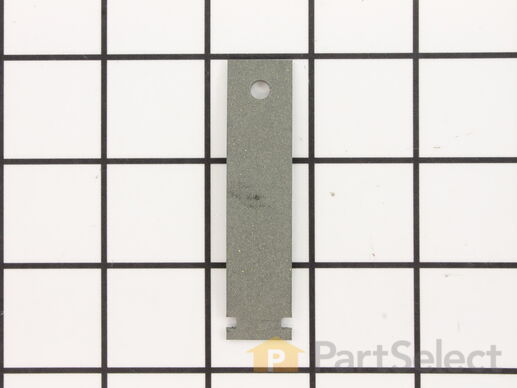
Drum Bearing Slide - Green (Sold individually) Specifications
This original equipment manufacturer Drum Bearing Slide is a plastic, green, easy-to-install part for your dryer. It replaces the dryer's front drum slide to allow for easier movement. You'll know if this part is an issue if your dryer is unable to tumble properly or is very noisy. Damage can come from regular use. As the slides start to break down it may cause your dryer to make noise or not dry clothes in the usual amount of time. You will need to purchase two for both sides of your dryer. They attach to the outer-most sides of the bearing. The manufacturer recommends replacing both slides at the same time. Take this opportunity to clean out the lint and dust in the dryer, to keep it running smoothly. This is a genuine replacement part that comes directly from the manufacturer. This item is sold individually. The part attaches to the outermost side of the bearing. Although this part is denoted as being "Green" in its title, many users and technicians have noted that its true colour is closer to a dark gray or black.
How Buying OEM Parts Can Save You Time and Money
Part Videos
Replacing your General Electric Dryer Drum Bearing Slide - Green (Sold individually)
Keep searches simple. Use keywords, e.g. "leaking", "pump", "broken" or "fit".
Sorry, we couldn't find any existing reviews that matched. Try using some different or simpler keywords.
★★★★★
★★★★★
Jacob A - August 25, 2022
Verified Purchase
Just what I needed!
Quick, efficient service!
★★★★★
★★★★★
Darlene W - October 20, 2021
Verified Purchase
Quick and Easy
That was so quick and easy. We ordered the part, it was shipped almost immediately and here within few short days! Thank you for making that so effortless.
★★★★★
★★★★★
Jerry B - December 30, 2020
Verified Purchase
Gas dryer
Part is great it fits and works great
★★★★★
★★★★★
Timothy A - July 21, 2020
Verified Purchase
Green wear strip
Everything went together well and no problems.
★★★★★
★★★★★
Robert R - May 26, 2020
Verified Purchase
This was much easier than I expected.instructions perfect. Thank you.
The part was all I needed perfect fit saved me a lot of Tim and money.
★★★★★
★★★★★
Scott B - September 20, 2019
Verified Purchase
Great Instructions!
I had never taken my dryer apart before, but it had started sounding like a thunderstorm was happening in my basement every time I ran it and about every other time I used it, one article of clothing became wedged between the frame and the drum as it turned, which resulted in a series of very permanent wrinkles as well as some equally permanent black marks on the item (like a localized, unintentional tie-dye effect). I searched the internet for information on this issue and I found a YouTube video showing exactly how to disassemble the front of the dryer and replace the drum bearing slides. PartSelect had created the video and included a link to the parts I needed, so I ordered them. They arrived quickly and I was able to take the dryer apart to replace them, but when I did, I realized that the plastic piece that supported the slides had worn completely through. I put the new slides in to keep the dryer going temporarily while I ordered a replacement bearing support, and once I put that in, the dryer was working like new again (no more thunderstorm noises and no clothing sacrifices). I was very happy with the parts I got from PartSelect and also with their detailed, easy-to-follow instructions on YouTube. I would definitely buy from them again!
★★★★★
★★★★★
Paul S - June 26, 2019
Verified Purchase
Easy Repair
Noisy dryer needed (4) new glides. Total procedure took about 15 minutes. Problem solved.
★★★★★
★★★★★
Timothy M - June 13, 2019
Verified Purchase
It WORKS!!!
3 months of squeaking gone!!!!
★★★★★
★★★★★
Dennis R - June 12, 2019
Verified Purchase
Fit just right.
Good fit. Easy to replace. Works well.
★★★★★
★★★★★
Michael H - May 31, 2019
Verified Purchase
Very Easy Repair!
I replaced a drum bearing and drum bearing slides on my 20year old GE dryer. One of the drum slides had fallen apart and was sticking out from the broken bearing snagging and ruining clothes.
Watched the repair video removed the old drum bearing and put in all four suggested drum bearing slides in a minute.
The entire process took me 18 minutes! The part(s) worked great!
< Prev
1
2
3
Next >
Customer Repair Stories
Average Repair Rating: 3.6 / 5.0, 174 reviews.
What's this?
Sort by:
< Prev
1
2
3
Next >
Search filter:
Clear Filter
Your search term must have 3 or more characters.
Keep searches simple. Use keywords, e.g. "leaking", "pump", "broken" or "fit".
Sorry, we couldn't find any existing installation instruction that matched.
Dryer not drying well and loud noise
Took off the front panel. Followed the repair videos provided. Everything went well. Dryer dries better and is very quiet.
Gas dryer only fired at the beginning of it's cycle
Be sure to segregate and label all screws. Remove back and front of control panel. Removed dryer top. Removed dryer front/door panel. Replaced slides. Due to discoloration it was hard to tell the white fr the green. Double checked partselect videos to be sure which was which. Propped up drum with the dowel to allo
... Read morew enough room to access the coils. One of the screws was frozen. Soaked in penetrating oil for 30 minutes. Then used a Philips headed socket to break it free. Used needle nose pliers to lift out old coils and to place new coils. Reversed process to reinstall all panels. Crossed fingers and tested. AOK.
Upon receiving the parts, we went to the video repair instructions. We found these videos to be very well done and very helpful. It was great being able to pause the video at specific points until we were able to complete that step of the repair. All of the replacement parts fit correctly and there were no issues.
dryer had started making a squeaking noise that got progressively worse with each use
i ordered parts before taking the dryer apart, based on the symptoms others described so that i would have everything i needed. sure enough once i pulled the panels off, the drum slides and entire bearing were destroyed. i assume that happened with age, and ignoring the problem didn't help. by the time i replaced the parts I'm surprised t
... Read morehe dryer drum was actually still turning at all!
The PartSelect company's "how to" repair videos are OUTSTANDING. Thank you! The videos provided a comprehensive overview of what to expect in terms of clothes dryer disassembly, component replacement and reassembly. The videos were invaluable tutorials for prior-to-disassembly work.
I ordered all the following parts which I fel
... Read moret were likely excessively worn--white and green bearing slides (two of each required), rear drum bearing kit, drive belt, and idler pulley wheel--to address the noisiness issue.
For your consideration: Since our dryer is 12 years old and would be disassembled anyway, I decided to order a new dryer drum belt and idler pulley, to replace these two constant-use items as preventive maintenance.
Two notes. One: When replacing the dryer drum bearing parts, you need a T25 torx bit to loosen and remove the three torx-head screws. But using my T25 torx bit-head-style screwdriver, it was impossible to loosen them. Fortunately, I had a T25 torx bit, which I could mount in a socket wrench, which DID allow me to loosen those three torx-head screws without damage/breakage. WHEW! Recommend you are similarly prepared! Two: If you purchase the "Rear Drum Bearing Kit," it already comes with the the "Drum Bearing Sleeve" and "Retainer O-Ring" components I thought I would also need--no need to purchase separately. I returned those two items, unopened, for a refund.
All together, from dryer disassembly to, component replacement, to a thorough vacuuming/cleaning, to reassembly and an operational check, it took about four hours. The dryer is now nearly noiseless again! Success!
I consider myself reasonably good with tools and have a fair amount of electrical and mechanical skill. My wife assisted with extra hands a couple times, too, seriously reducing my frustration level. Depending on your abilities, you'll take more time or less time than the four hours it took me. I'm certain I saved at least a couple hundred dollars by doing this maintenance myself.
In summary, the PartSelect person taking my order was knowledgeable and professional, I received my parts two days after ordering, the parts worked perfectly, and the company refunded my two, unopened returned parts promptly. Overall, a terrific experience. I highly recommend them to any capable do-it-yourselfer.
Diagnostics, ordered front and back bearing. Added the belt because I was there. Parts came quickly. disassembled, shot photos of wire assemblies. Unprepared for element and lint trap housing failure as the heating element was only 1/2 functional, made followup ordered which included the green and white shims. Note, front bearing replace
... Read morement does not come with wear shims, disappointing. Very inexpensive and should just be part of replacement package. Reassembled in reverse order, tricky part was the belt reinstall. New light made the repair complete.
Removed drum replaced pulley attached pulley spring to catch on motor bracket put belt on drum put drum in aligned belt and pulley released. Spring replaced door and top
Install would have been easier if part was an exact fit. Had to make do with part not fitting exact. Let's just say the dryer works but light won't line up.
I am a 55 year old woman who likes to repair household items. I followed You Tube instructions and did it all by myself. A few screws to get the top off and a two more to remove the front piece. Trap duct assembly was cracked and falling apart. Pulling off the old was fairly easy. I watched the You Tube instructions on my Ipad so I co
... Read moreuld rewind and watch as I did it. The hardest part was I dropped one of the screws when placing the front of the dryer back on and had to find another one that was the same size. Luckily I have lots of old screws in my tool box, If you like to do small simple repairs to save some money this is an easy one.
I followed some simple instructions from GE. It was really easy and I even found some spare change inside the cabinet which my wife took off my hands. :/
We're sorry, but our Q&A experts are temporarily unavailable.
Please check back later if you still haven't found the answer you need.
15 questions answered by our experts.
Sort by:
< Prev
1
2
Next >
Search filter:
Clear Filter
Your search term must have 3 or more characters.
Keep searches simple. Use keywords, e.g. "leaking", "pump", "broken" or "fit".
Sorry, we couldn't find any existing answers that matched.Try using some different or simpler keywords, or submit your new question by using the "Ask a Question" button above!
Peter
July 20, 2017
Looking to replace the green and the white glides but forget which went where, can you give me rough positioning?
Hi Peter, you can position the white bearing slides at approximately 9 and 3 o’clock (across from each other). The green bearing slides can be placed at approximately 1 and 11 o’clock. I hope this helps you visualize it better!
63 people found this helpful.
Was this helpful?
Thank you for voting!
Rachel
July 20, 2017
how many of these do I need to order to replace the green drum slides and how many come in a package
Hi Rachel, the drum slides come in one per package, so you will need to order two of each. For the green drum slides you can order part number WE1M1067, and for the white you can order part number WE1M504. Although only your green drum slides need replacing at the moment, we strongly advise replacing both the green and the white (upper and lower) together for an even wear. Please let us know if you have any further questions.
33 people found this helpful.
Was this helpful?
Thank you for voting!
Kerry
August 21, 2017
Drum bearing slides: What is the difference between the Green, and the white drum bearing slides?
For model number DX4500EE1WW
Hi Kerry,
Thank you for your inquiry. The green slides go on the inner most slots on the front bearing while the white glides go on the outer most sides of the front bearing. I hope this helps. Thank you and have a great day!
17 people found this helpful.
Was this helpful?
Thank you for voting!
Gary
April 27, 2018
Hello, my front bearing and bearing slides are completely worn out. There is only one bearing slide left on the right side and it's white. There are white and Green slides available for this model. What do i order, all white? What's the difference? Thanks, gary
For model number DBSR463GG0WW
Hi Gary, Thank you for the question. You will need to order two white and two green slides. Each side of the front drum bearing will need a white and green slide. Hope this helps!
12 people found this helpful.
Was this helpful?
Thank you for voting!
Andrea
July 20, 2017
There is a squeaking noise coming from my dryer. The top two slides look like they’ve seen better days. What do I need to order to fix my dyer?
Hello Andrea, to fix the squeaking noise you will need two upper bearing slides found here (green) WE1M1067, and two lower bearing slides found here (white) WE1M504. We recommend replacing all of them at the same time for an even wear. Best of luck with this repair!
10 people found this helpful.
Was this helpful?
Thank you for voting!
Paul
May 1, 2019
There are 4 drum bearing slides 2 white 2 Green can i replace them with either all Green or white??
For model number DVLR223EE2WW
Hello Paul, thank you for your question. No, unfortunately you would have to have 2 white and 2 green. They are a bit different and the manufacturer recommends ordering 2 of each. I hope this helps!
8 people found this helpful.
Was this helpful?
Thank you for voting!
Denis
November 14, 2019
I need to replace the drum bearing slides on me GE dryer (2 Green and 2 white). The two installation videos show the Green ones go one lower or outside slots and the white ones go on the upper or inside slots. There are a couple of q&a's that say just the opposite. Which is correct?
For model number DWSR473EV1WW
Hello Denis, thank you for your question. It is recommended to follow the instructions in the videos that we have provided for both the white and green slides. Good luck with your repair!
5 people found this helpful.
Was this helpful?
Thank you for voting!
Janina
December 7, 2019
I'm looking for a drum glide for my dryer Maytag I need a part # can you help me?
For model number Mde4658ayw
Hi Janina, see the link below. Thank you for your question and good luck with your repair!
I had a service technician come look at my dryer because it was really loud. She replaced the two upper slides with dark ones (I can't say they're exactly Green, more kind of black ish). She didn't replace the white ones, and she said the larger plastic front drum bearing was no longer available anywhere, and I should plan on buying a new dryer soon. Funny thing, I'm looking at it on your website! Do I need to replace the slides that she installed, or can I take them off and put them onto a new bearing, along with a set of new white ones? Also, can I re use the felt pieces or can they be ordered? Thank you!
For model number pwsr483ga1ww
Hello Karen, Thank you for the question. The "Green" Slide, Part #: PS6447706 is more of a black in color. You would be able to reuse then on the New Front Tub Bearing, Part #: PS960316. We also recommend replacing the White Slides, Part #: PS755842. We hope this helps!
Hi Larry,
Thank you for your question. There is a video listed with the front bearing on our website that you can reference on how to install it. The dryer in the video may not show exactly like the one you have, but it will give you a general idea on how to install the part. Here is a link to the part where you will find the video, https://www.partselect.com/PS960316-GE-WE3M26-Front-Drum-Bearing.htm?SourceCode=4&SearchTerm=DWSR483GB3CC&ModelNum=DWSR483GB3CC. I hope this helps. Thank you and have a great day!