The front lower drum seal is used in the assembly of dryers. This seal helps keep your appliance running quietly. It allows the drum to smoothly rotate on the front panel. If you notice brown marks on your clothing, if the dry cycle is taking long, or if there are unusually loud noises, the seal might be worn down. If that is the case, you will need to replace the seal. This replacement part is made out of felt. The high temperature adhesive required to install this seal is sold separately. Before you begin any repair work, make sure the appliance has been unplugged.
How Buying OEM Parts Can Save You Time and Money
Part Videos
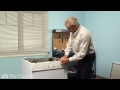
Replacing your Frigidaire Dryer Front Lower Drum Seal
Troubleshooting
This part fixes the following symptoms:
Marks left on clothes | Noisy
This part works with the following products:
Dryer, Washer Dryer Combo.
This part works with the following products:
Frigidaire, Kenmore, Gibson, Tappan.
Part# 5303283286 replaces these:
AP2143044, 456, 5303283286, 616044-000
Customer Reviews
Average Rating:
★★★★★
★★★★★
3 Reviews
5.0
Filter By Rating:
5 Stars
3
4 Stars
0
3 Stars
0
2 Stars
0
1 Star
0
Sort by:
< Prev
1
Next >
Search filter:
Clear Filter
Your search term must have 3 or more characters.
Keep searches simple. Use keywords, e.g. "leaking", "pump", "broken" or "fit".
Sorry, we couldn't find any existing reviews that matched. Try using some different or simpler keywords.
★★★★★
★★★★★
Alex J - June 26, 2019
Verified Purchase
Service par excellence
Have been using the internet since the early 90's. Finally found a retail/service company that incorporates finding out the problem, offering personalized solution based on the platform, on-time delivery with personalized video installation assistance; all without leaving the business site.
Kuddos to the owners and whom ever structured your website; anticipating the needs of your clients done smoothly
Thank you and I'll be back!
★★★★★
★★★★★
Gerald W - June 11, 2019
Verified Purchase
Easy to install
Ordered upper guide lower seal and a new belt .Your instructional video was spot on and made install a snap!!
★★★★★
★★★★★
Richard K - March 31, 2018
Verified Purchase
A perfect fit
The part fit perfectly with out any alterations. Thank you
< Prev
1
Next >
Customer Repair Stories
Average Repair Rating: 2.8 / 5.0, 66 reviews.
What's this?
Sort by:
< Prev
1
2
3
Next >
Search filter:
Clear Filter
Your search term must have 3 or more characters.
Keep searches simple. Use keywords, e.g. "leaking", "pump", "broken" or "fit".
Sorry, we couldn't find any existing installation instruction that matched.
dryer drum quit turning
followed the instructions video on the site had no problems just took about 2 hrs to complete
Removed drum replaced bearing with kit, replaced both front drum seals and drive belt. The only problem was when replacing the rear drum ball the three screw holes were poorly tapped and took several tries to get them in. The manufacturers could easily fix this problem. They could provide self tapping hex head screws instead of the Philli
... Read moreps head screws. Everything else went very smoothly.
After pulling out and unplugging my machine I followed the procedure already worked out by others. I bought and replaced all the parts that were listed as involved with this problem, since I only wanted to do this once and the parts were pretty cheap. The only slightly hard part was reconnecting the drum to the bearing, this could be easi
... Read moreer with a third hand.Everything went well and the dryer works fine.
Upper drum guide was wore out allowing the drum to sit lower than it should. Clothes would get caught between the drum and the frame.
unpluged the dryer. Used butter knife to open the top. Used screw driver to take the front off. Two screws one in each corner. removed all wiring from the front. Moved front into better light. Used sharp knife to remove old felt and guide material. Cleaned the door well. Used glue provided in the repair kit. Placed felt and guide on
... Read moredoor. Allowed to dry. reversed take off and ran dryer. Worked like a new one.
The online descriptions were very helpful. I used a wooden kitchen fork to pry open the top of the dryer from the front, about 3 inches in from each side. Two metal springs hold the lid. The wire harness was on the right and two disconnects were easy to separate. Remember to disconnect power before you start. On the inside on the left and
... Read more right sides are two screws which hold the front on. Remove these screws and the front panel will lean forward. Remember to support the drum as you pull the front off. Remove both top and bottom felt seals. I used a putty knife to aid in the removal of seals. Scrap the residue with the putty knife to remove. Run a bead of glue all around and let set for two minutes. Place top drum guide on first, and center on top. Put lower felt seal on next and tie a rope all around on top of felt, to hold in place while glue dries. Let dry for 30 minutes and remove the rope. Reassembly dryer. Test on low heat. It really is easy to do. Celebrate.
I followed the directions that came with the new Drum Glide kit. Unplugged the machine from the wall outlet. Raised the top of the machine which only required releasing the front top clips. Removed the two screws that hold the front cover on. Unplugged the harness connectors to the controls on the front cover. Pulled the front cover loo
... Read morese from the retaining clip and raised it to release the lower part of the front cover. I then removed both the Glide and the lower seal. Had to use Acetone to remove the old adhesive. Used the adhesive that came in the kit to put the new glide and lower basket seal on. I used small clamps to ensure a good fit as the adhesive cured. Then I put the front cover on raising the drum in the front to allow it to fit into the front cover. The rest was the reverse of what I did to remove the cover. I feel this is an ease repair. The hardest part is cleaning the old adhesive off.
Once in a while a piece of clothing would get stuck between the dryer tumbler and the frame around it, it would leave a burn mark on the piece of clothing that got stuck.
I noticed that the dryer drum had some free play and would allow the clothing to get lodged between the drum and the frame around it. I popped the top off the dryer and found that the lining on top of the frame work that carries the drum was woren out. I got on the web and the parts listings and order the part on a thursday and the part w
... Read moreas here the next day in the afternoon. I took the old part off and glued the new part on and left it dry over night. the next day I assembled the dryer and it was back in use. The wife was very happy that no more clothing was getting lodge and ruined.
I first watched the video. Had I not done that, I probably would have started looking for a new dryer. The repair is simple and I feel like now I could repair just about anything on the dryer.
Ask our experts a question about this part and we'll get back to you as soon as possible!
5 questions answered by our experts.
Sort by:
< Prev
1
Next >
Search filter:
Clear Filter
Your search term must have 3 or more characters.
Keep searches simple. Use keywords, e.g. "leaking", "pump", "broken" or "fit".
Sorry, we couldn't find any existing answers that matched.Try using some different or simpler keywords, or submit your new question by using the "Ask a Question" button above!
Kevin
October 9, 2019
There is a big gap at the top of the front seal. Clothes have gotten stuck and it smells like something is burning. Do I need a new front lower seal?
For model number FSE748GFS1
Hi Kevin,
Thank you for your question. If there is a gap at the top and the clothes are getting stuck and you have a burning smell, the seal may be worn and you will need to replace it. I hope this helps. Thank you and have a great day!
3 people found this helpful.
Was this helpful?
Thank you for voting!
Sergiy
January 30, 2023
Are part numbers PS460194 and 5303937183 identical or interchangeable? It is Kenmore dryer
For model number 970C8004200
Hello Sergiy, Thank you for contacting us. The part numbers PS460194 and 5303937183 are two different parts for different parts. We have researched the model you have provided and have found the part you are looking for is PartSelect Number PS460194. We hope this information helps!
1 person found this helpful.
Was this helpful?
Thank you for voting!
Sergiy
January 30, 2023
I need to replace both: Upper Drum Glide part #PS470317 and Front Lower Drum Seal part #PS460194 on Kenmore Dryer.
Upper Drum Glide comes with adhesive. Will this adhesive cover putting on both the glide top portion and the lower felt?
For model number 970C8004200
Hello Sergiy, thank you for your question. Yes, the High Temperature Adhesive 5308027429 should be enough to cover both the upper and lower felt pieces. We are pleased to have been able to help.
1 person found this helpful.
Was this helpful?
Thank you for voting!
Steve
May 7, 2018
Regarding the scorching of clothes, isn't there a thermostat in the dryer that can be adjusted to either run the dryer hotter or cooler?
For model number FDE336RES2
Hi Steve,
Thank you for your question. The temperature on your dryer cannot be adjusted. For information on each dryer setting for your dryer, you will need to consult your owner's manual. I hope this helps. Thank you and have a great day!
1 person found this helpful.
Was this helpful?
Thank you for voting!
Steve
May 5, 2018
I'm getting scorch marks on clothing when using this dryer. Also, the metal rotating drum is very hot to touch. A dryer has to be hot to dry clothes, but is it normal that the inside of the drum, wherein the clothes are placed, is so hot that one could burn their finger if the metal was touched at the end of the drying cycle? It definitely isn't normal that clothes are being scorched! What part do i need to replace to fix this issue?
For model number FDE336RES2
Hi Steve,
Thank you for your question. If your dryer is getting too hot, your dryer may be running to hot because of a clogged vent. It may also be running too hot, if you are overloading the dryer. This can also lead to scorch marks on your clothes because the dryer cannot tumble properly and the clothes stay in contact with the heated drum. I hope this helps. Thank you and have a great day!
Was this helpful?
Thank you for voting!
< Prev
1
Next >
✖
Ask a Question
Ask our experts a question on this part and we'll respond as soon as we can.