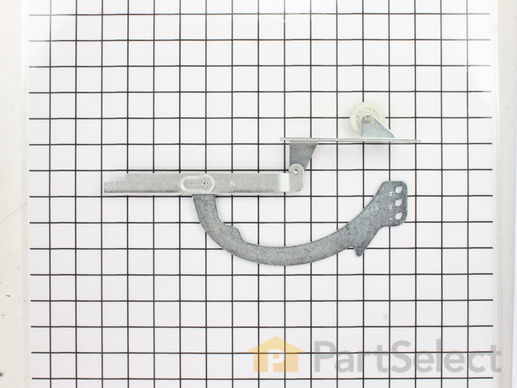
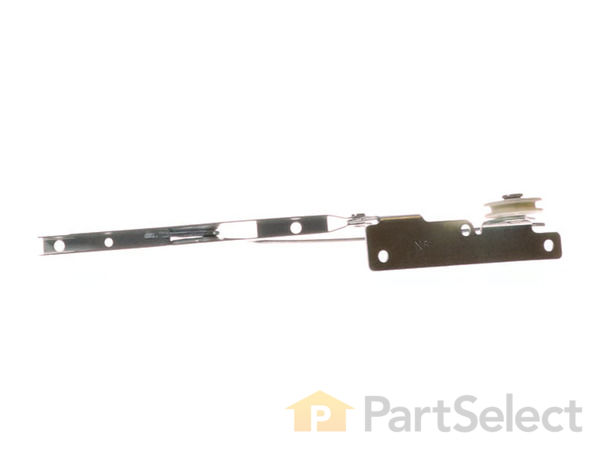
Hinge with Roller - Right Side WB14X104
$
48.72
In Stock
Get this part fast! Average delivery time for in-stock parts via standard shipping: 1.8 days.
PartSelect Number PS231612
Manufacturer Part Number WB14X104
Manufactured by
GE

Check if this fits your product and find model diagrams
Need help finding your model number?
Product Description
Hinge with Roller - Right Side Specifications
This is a hinge with roller for the oven door on your range. The roller allows you to open and close the door with ease and control. If your door is not opening easily, you may need to replace this part. To make this repair you will need a Phillips screwdriver and a pair of pliers. Take note that this model is only for the right-hand side of your unit, to replace the left-hand side, see the related parts section. We recommend replacing both hinges at the same time.

How Buying OEM Parts Can Save You Time and Money
Part Videos
Replacing your Kenmore Range Hinge with Roller - Right Side

Troubleshooting
This part fixes the following symptoms:
Door won’t close | Door won’t open after self cleaning cycle
This part works with the following products:
Range, Microwave Oven Combo.
This part works with the following products:
Kenmore, General Electric, Hotpoint, RCA.
Part# WB14X104 replaces these:
AP2020721, 245069, 332345, 334632, 4336783, WB14X0104, WB14X0114, WB14X114
Customer Reviews
Filter By Rating:
- < Prev
- 1
- 2
- Next >
Sort by:
Search filter:
Clear Filter
Your search term must have 3 or more characters.
Keep searches simple. Use keywords, e.g. "leaking", "pump", "broken" or "fit".
Sorry, we couldn't find any existing reviews that matched. Try using some different or simpler keywords.
Craig M - January 18, 2023
Verified Purchase
easy install
Works great and easy to replace
Carol S - July 17, 2022
Verified Purchase
perfect fit, but...
wish the description mentioned we should have bought the screws as well...
Kyle A - May 11, 2022
Verified Purchase
Works exactly as expected.
Arrived quickly and fit perfectly.
Stephen H - March 16, 2019
Verified Purchase
bad
we had ordered the parts and it was shipped by fed ex smartpost which then tranfered the package to the post office using thier systm, at which point could not be found since there is no tracking # after it arrived from fed ex, the reason why it disappeared i found out after spending much more of my time than was done to deliver it was , when i ordered it the box# was removed because your system said it wasnot a real address so it removed the postal info required for smartpost to work. what a cost killing, customer killing event. either you do not know how your own shipping works or ou should ship u.s.p.s. and avoid all of the returns and mad customers. the package is on its way back lets hope you donot use same method on returns, smartpost, we are waiting for our refund
Wayne T - January 21, 2019
Verified Purchase
The install was easy but the bagged parts were wrongly packaged.
I ordered the one for the right and then the part for the left. Both parts came with separate bags labeled appropriately but the parts in each bag were identically the same.
January 22, 2019
Hello,
Thank you for leaving a review on the part ordered. I have sent you an email in regards to the order. Hope to hear from you!
William M - August 21, 2018
Verified Purchase
It was easy to repair. No problems
It was the right part and not difficult to install. Removed the drawer and located the spring. The only slightly difficult part was unhooking the spring. The job took about 15 minutes and all is working well.
Joe E G - August 10, 2018
Verified Purchase
Oven Hinges
I thought the items were rather pricey for such simple parts. Otherwise they were simple to install thanks to the reviewers who explained how on your web page. Perhaps you ould add a one page instruction sheet for other users.
Robert P - June 23, 2018
Verified Purchase
Easy
No problem installing.
Roger B - June 3, 2018
Verified Purchase
Repair Complete
I received the part that I needed very quickly. I used all of it except the part that has the three holes in it. I had to drill a rivet to remove the unneeded part. I then was able to rivet the replacement part, and everything worked perfectly. Thank you for helping me to fix my oven easily and quickly. Roger
Lawrence J - May 16, 2018
Verified Purchase
All fixed: easily, conveniently
Our oven had a broken hinge for longer than I care to admit. Once I realized that I could replace the hinge by ordering the part, everything went smoothly, quickly, and easily.
- < Prev
- 1
- 2
- Next >
Customer Repair Stories
Average Repair Rating: 4.4 / 5.0, 32 reviews.
What's this?
- < Prev
- 1
- 2
- 3
- Next >
Sort by:
Search filter:
Clear Filter
Your search term must have 3 or more characters.
Keep searches simple. Use keywords, e.g. "leaking", "pump", "broken" or "fit".
Sorry, we couldn't find any existing installation instruction that matched.
Oven door would not stay open.
Called in and talked to someone and he look yup what he thought was correct but after i got them theywere wrong so i sent them back for a full refund minus 9.90 freight. I still need to figure out what i need for my 27 inch wall oven. Please help. Thanks
Other Parts Used:
-
GARY from BETHANY, MO
-
Difficulty Level:Very Difficult
-
Total Repair Time:Less than 15 mins
2 of 2 people
found this instruction helpful.
Was this instruction helpful to you?
Thank you for voting!
Hinge design is weak: Hinge roller wheel splits; it's been replaced twice in last two years
1. Slide oven door off hinge arms and set aside
2. Slide out oven bottom drawer and set aside
3. Detach springs from perforations in stove rails then hinges and set aside
4. Loosen three screws in each hinge, remove and set aside.
5. Remove hinges, threading them out through openings
6. Thread new hinges into stove openings. Align hinge arms with hinge wheels.
7. Align and tighten three hinge screws in each hinge.
8. Re-attach springs to perforations in hinge, then stove rails
9. Slide oven drawer into stove and door into hinge arms
Other Parts Used:
-
Charles from PORTLAND, OR
-
Difficulty Level:Easy
-
Total Repair Time:15 - 30 mins
-
Tools:Screw drivers
2 of 2 people
found this instruction helpful.
Was this instruction helpful to you?
Thank you for voting!
The right side hinge roller broke making the door balky
Lifted the door off the hinges, unhooked the spring from each hinge, unscrewed 3 Phillips head screws from the face plate of each hinge and removed the hinge assemblies . Hinges went in the way they came out; easy shmeasy. Took less than 15 minutes and the door is like new.
Other Parts Used:
-
Phil from BELLEVUE, WA
-
Difficulty Level:Very Easy
-
Total Repair Time:Less than 15 mins
-
Tools:Pliers, Screw drivers
2 of 2 people
found this instruction helpful.
Was this instruction helpful to you?
Thank you for voting!
Broken door hinge
The part arrived on timed and fit perfect. The repaired took 1/2 hour and everything works perfect. My wife thinks I am the best
-
Dave from Glenview, IL
-
Difficulty Level:Really Easy
-
Total Repair Time:15 - 30 mins
-
Tools:Screw drivers
1 of 2 people
found this instruction helpful.
Was this instruction helpful to you?
Thank you for voting!
Handle broke off & stove door would not close
The handle on the door was the hardes part of the fix. Took 20 minutes,Pull the door up & off,remove 3 screws from the top & 3 from the bottom. take the back panel off & remove 2 nutdrive screws fom the handle & replace with new handle. SIMPLE. With door off & broiler door open unscrew hinge & reach in broiler right side and remove spring by lefting straigh up on spring. Very easy too do. Replace with new hinge 3 screws. Put spring back on & fill with hand for holes. There are 3 holes in spring plate. It'S easy,10 minutes & your done
Other Parts Used:
-
Edgar from Clovis, CA
-
Difficulty Level:Really Easy
-
Total Repair Time:15 - 30 mins
-
Tools:Nutdriver, Screw drivers
2 of 2 people
found this instruction helpful.
Was this instruction helpful to you?
Thank you for voting!
oven door hinge roller was broken
It was extremely simple! I removed the oven door and the storage drawer, unhooked the spring, and unscrewed the hinges. Removed the broken hinges and screwed in the new hinges, hooked the springs back on, slid the oven door back on and replaced the storage drawer! Presto! The repair is complete
Other Parts Used:
-
Yvette from Galt, CA
-
Difficulty Level:Really Easy
-
Total Repair Time:15 - 30 mins
-
Tools:Screw drivers
1 of 2 people
found this instruction helpful.
Was this instruction helpful to you?
Thank you for voting!
Plastic roller on right hinge was broken
Pulled oven door up and off. Removed old hinge and installed new hinge. Replaced oven door. It was a very simple job. The whole project took less than 15 minutes.
-
Arthur from Northridge, CA
-
Difficulty Level:Really Easy
-
Total Repair Time:Less than 15 mins
-
Tools:Screw drivers
0 of 1 people
found this instruction helpful.
Was this instruction helpful to you?
Thank you for voting!
Plastic roller on hinge had broken causing door not to open easily
Slid door off hinges. Removed 3 screws which hold hinge in place. Removed drawer to access spring for hinge. Gasped at all the crumbs and crap which had collected underneath the drawer. Cleaned up crumbs+crap from floor. Disconnected spring from hinge and removed old hinge completely. Installed new hinge with 3 screws. Attached spring to hinge - center hole fitting. Slid drawer back in place. Angled hinges outward in order to re-install door. Slid door back onto hinges. Door now operates nice and smoothly. Job well done.
-
Roderick from Pleasanton, CA
-
Difficulty Level:Easy
-
Total Repair Time:Less than 15 mins
-
Tools:Screw drivers
0 of 1 people
found this instruction helpful.
Was this instruction helpful to you?
Thank you for voting!
Replace oven door right hinge
I really can't add much more to the very good instructions already posted. You will need a flashlight to see the spring -- when connected it stands vertical with one end connected to the hinge. There are 3 holes you can connect to -- I used the middle one, #2. The other end of the spring is anchored to a hole/slot in the stove frame. It is very easy to position this spring. Be careful though, there's a lot of sharp sheet metal in there. You will need a phillips head screwdriver to remove/install 3 sheet metal screws that fasten the hinge to the stove.
-
Arthur from Silver Spring, MD
-
Difficulty Level:Really Easy
-
Total Repair Time:15 - 30 mins
-
Tools:Screw drivers
0 of 1 people
found this instruction helpful.
Was this instruction helpful to you?
Thank you for voting!
Broken roller on hinge
Removed the oven door. Released spring on hinge. Removed 3 screws. Removed broken hinge and replaced new hinge reversing these steps.
-
Angelina from San Diego, CA
-
Difficulty Level:Easy
-
Total Repair Time:Less than 15 mins
-
Tools:Screw drivers
0 of 1 people
found this instruction helpful.
Was this instruction helpful to you?
Thank you for voting!
- < Prev
- 1
- 2
- 3
- Next >
Questions and Answers
Ask our experts a question about this part and we'll get back to you as soon as possible!
- < Prev
- 1
- Next >
Sort by:
Search filter:
Clear Filter
Your search term must have 3 or more characters.
Keep searches simple. Use keywords, e.g. "leaking", "pump", "broken" or "fit".
Sorry, we couldn't find any existing answers that matched.Try using some different or simpler keywords, or submit your new question by using the "Ask a Question" button above!
Frank
December 7, 2019
I need to replace a door hinge on our range. The parts listed are identified as "right" or "left". Is this determined by standing in front of the range, looking into the oven, then matching with my corresponding left and right sides ?
For model number jsp38gov1bb
Hi Frank, when parts are labelled as right or left side on a model this is usually based on your perspective when standing in front of the model. So standing in front of the range and looking directly at it, your left side is what they would call a left side part and your right side is a right side part. Thank you for your question and good luck with your repair!
1 person found this helpful.
Was this helpful?
Thank you for voting!
- < Prev
- 1
- Next >
✖
Ask a Question
Ask our experts a question on this part and we'll respond as soon as we can.
Something went wrong. Please try again later.
Your Question Has Been Submitted!
Our experts will send you an email as soon as your question has been answered.
You May Also Need?
Model Cross Reference
This part works with the following models:
PartSelect Number: PS231612
Manufacturer Part Number: WB14X104
Brand
Model Number
Description
Kenmore
3627129183
Range
- Kenmore Range/Stove/Oven Model 362.7129183 (3627129183, 362 7129183) Parts