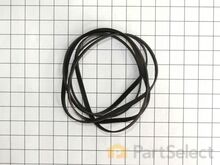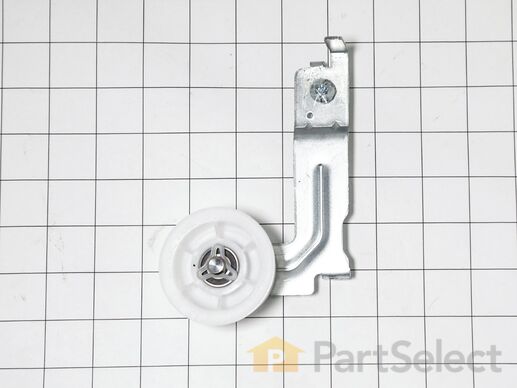
Idler Pulley Assembly DC93-00634A
Rated by 7 customers
Easy
1- 2 hours
Ratings submitted by customers like you who bought this part.
Get this part fast! Average delivery time for in-stock parts via standard shipping: 1.8 days.
Idler Pulley Assembly Specifications

How Buying OEM Parts Can Save You Time and Money
Replacing your Samsung Dryer Idler Pulley Assembly

-
5 Stars 22
-
4 Stars 0
-
3 Stars 0
-
2 Stars 0
-
1 Star 2
- < Prev
- 1
- 2
- 3
- Next >
- < Prev
- 1
- 2
- 3
- Next >
- < Prev
- 1
- Next >
Cost of part to fix - about $50.
... Read more />Repairman - didn't even ask. Would probably be $300-400.
Cost of replacement $1,000.
I rated the repair "A bit difficult" only because this is the first time I have ever repaired an appliance. If I were to repair this one again, I'd rate it as Easy.
I'm really thankful for the PartSelect video. This makes DIY repairs possible.
Thanks.
-
John from EARLYSVILLE, VA
-
Difficulty Level:A Bit Difficult
-
Total Repair Time:More than 2 hours
-
Tools:Screw drivers
These are not instructions as much as warning that although it is a one-person job, the idler pulley assembly is not as easily manipulated with the barrel there. Doing the fix was straightforward: one screw holds it in place. The men in the videos seemed to have no problem with easily replacing the belt, but I needed help with the tight spring. Perhaps now that I've done it once, I could figure out how to reach around the barrel and yank the roller enough to replace the belt, but with the extra hand it took seconds and was super easy.
-
Pamela from TILLSON, NY
-
Difficulty Level:Easy
-
Total Repair Time:More than 2 hours
-
Tools:Screw drivers
-
Jonathan from PEMBROKE PNES, FL
-
Difficulty Level:Easy
-
Total Repair Time:15 - 30 mins
-
Tools:Nutdriver, Screw drivers, Socket set
However, I did discover large amounts of lint caked to the bottom of the lint screen housing just beyond the filter screen. There was minimal lint on the lint ... Read more exhaust fan blades and no lint in the exhaust ducts.
I didn't recall seeing any video instructions drawing attention to potential lint issues, it just made good sense to clean the entire system while it was apart . At first I saw no major lint problem.
However, after removing the lint screen and placing a vacuum cleaner wand to the bottom of the lint screen housing (the bottom is not easy to see) my vacuum cleaner hose became clogged three times. I realized there was a major lint issue isolated to this area.
Many of the on line complaints focused on parts not properly fitting their dryer. they had to modify the parts in some way to fit or operate or they had to return them for other parts. Just think of the time wasted and the lack of use of their dryer.
I called and talked to a tech. Gave them my model number and the tech located the correct OEM parts for my dryer. I paid the extra money for OEM parts because I wanted my dryer fixed and restored to service in the least amount of time.
Outside the discovery of the not so obvious lint issue, the repair project was easy and the dryer was restored to full service with minimal down time.
Thanks for all your help and fast delivery service.
-
John from OCEANSIDE, CA
-
Difficulty Level:Really Easy
-
Total Repair Time:30 - 60 mins
-
Tools:Screw drivers
-
Corrado from YONKERS, NY
-
Difficulty Level:Difficult
-
Total Repair Time:1- 2 hours
-
Tools:Pliers, Screw drivers
Pulled top of dryer off; noticed the belt was loose but not broken.
Went in through the back (1 screw and removed the exhaust pipe/plate); noticed the wheel was broken and thus the belt had fallen off.
Ordered replacement wheel/arm.
One screw to remove ol ... Read more d one, one screw to install new one...tentioned the belt. Dryer was good as new.
-
Noah from OXFORD, KS
-
Difficulty Level:Really Easy
-
Total Repair Time:Less than 15 mins
-
Tools:Screw drivers
-
Vicky from BLOOMSBURY, NJ
-
Difficulty Level:Really Easy
-
Total Repair Time:30 - 60 mins
-
Tools:Screw drivers
- < Prev
- 1
- Next >
Ask our experts a question about this part and we'll get back to you as soon as possible!
- < Prev
- 1
- 2
- Next >

7 people found this helpful.

4 people found this helpful.

3 people found this helpful.

2 people found this helpful.

2 people found this helpful.

1 person found this helpful.

1 person found this helpful.


- < Prev
- 1
- 2
- Next >


Manufacturer Part Number: DC93-00634A

Item is in stock and will ship today if your order is placed before 4:00 PM Eastern Standard Time.
If your order is placed after 4:00 PM EST, the in stock items will ship on the next business day.
Item is not in stock and usually ships 3-5 business days from the time you place your order.
Item is not in stock and usually ships 10-15 business days from the time you place your order.
This item is no longer being made by the manufacturer, and cannot be added to your shopping cart.


