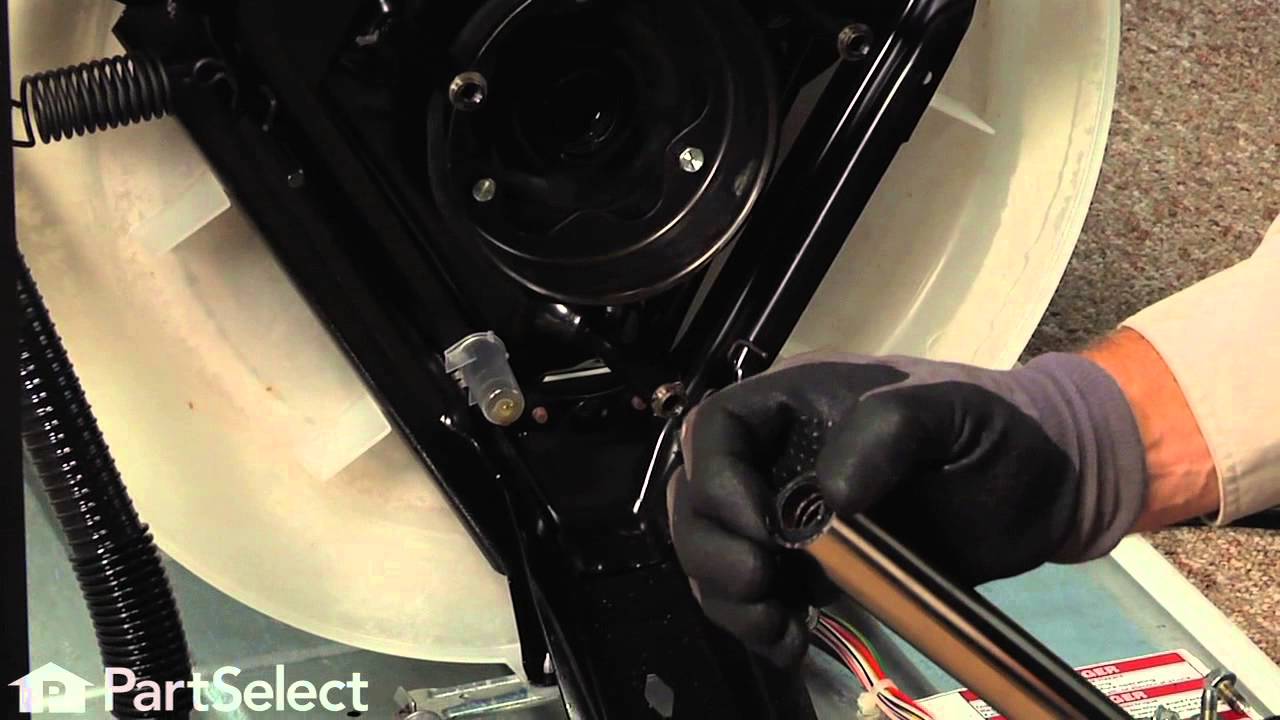
This part may also be referred to as a main outer tub seal. This part prevents leaking from the bottom of the tub. The gasket is approximately 2 inches in diameter to the outer edge, black in color, and made of plastic material. To perform this repair, you will need to disconnect the power, drain hose, and the inlet hose. You will need to remove the entire outside cabinet to have access to the tub assembly. The tub will need to be removed entirely. This is a genuine part that is sourced directly from the manufacturer.
Washer was leaking -- in part from hoses that had loosened over time due to unbalanced loads and age, and partly from a worn pump -- and not agitating/spinning properly. Fixed hoses, replaced pump and clutch. Unfortunately, when I pulled apart direct drive to replace clutch, the drive shaft started leaking because old seals worn and comp
... Read moreromised on disassembly. Have to give credit where due -- YouTube invaluable here -- pulled and disassembled drive shaft, removed old seals, replaced and reassembled. Time consuming, but if you keep track of where things go, not too bad. 3 things I wish I knew in advance: (1) for an old washer you definitely need a spanner nut wrench (like 15-25 bucks online) to remove the spanner nut so you can pull the basket and get to the seals -- no wrench/pliers/vise substitute will do the trick; (2) the shaft seals have metal washers inside the rubber/plastic -- when you're removing the old seals, you might need to chisel (hammer and small flat head screwdriver) the old seals out instead of just pulling out the corroded rubber which will leave the old metal behind; (3) if your time is valuable, try to diagnose all the likely sources of your problem and buy the parts to repair at once rather than doing piecemeal like me. Took me 2 weeks and two complete tear downs to finish a repair that should have taken me an afternoon. I love my local Appliance Parts guy -- he's knowledgeable and usu. has what I need or can get it fast and I like supporting local brick and mortar -- but if time is important to you, taking advantage of online companies that allow you to return what you don't use may save you time.
Washer was leaking.. determined it was center gasket
Completely dismantled washer per video , replaced gasket and spanner nut, then re-assembled washer. I’m a 58 year old female. It was tough. Main issue was that video was for dif. Model washer. Had to figure out some things myself.
Nutdriver, Pliers, Screw drivers, Socket set, Wrench (Adjustable), Wrench set
5 of 5 peoplefound this instruction helpful.
Was this instruction helpful to you?
Thank you for voting!
The middle tub would not come out
Sprayed wd40 - limescale - boiling water , NOTHING WORKED after half an hour reapeted spraying and pulling the tub and shaking it back and forth - still nothing Finally I replaced the center nut loosely than putting a piece of wood on top of it and with me holding the tub slightly high - my wife than whacked it hard several times ,
... Read moreI also was turning the tub every whack When it came out it was full of rust and grime - it would have never come out without what we did Replacing the the rubber washer was easy - machine works and no more leaking- thank you for your video which really helped to start the job
Read less
Jayanti from SNELLVILLE, GA
Difficulty Level:
Very Difficult
Total Repair Time:
More than 2 hours
Tools:
Nutdriver, Pliers, Screw drivers, Socket set, Wrench (Adjustable), Wrench set
5 of 7 peoplefound this instruction helpful.
Was this instruction helpful to you?
Thank you for voting!
Washer made a loud banging noise at end of spin cycle, leaked water and agitator seemed loose
After entering the model number of your appliance you will be taken to a page where all of the parts are displayed by sections. On that page about in the middle there is a heading called "Find Part By Symptom." I figured out from there which symptom the washer had and read what other people were saying and how they made the repairs. Ba
... Read moresically I had three problem areas, Noise, Leaking and a problem with the agitator. I focused on the loud noise first and decided I needed to replace the clutch/brake assemblies. I found the clutch parts page and on that page there was a video on how to make this repair. This video is all you need to gain access to all moving parts located under the cabinet. Which ever part you are replacing, I recommend watching this video! After removing the console, back panel and cabinet then laying the machine on its back just as seen on the video, I had access to the water pump, motor, transmission and related clutch/brake parts. As it turned out I did not need the clutch/brake assembly but as a precaution and because the parts were cheap, I replaced the motor coupling, water pump and tub wear pads. I decided to replace the agitator assembly because of several worn parts associated with the dog ears/drive shaft ETC. I put the machine back upright and took off the top cap on the agitator, then there is an inner cap with seal that gives access to the 7/16" bolt you must remove to remove the agitator. However once the agitator was removed I noticed metal shavings and play in the shaft. I used a spanner wrench to remove the spanner nut. I removed the Plastic Tub Ring (has several clips around the outer tub), then removed the inner washer tub to replace the Drive Block. Replacing the Drive Block stopped the loud noise at the end of the spin cycle. Now just reverse the order to put the machine back together and your done. For my situation it was best to take the machine apart and decide which parts I needed before ordering to minimize errors. These machines are made very cheaply and are designed to brake at some point in time and it is very easy to determine which parts are worn because most are made of plastic. In this process I also noticed where my leaks (did I say Leaks) were coming from. There were two hose clamps installed improperly from the factory, so check all clamps, hoses ETC. and you should be good to go.
The motor turned with loud noise ,but nothing else worked
I used "Emley's Cheap and Easy Repair" book to remove,install and reassemble the machine. A lot of time was used to clean the filthy tub and basket. While replacing the broken motor coupling I decided to replace some of the seals. PartSelect got the ordered parts to me in a couple of days. I wouldn't hesitate to d
... Read moreo the job again.
Nutdriver, Pliers, Screw drivers, Socket set, Wrench set
81 of 174 peoplefound this instruction helpful.
Was this instruction helpful to you?
Thank you for voting!
leaking from tub
First I turned off the water and unplugged the washer from the outlet. I took the two screws off the console and turned it up to undo the clips that hold the cabinet to the back. I took out the 2 phillips screws at the top corners of the back. I was then able to pull cabinet off and not have to remove the console, but carefully slid it t
... Read moreo the side, as ther wires were still attached. Pried off agitator cap & reached into agitator to pry out another cap to access 7/16 bolt. Checked over the agitator parts for wear (dogs) Took agitator, top outer (white) and inner (brown) tub rings off. Sprayed lots of liqid wrench around spanner nut and drive block and gave it time to work. Used spanner tool to get spanner nut off. Hard work. Pounded and pounded and pounded and pounded with hammer. It gave a tiny bit. Then I got an idea: I pounded it back the other way, as you would to tighten. This helped. I then pounded back the other way and did this again. It worked amazingly well. Got to drive block and it was rusted out along the bottom and also hard to get off. The diagram showed a "lock" (horseshoe shaped thing) on top of it, but mine was all in one piece but I couldn't tell that. I sprayed and pryed and pounded from the bottom and it split in half. It needed to be replaced anyway. The inner tub was also hard to get out and I used some dish liquid. I pushed down, (using the rags here, the edges can cut you). I twisted, I pulled. I pushed, I pulled, I cussed, and begged. I then went to bed and then next day I pushed backwards and forwards and side to side & finally it came off. Then I undid the brackets on the bottom of the outer tub along the bottom and disconnected the clear hose in back. When loosening the black hose clamp in front to the pump, water started to come out of the hose so I grabbed a cool whip container to catch it. It smelled yucky. Once I had the outer tub off I put the new seal in, using some plumber's grease to help get ithe tub over the shaft..Then I hooked up the hoses & brackets on the bottom of the outer tub. I cleaned out the outer tub, as there was crud in the bottom. Then I poured about 5 gallons of water in it to see if the seal was set in right. Make sure the drain hose hasn't fallen out! (You can leave this water in the tub, you'll find out why) I cleaned up the rust on tube of the inner tub with steel wool and inspected everything else. Something didn't look quite right about the outer shaft that goes around the spin tube. It looked like something should go there. I discovered there SHOULD have been a seal there but one was never put in. So I put one in. I used a little grease to help put the new drive block on, and tightened the spanner nut with the spanner wrench. I put everything else back on EXCEPT for the cabinet-with the console attached. Ha Ha All the other directions I read wrote to take the console off first. If I had done that I wouldn't have been able to do the most important part of the job: testing the result. I finished filling the tub to the lowest water level to watch it go thru it's cycles and checked for leaks. If the console was "flopped over" the back how can you check? (I don't play with wiring) I turned off the water & unplugged the washer and slid the cabinet on.. I tipped the console back to access the large gold squiggly brackets that hold the cabinet to the back and reattached them to the back, by removing them, hooking them onto the back, and snapping them into place. I double-DOUBLE checked to see if anything had come loose, then slid the console first on top of the back and put the two screws back in. The screws on my machine are not covered up by the end caps, but they are at a wierd angle, so I held the console up slighly and started the screws first. As they tightened down the console slid into the holes on the cabinet. There is a small sppliance shop in my town & the guy loaned me the spanner wrench. It was very nice of him.I guess I will have to give his & his famil
Read less
Debra from Milton - Freewater, OR
Difficulty Level:
A Bit Difficult
Total Repair Time:
More than 2 hours
Tools:
Pliers, Screw drivers, Socket set
37 of 45 peoplefound this instruction helpful.
Was this instruction helpful to you?
Thank you for voting!
oyter tub leaking found a nail in bottom of inter tub ,rubbed a hole in inter tub
removed the controll panel,removed back. ,and then top ,and sides. pryed top off adjtater take out bolt in center ,remove top ring of outer tud,remove adjatater and large nut and coller,take off drain hose lift out outer tub and seal,. put new seal in new tub install in reverse order . hardest part was geting sides lined up
Ask our experts a question about this part and we'll get back to you as soon as possible!
9 questions answered by our experts.
Sort by:
< Prev
1
Next >
Search filter:
Clear Filter
Your search term must have 3 or more characters.
Keep searches simple. Use keywords, e.g. "leaking", "pump", "broken" or "fit".
Sorry, we couldn't find any existing answers that matched.Try using some different or simpler keywords, or submit your new question by using the "Ask a Question" button above!
Don
October 6, 2017
Remove the spanner nut. Having problems getting the inner tub out. You need to replace the tub seal.
For model number KAWE860WWH0
Hi Don,
Thank you for your inquiry. There is a video on our website that you can reference on how to install the. You will find the video under part number PS4704237. I hope this helps. Thank you and have a great day!
9 people found this helpful.
Was this helpful?
Thank you for voting!
Robert W.
March 19, 2018
I think i already know the answer to this question, but hope not. I am taking my washer apart to repair it and realized that all the gunk and junk built up over the years in the outer tub gets in contact with the clean water added to each new load in the inner tub. Please tell me if im wrong....sure seems like over the years they could have solved this.........
thanks
For model number KAWE679BBL1
Hi Robert,
Thank you for your question. The gunk you are seeing is the buildup of liquid soap and fabric softner that you will need to clean. Hot soapy water, vinegar or a mildew cleaner should help with this. I hope this helps. Thank you and have a great day!
5 people found this helpful.
Was this helpful?
Thank you for voting!
Angel
November 6, 2019
I have oil residues coming into the clothes after washing. I did a cleaning job inside the drum myself and condition got better but is coming back again.
For model number LA5200XTW0
Hello Angel, Thank you for the question. I suggest checking the Washer Transmission Stem Seal PartSelect Number PS11746747, Spin Pinion Seal PartSelect Number PS11741857 and the Gearcase Cover Seal PartSelect Number PS11741173 for wear or damage that will allow oil into the tub. hope this helps!
My washer is leaking. I bought and replaced the center post gasket but it still leaks. Where else could it be leaking from? It's not the drain hose.
For model number YLTE6234DQ2
Hello Greg, thank you for your inquiry. Leaks at the front of the washer are often caused by a clogged overflow tube or an improperly-fitted old seal (in a front-loading washer). Leaks at the back of the washer are often caused by loose or damaged supply hoses. Leaks under the washer are often caused by a hole in the water pump or leaky internal hoses. We hope this information helps!
3 people found this helpful.
Was this helpful?
Thank you for voting!
Forrest
October 27, 2017
Leaks from the center (drips off the new transmission) underneath, but only when water level is on high - a month using "low" and "medium" and no leaks. Can't see how the washer door boot part would do it, unless it's the water level rising above the drive block area?
For model number 11082980120
Hi Forrest, Thank you for the question. If the appliance is leaking from the transmission you may need to replace the Gearcase Cover Seal, Part Number: PS11741173.The only way to know for sure if there is a seal that needs to be replaced would be taking the appliance apart. Hope this helps!
I’m having trouble getting the outer tub off of the drive shaft. I rocked it back and forth and pulled up but it won’t come off.
For model number GSQ9669LG1
Hello Eric, Thank you for the question. Once everything is removed from the tub including the driver block, the tub should just lift off. Here is a link to a video that may help. Good luck with this repair!
https://www.youtube.com/watch?v=H4Xxn5RfRAg
1 person found this helpful.
Was this helpful?
Thank you for voting!
Karen
July 29, 2019
I was trying to push a large comforter into the washer. Not realizing it the fabric was hooked over the agitator. So i was pushing it really hard, finally saw the problem and got the comforter in. Turned it on and the floor flooded. Turned it off and it stopped leaking. I'd like to order the parts so they are hear when my friend comes to repair it. Do you think it is the tub seal? What parts should i order?
For model number 11020904990
Hi Karen, thank you for your question. It may be the tub seal. I would suggest that you check your model to determine which parts are broken so that we can get you a list of the parts to replace. You may want to look at the agitator itself and any parts below it. Including the outer tub. I hope that helps. Good luck with your repair.
1 person found this helpful.
Was this helpful?
Thank you for voting!
Robert
June 12, 2023
Water leaks from above clutch -- small/slow with full tub, faster/more when agitating/spinning. Is this the seal I need?
For model number Kenmore Washer 11027322600
Hi Robert, thank you for getting in touch. According to our research, this problem is caused by a faulty center-post gasket. We recommend you replace the center-post gasket, part number PS11723081, to fix the issue. We hope this is what you were looking for!
1 person found this helpful.
Was this helpful?
Thank you for voting!
Richard
June 13, 2023
Does this part work on Estate Model TAWS700D if not what is the recommended part number
For model number TAWS700DQ0
Hi Richard, thank you for the question. Yes, this centerpost gasket will fit your model. We hope this information helps!
Was this helpful?
Thank you for voting!
< Prev
1
Next >
✖
Ask a Question
Ask our experts a question on this part and we'll respond as soon as we can.