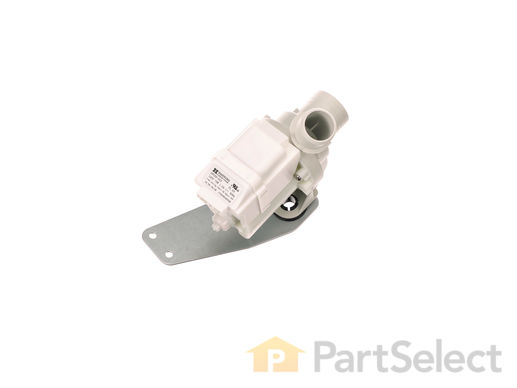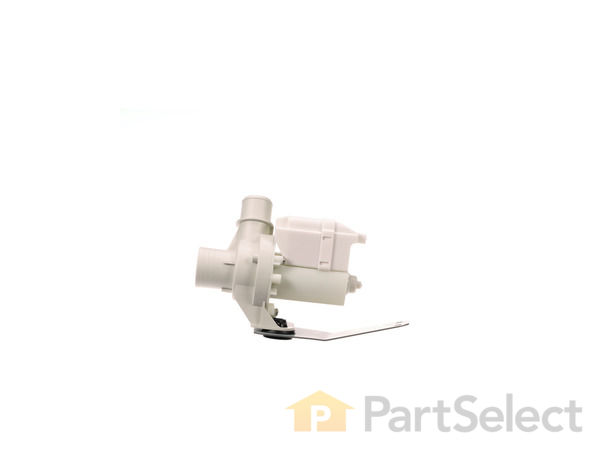
Drain Pump WH23X10043
Rated by 7 customers
Really Easy
30 - 60 mins
Ratings submitted by customers like you who bought this part.
Get this part fast! Average delivery time for in-stock parts via standard shipping: 1.8 days.
Drain Pump Specifications

How Buying OEM Parts Can Save You Time and Money
Replacing your General Electric Washer Drain Pump

-
5 Stars 18
-
4 Stars 2
-
3 Stars 0
-
2 Stars 0
-
1 Star 0
- < Prev
- 1
- 2
- Next >
- < Prev
- 1
- 2
- Next >
- < Prev
- 1
- Next >
-
Daniel from LANEXA, VA
-
Difficulty Level:Really Easy
-
Total Repair Time:30 - 60 mins
-
Tools:Nutdriver, Pliers, Socket set
-
Richard from LEXINGTON, OH
-
Difficulty Level:Easy
-
Total Repair Time:15 - 30 mins
-
Tools:Nutdriver, Pliers, Screw drivers, Socket set
-
Ronald from STANFIELD, NC
-
Difficulty Level:Easy
-
Total Repair Time:30 - 60 mins
-
Tools:Nutdriver, Pliers, Socket set
-
Toivyan from UNION SPRINGS, AL
-
Difficulty Level:Very Easy
-
Total Repair Time:15 - 30 mins
-
Tools:Nutdriver, Pliers
Unplug the washer. Pull off the front panel there are two clips 1" below the top, where the panel and the top meet. Slide a 1" putty knife about 5" from the right edge and push to disengage the retainer. Ditto left side. The pump is exposed on the bottom right. Super easy to remove but make sure you have 4" glass cooking pan or another way to get the water that remains in the line that goes to the washer tub. The hardest part is those stupid retaining clips. The back one is too far to get two hands back there, so holding the wrench, the pump, and the hose is almost impossible without another set of hands, which I didn't have. Took me 15 minutes for one clip. I suggest you first unplug the electrical and unbolt the pump before you do it so you can get more reach with the hoses. Ditto on the reverse.
I replaced the temperature sensor at the same time as the inlet valves. Unscrew three bolts to the back of the washer top where the controls are. Move the washer forward 3" so its not even with the dryer if the dryer is on the right side of the washer. The top assembly pops out and then to the right 3/4" to remove it. Take a picture of the electrical connections before you do anything. Unplug all the quick disconnect electrical connections so you don't mess up and smack the circuit boards, or pull too hard on a wire. Set it aside. The valve replacement is straight forward, just a few nuts holding it down, adjustable pliers to unscrew the hoses, and a hose clamp. Remove the valve. Then remove the temperature sensor. It's held in place on top of the water inlet, the Y-shaped part inside the washing machine that lets the water drop down. You need to unscrew that Y-shaped piece with its 2 sheet metal screws. Easy job. Pull it out and guide the electrical wires down the hole. Replace the sensor and reinstall the opposite way. But, you will see some tape on the wires which I think is to make sure the jiggling and vibrations don't rub through the insulation where it hits the metal (in the area where the valves are). Get some strapping tape or something to protect it. Carefully pull the wires back up the channel and tape around the areas that contact the metal when the wire turns 90 degrees to be plugged in. Install the valves. Plug everything back in. In my washer the electrical connections are all keyed so you shouldn't be able to plug it into the wrong spot. However, the red wire on the temperature sensor that goes to the far left can be plugged into a different slot if you aren't careful. Check the photo. Also, use zip ties to keep the wires from bouncing around.
I ran a few loads before putting the front back on. I don't recommend that if you have kids or stupid adults or cats or .... so cordon off the area if you aren't alone. That way you can see if you have any leaks from the pump and you don't have to take things apart again.
All works fine now! The biggest cost of the job is your labor, so if you are replacing the valves, buy and replace the temperature sensor because it tells the valves when to open and close. It might be the faulty part and not the valve. Good luck.
-
Michael from ORMOND BEACH, FL
-
Difficulty Level:Easy
-
Total Repair Time:30 - 60 mins
-
Tools:Pliers, Screw drivers, Wrench (Adjustable)
-
LAUREN from CHARLOTTE, NC
-
Difficulty Level:Really Easy
-
Total Repair Time:30 - 60 mins
-
Tools:Screw drivers, Wrench (Adjustable)
-
James from WILLOW STREET, PA
-
Difficulty Level:Very Easy
-
Total Repair Time:30 - 60 mins
-
Tools:Pliers, Socket set
- < Prev
- 1
- Next >
Ask our experts a question about this part and we'll get back to you as soon as possible!
- < Prev
- 1
- Next >

10 people found this helpful.

4 people found this helpful.


1 person found this helpful.


- < Prev
- 1
- Next >
Manufacturer Part Number: WH23X10043

Item is in stock and will ship today if your order is placed before 4:00 PM Eastern Standard Time.
If your order is placed after 4:00 PM EST, the in stock items will ship on the next business day.
Item is not in stock and usually ships 3-5 business days from the time you place your order.
Item is not in stock and usually ships 10-15 business days from the time you place your order.
This item is no longer being made by the manufacturer, and cannot be added to your shopping cart.


