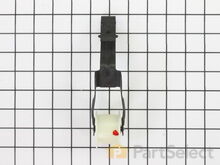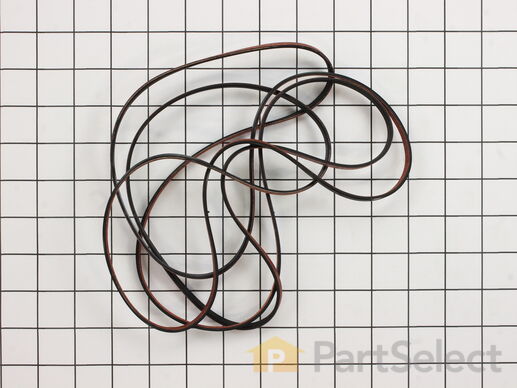
Multi Rib Belt - 92-1/4" 341241
Rated by 358 customers
Easy
30 - 60 mins
Ratings submitted by customers like you who bought this part.
Get this part fast! Average delivery time for in-stock parts via standard shipping: 1.8 days.
Multi Rib Belt - 92-1/4" Specifications

How Buying OEM Parts Can Save You Time and Money
-
5 Stars 340
-
4 Stars 26
-
3 Stars 5
-
2 Stars 2
-
1 Star 3
- < Prev
- 1
- 2
- 3
- Next >
- < Prev
- 1
- 2
- 3
- Next >
- < Prev
- 1
- 2
- 3
- Next >
Second time using PartSelect; washing machine repair ~ 6 mo. previous.
PartSelect was spot-on with that repair as well, sa ... Read more ving hundreds of dollars.....my go-to site for appliance repairs and pats....make it yours as well and you will NOT be disappointed! Fast, prompt shipping.
-
holly from LONG BCH TWP, NJ
-
Difficulty Level:Easy
-
Total Repair Time:30 - 60 mins
-
Tools:Socket set, Wrench (Adjustable)
Before cleaning I marked the exact location where the idler pully mounted to the bottom of the dryer.
While waiting for the replacement parts to be delivered a vacuum cleaner was used to remove lint from the inside surfaces of the dryer as well as the old fragments of the lint trap housing seals were removed and surfaces where the new seals would attach were cleaned.
Assembling the dryer with the new belt was a challenge due to the lack of support for the drum while getting the new belt in place, lined up properly, threaded through the idler pully and attached to the motor drive shaft. This is how I installed the new belt:
I used a piece of wood wider than the sides of the dryer, drilled holes that allowed for a piece of cloths line rope to be looped through and used to support the door opening end of the drum.
The drum was set on the seal and rollers at the back of the dryer.
The temporary wood /rope hanger was placed at the front end of the dryer resting on the sides with the top of the dryer raised.
The rope was adjusted until the drum rested on the back rollers and the rope like it would be positioned normally.
The new belt was then gently installed under the temporary support rope and around the drum.
The new belt had many kinks from shipping and was difficult to align with the location on the drum where it needs to ride so small strips of tape were temporarily used to hold the new belt in position until it could be fed through the idler pully and on to the drive shaft.
Several small pieces of a cardboard box were used to shim under the idler pully to hold it in its proper location as well as to make the belt attachment to the drive shaft easier.
With the belt attached, the temporary cardboard shims were removed from under the idler pully.
The front of the dryer was attached .
The temporary board and rope hanger was removed.
The tape that had been placed over the new belt to hold it in proper alignment was removed as the drum was rotated slowly by hand to ensure that all tape was removed prior to closing the top of the dryer.
The seals as well as the remainder of the dryer assembly was completed without any problems.
The dryer ran well for its initial trial spin and has dried several loads of laundry since.
Great parts and support Thankyou
-
Benjamin from WELLS, ME
-
Difficulty Level:A Bit Difficult
-
Total Repair Time:30 - 60 mins
-
Tools:Nutdriver
-
Brett from CRESCENT CITY, CA
-
Difficulty Level:Easy
-
Total Repair Time:30 - 60 mins
-
Tools:Nutdriver, Screw drivers
-
Danielle from FREEDOM, IN
-
Difficulty Level:Really Easy
-
Total Repair Time:More than 2 hours
-
Tools:Nutdriver, Screw drivers
Basically opened the dryer.
Took the drum out.
Took the broken motor out.
cleanned the dryer since I had everything opened.
Replaced motor, pulley, old belt.
My 20 years old dryer is running like brand new.
-
sherif from BARTONSVILLE, PA
-
Difficulty Level:Really Easy
-
Total Repair Time:30 - 60 mins
-
Tools:Nutdriver, Screw drivers, Wrench (Adjustable)
-
Dexter from COUNCIL BLFS, IA
-
Difficulty Level:A Bit Difficult
-
Total Repair Time:30 - 60 mins
-
Tools:Nutdriver
-
Matthias from BEVERLY HILLS, CA
-
Difficulty Level:Easy
-
Total Repair Time:30 - 60 mins
-
Tools:Screw drivers, Socket set
-
DAT from ALHAMBRA, CA
-
Difficulty Level:A Bit Difficult
-
Total Repair Time:1- 2 hours
-
Tools:Screw drivers, Socket set
Removed the belt and the drum.
Saw what I needed to replace. Ordered the parts then put back together. It was a really easy job.
-
Nathan from ALTOONA, PA
-
Difficulty Level:Very Easy
-
Total Repair Time:30 - 60 mins
-
Tools:Socket set, Wrench (Adjustable)
I lucked out opening the top of the dryer in that I didn't break anything when I popped the top up, since I didn't know to use a putty knife to depress inward the retaining clips.
Found the belt lying on top of the drum, and when I lifted it, it easily came free s ... Read more ince it was broken.
Watched the YouTube from PartSelect, finally, and Steve made it seem so easy. Unplugged it, turned off the gas, too.
Front two screws unscrewed no problem. Front panel lifted away, no problem. Tons of lint in the front housing, so I decided to clean away as much lint as possible since this was the best opportunity, and I also vacuumed lint out of the sheet metal exhaust all the way to the outdoors exit port. Then I had to get that sheet metal pipe back in place, perfectly, and that was a little tricky
The roller kit was a bargain compared to separate parts I thought I'd need (one roller only) so I replaced both rollers and their posts, spacer, and washers.
Another vender video recommended high temp lithium grease to lube the new posts, but I just used "plumbers grease" that I happened to find lying around the house.
The most difficult part of the whole process was pre-fitting the new screws into the plates of the new posts because you are self-threading the screws and I didn't have a nut driver. (I was trying to do it using two wrenches, one to hold the plate, the other to turn the screw. The torque required is so high that you'll start to round the hex edges of the screws and ruin them. So, I went out and bought a 5/16" socket for $2.49, and self threaded the screws by holding the plates with a wrench, and using my power drill with the 5/16" socket.
This is where you risk ruining everything because as soon as the screw has self-threaded the plate, the resistance drops to near-zero, and the drill zooms the screw down hard onto the plate. I found, afterward, one ribbon of thread lying on the work area, which means I stripped one of the threads by one winding. (I'm not too worried, but it did make me wonder if I had screwed up. Keep the old screws to use as replacements for the new ones if you encounter the same problem where you inadvertently strip a screw too far.)
Then, the plates go back into the dryer, and the left side plate has a much larger gap, because you have to remove/replace it through the rear wall slot by turning it in-situ; the right one just falls down into your waiting hand, and is replaced by raising it up from behind its slot.
Finally, you come to the belt replacement, and just follow the way Steve showed in the YouTube. However, I tried and tried, but it was difficult for me since I'm left handed and you do it with the right hand. I was finally able to get it by getting the belt around the metal drive, first, and then bringing the white wheel over and working it into position by pulling the belt forward to clear the white wheel being positioned to receive the belt's tension.
This is a very doable dryer repair, it will save you hundreds of dollars, you'll do a better job than a repairman (since you vacuum all the lint out too), and its a great story to tell your friends.
Learning how to do it, actually doing the repair, and then double checking that I got everything "right," I'd guess that I put in 8 hours of my time.
It was fun… but keep your cool since there will be a little aggravation, and maybe a trip to the hardware store to get tools you don't own.
-
Robert C. from GLEN RIDGE, NJ
-
Difficulty Level:A Bit Difficult
-
Total Repair Time:More than 2 hours
-
Tools:Nutdriver, Pliers, Screw drivers, Wrench (Adjustable)
- < Prev
- 1
- 2
- 3
- Next >
Ask our experts a question about this part and we'll get back to you as soon as possible!
- < Prev
- 1
- 2
- 3
- Next >

147 people found this helpful.

55 people found this helpful.

44 people found this helpful.

24 people found this helpful.

21 people found this helpful.

19 people found this helpful.

18 people found this helpful.

18 people found this helpful.

5 people found this helpful.

3 people found this helpful.
- < Prev
- 1
- 2
- 3
- Next >

Manufacturer Part Number: 341241

Item is in stock and will ship today if your order is placed before 4:00 PM Eastern Standard Time.
If your order is placed after 4:00 PM EST, the in stock items will ship on the next business day.
Item is not in stock and usually ships 3-5 business days from the time you place your order.
Item is not in stock and usually ships 10-15 business days from the time you place your order.
This item is no longer being made by the manufacturer, and cannot be added to your shopping cart.


