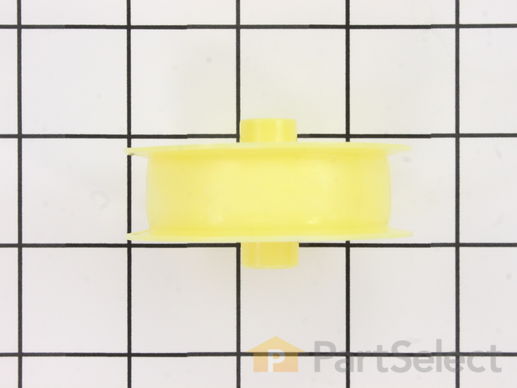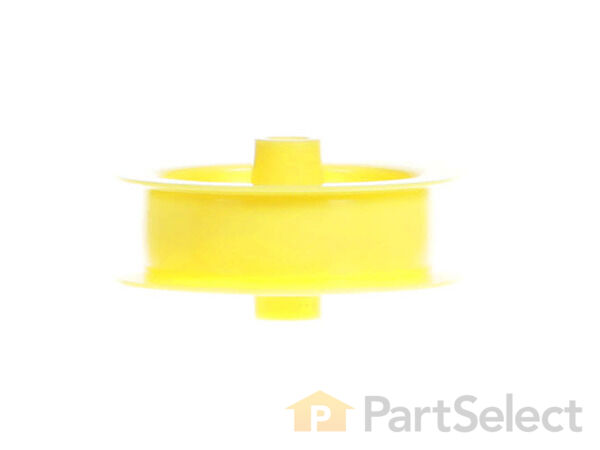
Idler Pulley Wheel WE12X83
Rated by 17 customers
Easy
1- 2 hours
Ratings submitted by customers like you who bought this part.
Get this part fast! Average delivery time for in-stock parts via standard shipping: 1.8 days.
Idler Pulley Wheel Specifications

How Buying OEM Parts Can Save You Time and Money
Replacing your General Electric Dryer Idler Pulley Wheel

-
5 Stars 7
-
4 Stars 0
-
3 Stars 0
-
2 Stars 0
-
1 Star 0
- < Prev
- 1
- Next >
- < Prev
- 1
- Next >
- < Prev
- 1
- 2
- Next >
-
David from EASTON, CT
-
Difficulty Level:Really Easy
-
Total Repair Time:1- 2 hours
-
Tools:Pliers, Screw drivers, Socket set, Wrench set
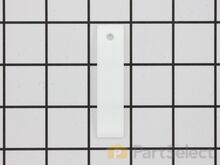
I ordered all the following parts which I fel ... Read more t were likely excessively worn--white and green bearing slides (two of each required), rear drum bearing kit, drive belt, and idler pulley wheel--to address the noisiness issue.
For your consideration: Since our dryer is 12 years old and would be disassembled anyway, I decided to order a new dryer drum belt and idler pulley, to replace these two constant-use items as preventive maintenance.
Two notes.
One: When replacing the dryer drum bearing parts, you need a T25 torx bit to loosen and remove the three torx-head screws. But using my T25 torx bit-head-style screwdriver, it was impossible to loosen them. Fortunately, I had a T25 torx bit, which I could mount in a socket wrench, which DID allow me to loosen those three torx-head screws without damage/breakage. WHEW! Recommend you are similarly prepared!
Two: If you purchase the "Rear Drum Bearing Kit," it already comes with the the "Drum Bearing Sleeve" and "Retainer O-Ring" components I thought I would also need--no need to purchase separately. I returned those two items, unopened, for a refund.
All together, from dryer disassembly to, component replacement, to a thorough vacuuming/cleaning, to reassembly and an operational check, it took about four hours. The dryer is now nearly noiseless again! Success!
I consider myself reasonably good with tools and have a fair amount of electrical and mechanical skill. My wife assisted with extra hands a couple times, too, seriously reducing my frustration level. Depending on your abilities, you'll take more time or less time than the four hours it took me. I'm certain I saved at least a couple hundred dollars by doing this maintenance myself.
In summary, the PartSelect person taking my order was knowledgeable and professional, I received my parts two days after ordering, the parts worked perfectly, and the company refunded my two, unopened returned parts promptly. Overall, a terrific experience. I highly recommend them to any capable do-it-yourselfer.
Thanks, PartSelect!
-
DENNIS from RALEIGH, NC
-
Difficulty Level:A Bit Difficult
-
Total Repair Time:More than 2 hours
-
Tools:Pliers, Screw drivers, Socket set
-
Richard from LUMBERTON, TX
-
Difficulty Level:Very Easy
-
Total Repair Time:15 - 30 mins
-
Tools:Screw drivers, Wrench (Adjustable)
Removing the drum proved difficult due to the lack of room on the two sides.The vent blower motor bracket is at the front bottom of the dryer, and when the two screws ... Read more on either the left or right side are removed, the dryer sides spread more easily and allow the drum to be removed or re-installed more easily.
Next, the rear drum bearing I bought has a rubber o-ring which holds it in place. There is a good chance this o-ring will be hard and brittle after years of service, and will crumble when removed, in order to replace the bearing. I had to run to the local hardware store to get a new o-ring, and could only find one that did was not rated for high heat usage. I presumed once the drum is re-installed that the bearing can't dislodge even with a missing o-ring. I think it just holds the bearing in place while removing and re-installing the drum, but I cannot be certain about this.So if you plan to replace the rear drum bearing, make sure to also order the o-ring that holds it in place. It is doubtful you can re-use the old one depending on the age of your dryer.
Replacing the old white belt tensioning pulley requires the removal and re-installation of a "nut" that has no threads. It is forced on and off and not simple to re-install. The removal was easy simply by using a wrench to "unscrew" it counterclockwise. But re-installing it is another matter. It requires force to get it back onto the shaft. I saw a tip to use a 7/16" socket placed over the nut and hit with a hammer while bracing the bracket from the other side. I did this by used a smaller tool, linesman's pliers, which provided the force needed. Install it about 1/4" past the end of the bracket shaft. Careful, that nut has sharp edges and I ended up bleeding from that process. Three hands would help: one to brace the bracket, one to hold the nut and socket in place, and one to hammer. So good luck with that. Probably there is a smarter way to do this.
If you replace the old white plastic belt tensioning pulley with a new yellow one, it is not simple to understand how to re-install the belt properly. The videos do not do the trick adequately. I did find one on youtube where they removed the dryer side in order to show the belt installation and I had an "aha moment". Since you cannot see the belt, the pulleys, the motor, or anything else during installation, it is not a simple thing to do. Here are my tips: Before re-installing the drum, move the belt tensioning pulley bracket to the right (when facing the dryer front) and you will see a little spot where the bracket will stay to the right when engaged in this spot. Engage the bracket and then proceed to re-install the drum. That way, when you reach under the drum to set the belt properly on the pulleys, you won't have to engage the tensioning bracket without being able to see. Once the belt is in place, carefully remove the bracket from the right holding spot and allow it to move back to the left operating position. I used two hands and don't think I could have done it with one. When the belts are new, they can be naturally twisted and you have to be careful to install the belt with no twist. I had to do it twice to get it right. If someone can take up the top belt slack for you, it's easy to feel the belt underneath the drum and get any twists out.
Next, i had a hard time inserting the drum back into the dryer and finding the hole where the bearing inserts. The problem is, if you are not careful, it's easy to move, bend, or break the heater wires which surround the hole you need to locate blindly and slip the drum bearing into. I did bend those wires, but luckily not break them. In hindsight, applying some masking tape to the rear inside panel of the dryer right at the top, left and right of the drum BEFORE removing the drum would have made it much easier estimating the proper drum height while maneuvering the bearing into the rear hole. Then remove the masking tape when done.
I ordered a new top plastic front bearing that supports the drum in the front. Good thing I did because mine was split about 5" where one set of the green and white sliders install. I had one white "plastic" insert visible. The other one plus the two green bearings were totally missing. No wonder it was squealing.
Finally, the hardest part for me was re-installing the top of the dryer! Take a good look before removing it so you can see exactly how the top fits to the dryer and how the parts need to be lined up first.
Thanks to PartSelect.com! Every part was correct and the installation videos gave me so much help. Also, parts arrived in two days, which surprised me. I will be ordering all parts here.
-
KENNETH from HOLLAND, PA
-
Difficulty Level:A Bit Difficult
-
Total Repair Time:More than 2 hours
-
Tools:Screw drivers, Wrench (Adjustable)
-
Lissa from Redlands, CA
-
Difficulty Level:Really Easy
-
Total Repair Time:Less than 15 mins
-
Dean from Mahtomedi, MN
-
Difficulty Level:Easy
-
Total Repair Time:30 - 60 mins
-
Tools:Socket set
-
Roger from Taylorsville, IN
-
Difficulty Level:Really Easy
-
Total Repair Time:1- 2 hours
-
Tools:Pliers, Screw drivers, Wrench (Adjustable)
-
CHARLES from MORGANTON, NC
-
Difficulty Level:Easy
-
Total Repair Time:30 - 60 mins
-
Tools:Nutdriver, Pliers, Screw drivers
-
carl from vinita, OK
-
Difficulty Level:Really Easy
-
Total Repair Time:30 - 60 mins
-
Tools:Nutdriver, Screw drivers
-
Warren from Ballston Lake, NY
-
Difficulty Level:A Bit Difficult
-
Total Repair Time:30 - 60 mins
-
Tools:Screw drivers
- < Prev
- 1
- 2
- Next >
Ask our experts a question about this part and we'll get back to you as soon as possible!
- < Prev
- 1
- Next >

2 people found this helpful.

2 people found this helpful.

1 person found this helpful.


1 person found this helpful.

1 person found this helpful.

1 person found this helpful.
- < Prev
- 1
- Next >



Manufacturer Part Number: WE12X83

Item is in stock and will ship today if your order is placed before 4:00 PM Eastern Standard Time.
If your order is placed after 4:00 PM EST, the in stock items will ship on the next business day.
Item is not in stock and usually ships 3-5 business days from the time you place your order.
Item is not in stock and usually ships 10-15 business days from the time you place your order.
This item is no longer being made by the manufacturer, and cannot be added to your shopping cart.


