We're sorry, but our Q&A experts are temporarily unavailable.
Please check back later if you still haven't found the answer you need.
1 question answered by our experts.
< Prev
1
Next >
Sort by:
Search filter:
Clear Filter
Your search term must have 3 or more characters.
Keep searches simple. Use keywords, e.g. "leaking", "pump", "broken" or "fit".
Sorry, we couldn't find any existing answers that matched.Try using some different or simpler keywords, or submit your new question by using the "Ask a Question" button above!
Sandi
February 24, 2018
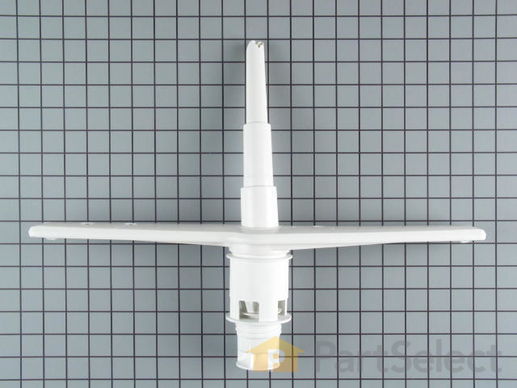
How do we remove the broken wash tower to replace the new one?
For model number GSD4000J00BB
Hello Sandi,
Thanks for your question. Unplug the dishwasher. Remove the lower dishrack. Use a strap wrench to loosen the old wash arm assembly counterclockwise. Unthread the old assembly. Be sure the pump's connector is intact and then install the new part.
I hope this helps.
5 people found this helpful.
Was this helpful?
Thank you for voting!
< Prev
1
Next >
Customer Repair Stories
Average Repair Rating: 4.4 / 5.0, 8 reviews.
What's this?
< Prev
1
Next >
Sort by:
Search filter:
Clear Filter
Your search term must have 3 or more characters.
Keep searches simple. Use keywords, e.g. "leaking", "pump", "broken" or "fit".
Sorry, we couldn't find any existing installation instruction that matched.
Washing poorly, leaving particles of food on top of the dishes, not draining completely, ceiling spray arm not spinning (bent up to the ceiling)
The lower spray arm unscrews. From inside the dishwahser, put a screwdriver through the tab slots and unscrew the tower from the floor. It's pretty tight for plastic. The upper spray arm has screws on the top of the dishwasher. You must slide the dishwasher out from underneath the countertop to get to the screws. Normally that's just the two screws above the door that screw into the countertop. Pull the insulation back and unscrew the arm from the top of the dishwasher. Reverse to reinstall. Piston and nut assembly for check valve: Inside the dishwasher at the back there are 2 screws that hold a screen down. Remove the screen. Take out the check valve and replace it. It was still functional in mine, it looked like food gunk had built up on it and impeded the check valve action. The flapper chec is a rubber flap in the drain tube that connects to your sink drain. You have to pull the dishwasher out from under the sink to get to the end of the drain tube that connects to the dishwasher. Take the hose clamp loose and remove the drain tube from the dishwasher. Then unscrew the plastic fitting that you just took the drain tube off of. The flapper chec is there. It had turned brittle and didn't flap anymore. It is a similar setup to the rubber seal at the end of your garden hose.
Top of the water spray "tower" was broken off by opening lower dish drawer and not checking to see if tower was in the down position.
Apply large vice like pliers at base of the lower spray arm and not applying too much pressure to plier as this is an all plastic part and slowly turn counter-clockwise until entire spray arm is loose enough to lift out and install the new part in the reverse order.
William from Middle Island, NY
Difficulty Level:
Really Easy
Total Repair Time:
Less than 15 mins
Tools:
Pliers
45 of 54 peoplefound this instruction helpful.
Was this instruction helpful to you?
Thank you for voting!
extention broken on lower wand sprayer
turn wand counter clockwise until it's out,replace it with the new one.DON'T OVERTIGHTEN!
STEPHEN from MYERSTOWN, PA
Difficulty Level:
Really Easy
Total Repair Time:
Less than 15 mins
Tools:
Pliers
4 of 5 peoplefound this instruction helpful.
Was this instruction helpful to you?
Thank you for voting!
tower broken, items having to be washed twice
i removed the old power tower with a regular plumbers pliers spining SLOWLY and firmly but no too firm until it broke loose and unscrewed. I reintalled the new tower oppisite how i removed it being carefull not to overtighten. all is well. it was very ez, so much in fact that my wife thought she was going to be able to read a book waiting for me "all afternoon" to fix it! Bad news, I had to take her shopping!
i was impressed with the ease and speed of normal delivery of this part. this is a quality company. JS
john from spring hill, FL
Difficulty Level:
Really Easy
Total Repair Time:
Less than 15 mins
Tools:
Pliers
4 of 5 peoplefound this instruction helpful.
Was this instruction helpful to you?
Thank you for voting!
Broken spray arm tower
I removed the broken lower spray arm tower using a scew driver and snapped in the replacement part not needing any tools.
Evelyn Rae from Tallahassee, FL
Difficulty Level:
Really Easy
Total Repair Time:
Less than 15 mins
Tools:
Screw drivers
3 of 4 peoplefound this instruction helpful.
Was this instruction helpful to you?
Thank you for voting!
my dishwasher was leaking from underneath
we took the surrounding cover off the machine, then took out the bottom basket. turned the dishwasher on it's back for easy access. open the door and unscrew the lower spray arm from the rubber connector, then loosen the clamp around the connector and pry out. the connector is a little hard to put back on because of the need to be tight but a little muscle does the trick! then screw the new spray arm back onto the connector from inside the machine making sure you get it tight, without using a tool on it. then just re-attach the cover.
with a pair of pvc pipe pliers,I loosened the Spray arm and replaced with the new one.Soap residue had built up inside and would come out on the clean dishes due to a worn plunger from an earlier repair.Also fixed the dryer start switch in 5 min thanks to the info from this site.
Getting the upper part of the lower arm out was easy. It is just tabs that hold it in. Screwing the old one out was the hardest part it was fused in with dried detergant but once it was loose it was a real easy to put the new one back in.
Kevin from Valrico, FL
Difficulty Level:
Easy
Total Repair Time:
Less than 15 mins
Tools:
Screw drivers, Wrench (Adjustable)
2 of 3 peoplefound this instruction helpful.
Was this instruction helpful to you?
Thank you for voting!
< Prev
1
Next >
Customer Reviews
Average Rating:
★★★★★
★★★★★
5 Reviews
5.0
Filter By Rating:
5 Stars
5
4 Stars
0
3 Stars
0
2 Stars
0
1 Star
0
< Prev
1
Next >
Sort by:
Search filter:
Clear Filter
Your search term must have 3 or more characters.
Keep searches simple. Use keywords, e.g. "leaking", "pump", "broken" or "fit".
Sorry, we couldn't find any existing reviews that matched. Try using some different or simpler keywords.
★★★★★
★★★★★
Tawni G - August 16, 2020
Verified Purchase
Perfect fit
The part was exactly what I needed to fix my dishwasher. It was easy to install. It also came somber than expected.
★★★★★
★★★★★
Kenya F - July 12, 2020
Verified Purchase
Easy to Replace
Our washer is good as new!
Thank you!
★★★★★
★★★★★
Thomas G - April 15, 2020
Verified Purchase
Works great. Shipping was sl pi w.
Part works well. It took a while to get but 'm happy.
★★★★★
★★★★★
Mary W - August 25, 2018
Verified Purchase
Worked well, easy to put in.
My appliance is back working.
★★★★★
★★★★★
Edwin B - January 27, 2018
Verified Purchase
Easy Repair
Good replacement part. Dishwasher works fine. Shipping took too long.
< Prev
1
Next >
Model Cross Reference
This part works with the following models:
PartSelect Number: PS260604
Manufacturer Part Number: WD22X155
The Fix App makes it easy to manage all your stuff in one place. Just snap a photo and we'll find and store your user manuals, receipts, and product information in one easy-to-find place!
"Like magic. I took a picture of the model number on my refrigerator, and the app identified it right away … Very convenient. I'm impressed." ★★★★★ - Clever Jeff