Keep searches simple. Use keywords, e.g. "leaking", "pump", "broken" or "fit".
Sorry, we couldn't find any existing reviews that matched. Try using some different or simpler keywords.
★★★★★
★★★★★
Don R - April 30, 2019
Verified Purchase
Replacement part appears to be of better design than original, need to order different screw mounts
Std Ground shipping took a couple of days longer than expected. Some wires to heating elements required removal of tape to pull needed slack due to different 90 degree orientation. I did not realize until after ordering that metric mounting screws were required but luckily I had correct size and thread pattern on hand.
< Prev
1
Next >
Customer Repair Stories
Average Repair Rating: 3.6 / 5.0, 6 reviews.
What's this?
Sort by:
< Prev
1
Next >
Search filter:
Clear Filter
Your search term must have 3 or more characters.
Keep searches simple. Use keywords, e.g. "leaking", "pump", "broken" or "fit".
Sorry, we couldn't find any existing installation instruction that matched.
Cooktop switch control quit controlling temperature properly
1. I cut off the circuit breaker for the stovetop and removed items on the shelf directly under the cooktop 2. I looked under the cooktop and unscrewed the two screws holding the panel under the switch controls and removed the panel. 3. I pulled the knob up off of the bad cooktop control switch. 4 I unscrewed the two screws
... Read more holding the bad cooktop switch control. 5. I looked under the cooktop and pulled the bad cooktop control switch down so I could remove the wires connected to it. 6. I got the new switch control and put the wires from the old control onto the new control, one-at-a-time, to the same labelled connection on the new control, which was a somewhat different arrangement. 7. I worked the new control up through the wires and put the knob shaft up through the hole in the cooktop. 8. Back on top, I installed the two screws I had removed from the old switch control to hold the new control to the stovetop. 9. I reinstalled the control knob onto the control. 10. I turned back on the circuit breaker for the stovetop and checked out the operation of the new switch control. It worked fine. 11. I turned the circuit breaker back off and reinstalled the panel cover under the switch controls, with the two screws I had removed earlier. 12. I turned back on the circuit breaker for the stovetop. 13 I put the items back onto the shelf directly under the stovetop. 14. Job done!
Read less
Stacy from LEAGUE CITY, TX
Difficulty Level:
A Bit Difficult
Total Repair Time:
30 - 60 mins
Tools:
Screw drivers
2 of 2 peoplefound this instruction helpful.
Was this instruction helpful to you?
Thank you for voting!
Large Burner was not heating up properly
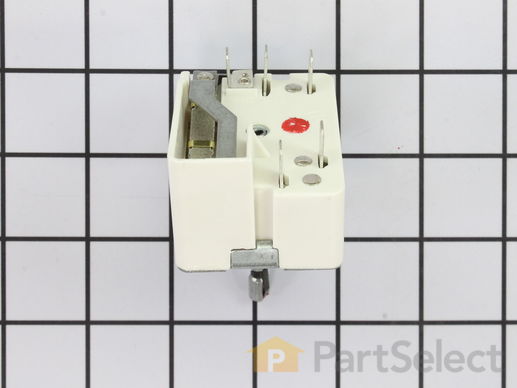
Don't be put off when you first get the new switch. It's not an exact duplicate to the one your replacing. You will notice that the new switch has 5 electrical connectors and you'll see 6 wires on the old one. start by removing the L1 wire(s) off the old switch, you will see that it actually has 2 wires connected to the same connector.
... Read more Now connect to the L1 position on the new switch. Continuie with taking one wire at a time off the old switch and connect to the corresponding connector on the new switch (all the connectors are coded the same, ex. L1, P, etc....) Once complete the switch and burner worked perfectly
Read less
Michael from Oconomowoc, WI
Difficulty Level:
Easy
Total Repair Time:
30 - 60 mins
Tools:
Pliers, Screw drivers
9 of 14 peoplefound this instruction helpful.
Was this instruction helpful to you?
Thank you for voting!
Surface Burner Switch
Remove the 3 screw on the bottom cover, and 2 screw holding the switch and then switch your wires out.
Alowyn from Albany, NY
Difficulty Level:
Really Easy
Total Repair Time:
Less than 15 mins
Tools:
Screw drivers
5 of 13 peoplefound this instruction helpful.
Was this instruction helpful to you?
Thank you for voting!
switch was not turning off had to jiggle it to go off
no problem slightly different shape than original but labels for wires matched up mounting screws aligned perfectly works great
Leon from Deer Paerk, TX
Difficulty Level:
Easy
Total Repair Time:
15 - 30 mins
Tools:
Screw drivers
19 of 34 peoplefound this instruction helpful.
Was this instruction helpful to you?
Thank you for voting!
Surface burner switch needed replacement
Followed the procedure used in replacing the previous switches. The part came without a bushing needed to adjust the height of the knob sticking above the surface of controls. Fortunately, I could use the bushing from the previous part. I suggest a bushing should be included with this part.
Ashok from Palo Alto, CA
Difficulty Level:
Easy
Total Repair Time:
15 - 30 mins
Tools:
Pliers, Screw drivers
7 of 17 peoplefound this instruction helpful.
Was this instruction helpful to you?
Thank you for voting!
burner got to hot
repair it
larry from chatsworth, GA
Difficulty Level:
Easy
Total Repair Time:
30 - 60 mins
Tools:
Screw drivers, Socket set, Wrench set
12 of 27 peoplefound this instruction helpful.
Was this instruction helpful to you?
Thank you for voting!
< Prev
1
Next >
Questions and Answers
We're sorry, but our Q&A experts are temporarily unavailable.
Please check back later if you still haven't found the answer you need.
6 questions answered by our experts.
Sort by:
< Prev
1
Next >
Search filter:
Clear Filter
Your search term must have 3 or more characters.
Keep searches simple. Use keywords, e.g. "leaking", "pump", "broken" or "fit".
Sorry, we couldn't find any existing answers that matched.Try using some different or simpler keywords, or submit your new question by using the "Ask a Question" button above!
Karen
January 11, 2018
The large eye on my cooktop stopped working in the middle of cooking spaghetti. I am confused as to what I need to buy for my husband to replace it.
For model number FEC30S6ASC
Hi Karen, Thank you for the question. It would be the switch that controls the element or the element its self. I recommend testing both parts with a multi meter to determine the defective part. Hope this helps!
4 people found this helpful.
Was this helpful?
Thank you for voting!
Martin
November 13, 2018
My large heating element cycles on and off. Is this switch the problem? Also, if so, how many screws do i also need to purchase to replace the switch? Do any new screws come with the switch?
For model number FEC30S6ABF
Hello Martin, Thank you for the question. Yes, the switch, Part Number: PS2342881 will need to be replaced. The Mounting screws, PartSelect Number PS467647 are sold separate and 2 are required. Hope this helps, good luck with this repair!
Changing control switch on 8'' burner, the wiring poles on the new switch seem to be different,are they wired in the same pattern?
For model number fec30s6abc
Hi Lynn, thank you for your question. Yes, the parts should be wired the same as your original parts. Good luck with your repair.
1 person found this helpful.
Was this helpful?
Thank you for voting!
Charles
October 5, 2021
My old switch is replaced with 318293825 switch. The problem is the wiring is different. How do I know which wire goes where? Thanks
Hello Charles, Thank you for the question. The L1 should have a black wire and the L2 should have a Red wire and the H1 and H2 should not matter. We hope this helps!
Was this helpful?
Thank you for voting!
Andy
March 15, 2023
How long is the shaft ,that the knob goes on
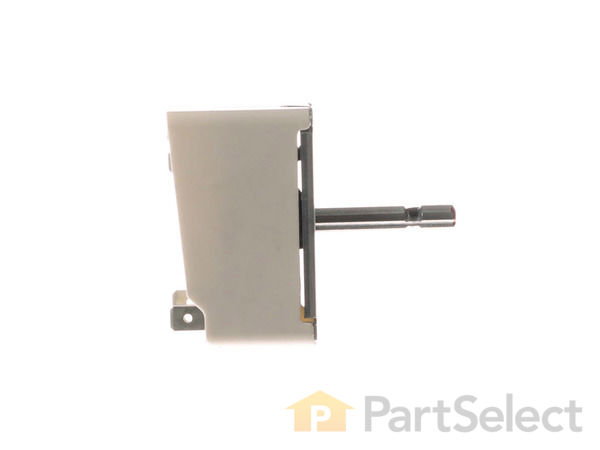
Hi Andy, thank you for contacting us. The length of the shaft is 1.5 inches for the knob insertion. We hope this information is useful!
Was this helpful?
Thank you for voting!
Billy
September 2, 2019
The other one have the same number except the last number changed to a five what is the difference between the two
For model number FEC30S6ABF
Hello Billy, Thank you for the question. The Part #: PS2342880 (318293824) controls the smaller elements and the Part #: PS2342881 controls the larger elements. Hope this helps!