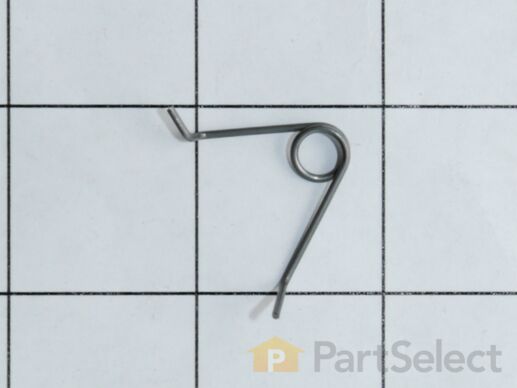
Interlock Spring
$
13.90
In Stock
Get this part fast! Average delivery time for in-stock parts via standard shipping: 1.8 days.
PartSelect Number PS1964350
Manufacturer Part Number W10156812
Manufactured by
Whirlpool

Check if this fits your product and find model diagrams
Need help finding your model number?
Troubleshooting
This part fixes the following symptoms:
Door not closing properly | Won’t turn on
This part works with the following products:
Microwave, Microwave Oven Combo.
This part works with the following products:
Whirlpool, Maytag, Amana, KitchenAid.
Part# W10156812 replaces these:
AP4409981, W10156812
Questions and Answers
Ask our experts a question about this part and we'll get back to you as soon as possible!
- < Prev
- 1
- Next >
Sort by:
Search filter:
Clear Filter
Your search term must have 3 or more characters.
Keep searches simple. Use keywords, e.g. "leaking", "pump", "broken" or "fit".
Sorry, we couldn't find any existing answers that matched.Try using some different or simpler keywords, or submit your new question by using the "Ask a Question" button above!
Misty
January 17, 2018
The door is not shutting it will not stay shut what part do I need to fix it
For model number Wmh31017ab2

Hi Misty, Thank you for the question. If the hooks on the door are not damaged, you may need to check or replace the Interlocks, Part Number: PS11745301 and Part Number: PS11749178. You can check to see if they have not come loose or if a switch is out of place. The interlock could be damaged and need to be replaced. Hope this helps!
3 people found this helpful.
Was this helpful?
Thank you for voting!
Related Parts:
Virgilio
March 2, 2018
Door won’t latch closed. All switches are good and i replaced interlocks (top and bottom) with no luck. Should i try replacing springs? Everything works perfect if i keep a little pressure on door : /. Thanks in advance.
For model number ywmh76719cs-0 Whirlpool microwave

Hi Virgilio,
Thank you for your question. If your microwave door won’t close or won’t latch, it usually means there is an issue with the door latch assembly. The latch assembly typically has two hooks which link to the switch holder on the frame of the microwave. When the hooks work properly, they engage the switches to begin powering the microwave, so having them in working order is important. The latch assembly is spring-loaded to provide the necessary tension to engage the hooks. A broken door latch may be as simple as a broken hook or worn out spring, which will require replacing the door latch assembly. To access the assembly, unplug the microwave and take off the inner door panel, which is held in place with plastic tangs. I hope this helps. Thank you and have a great day!
1 person found this helpful.
Was this helpful?
Thank you for voting!
Ryan
March 28, 2019
Do both the top and bottom support interlocks require a spring? My door will not latch to the top interlock and i noticed there is no spring present. The bottom appears to be latching and switching correctly with a spring present.
For model number WMH53520CS

Hello Ryan, Thank you for the question. Checking the diagram there should be a spring at the top. Hope this helps!
Was this helpful?
Thank you for voting!
- < Prev
- 1
- Next >
✖
Ask a Question
Ask our experts a question on this part and we'll respond as soon as we can.
Something went wrong. Please try again later.
Your Question Has Been Submitted!
Our experts will send you an email as soon as your question has been answered.
Customer Repair Stories
Average Repair Rating: 3.8 / 5.0, 1 reviews.
What's this?
- < Prev
- 1
- Next >
Sort by:
Search filter:
Clear Filter
Your search term must have 3 or more characters.
Keep searches simple. Use keywords, e.g. "leaking", "pump", "broken" or "fit".
Sorry, we couldn't find any existing installation instruction that matched.
Door switch inconsistent operation for Open/Close sensing.
Ordered top & bottom micro-switches and mounting plate parts. Internet reviews could not find specifics if the issue was due to a top/bottom or combination of micro-switch or mounting plate failure. Pulled the plug. Removed the top vent assembly cover held in by 2 Phillips screws inside the vent. Removed the control panel held in by 1 Phillip screw at the top vent assembly area. Lifted control panel upward to release the catch and moved it off to the side - didn't disconnect any leads. Used a Torx bit to remove the door switch mounting plates at the front and pulled the plates through the opening from the control panel. Documented the wire color code connections, the top plate uses 2 micro's with one using both the closed & open contact. Installed the respective micros on the mounting plates and worked backwards with the wiring and removal steps. Once completed, the open/close sensing has worked every time.
Other Parts Used:
-
Mark from HOMER GLEN, IL
-
Difficulty Level:Really Easy
-
Total Repair Time:30 - 60 mins
-
Tools:Pliers, Screw drivers
100 of 115 people
found this instruction helpful.
Was this instruction helpful to you?
Thank you for voting!
- < Prev
- 1
- Next >
Customer Reviews
Filter By Rating:
- < Prev
- 1
- Next >
Sort by:
Search filter:
Clear Filter
Your search term must have 3 or more characters.
Keep searches simple. Use keywords, e.g. "leaking", "pump", "broken" or "fit".
Sorry, we couldn't find any existing reviews that matched. Try using some different or simpler keywords.
Scott W - February 7, 2019
Verified Purchase
Convenient shopping
I was able to buy only the part I needed without having to purchase the entire assembly. Saved money
Ron M - July 10, 2018
Verified Purchase
spring
This part worked as expected
- < Prev
- 1
- Next >
You May Also Need?
Model Cross Reference
This part works with the following models:
PartSelect Number: PS1964350
Manufacturer Part Number: W10156812
Brand
Model Number
Description