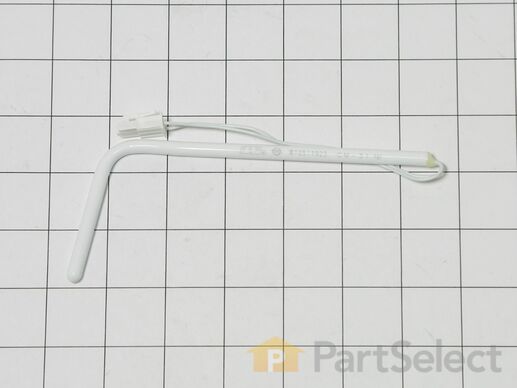
Ice Maker Bin Temperature Sensor WPW10511923
$
69.14
In Stock
Get this part fast! Average delivery time for in-stock parts via standard shipping: 1.8 days.
PartSelect Number PS11755842
Manufacturer Part Number WPW10511923
Manufactured by
Whirlpool

Check if this fits your product and find model diagrams
Need help finding your model number?
Product Description
Ice Maker Bin Temperature Sensor Specifications
This bin temperature sensor is for ice makers.
The bin temperature sensor monitors the temperature in the ice maker bin and sends the temperature reading to the electronic control board.
Disconnect the power before installing this part. Wear work gloves to protect your hands.

How Buying OEM Parts Can Save You Time and Money
Troubleshooting
This part works with the following products:
Ice Maker, Refrigerator.
This part works with the following products:
KitchenAid, Whirlpool, Jenn-Air, Kenmore.
Part# WPW10511923 replaces these:
AP6022509, W10511923
Customer Reviews
Filter By Rating:
- < Prev
- 1
- 2
- Next >
Sort by:
Search filter:
Clear Filter
Your search term must have 3 or more characters.
Keep searches simple. Use keywords, e.g. "leaking", "pump", "broken" or "fit".
Sorry, we couldn't find any existing reviews that matched. Try using some different or simpler keywords.
Steve T - December 11, 2022
Verified Purchase
Happy
Got the part. Fine condition. Easy install.
Fixed the problem!
Graham N - September 1, 2022
Verified Purchase
Easy repair.
I received the replacement part quickly. Removal of the old part required removing one small screw and unsnapping a wiring connection. The new replacement part fit perfectly and corrected the problem. Very happy with the outcome.
Clince M - August 27, 2022
Verified Purchase
Making ice
Part was simple to install and works great, now making ice and shutting off when it is supposed to.
Frank H - July 19, 2022
Verified Purchase
Easy Fix
Icemaker wouldn't stop making ice. This took care of the problem. Back to normal now.
Terry C - November 28, 2021
Verified Purchase
Ice maker sensor
The part came quick and was easy to install and corrected the problem of to much ice production
Randall H - June 15, 2021
Verified Purchase
Extremely Simple Freestanding Icemaker Repair
The ice bin thermometer (thermistor) arrived promptly and was identical to the faulty part. The entire "fix" took less than 10 minutes from opening the box to restarting the appliance. I read a couple of suggestions by PartSelect experts before the part arrived and the installation went just as they described it.
Kevin O - May 29, 2021
Verified Purchase
My ice machine now stops making Ics when its full
The part was exactly what I needed to get my ice machine operating properly again. The old part failed and would no longer send the signal that my ice bin was full. Unless you turned the machine off it would continue making ice. This part is simple to replace, just pop off the cover for access unplug the old one and install the new one. There is also one screw that holds it in place tighten it and snap the cover back on and you will be done
STEPHANIE N - April 9, 2021
Verified Purchase
EASY REPAIR
PART IN GREAT CONDITION - PERFECT FIX!
Kim M - April 7, 2020
Verified Purchase
Easy-to-replace temperature sensor fixed my ice maker!
The temperature sensor I received was super easy to install in my ice maker. Now my ice maker is no longer making too much ice....and I’ve saved a lot on a service call!
Phillip J - February 20, 2019
Verified Purchase
Easy Repair
Part was easy to find, order and the delivery came on schedule. Easy to install. Saves a lot of money when things go this smoothly.
- < Prev
- 1
- 2
- Next >
Customer Repair Stories
Average Repair Rating: 5.0 / 5.0, 7 reviews.
What's this?
- < Prev
- 1
- Next >
Sort by:
Search filter:
Clear Filter
Your search term must have 3 or more characters.
Keep searches simple. Use keywords, e.g. "leaking", "pump", "broken" or "fit".
Sorry, we couldn't find any existing installation instruction that matched.
Very easy installation.
Tools needed:
- 1/4 inch nut driver or socket & ratchet (or wrench... depending on what you have available.)
- Optional: Flashlight and mirror
1 - I turned the power off.
2 - Grabbing the bottom of the cover (above the ice bin) with both hands, I pulled sharply toward me and the cover was free.
3 - I used the nut driver to remove the screw holding the thermistor in place against the wall of the ice bin.
4 - I used the flashlight and mirror to confirm the placement of the connector.
5 - Used my index finger to depress the locking clip and gently pulled the connector downward.
6 - I attached the new thermistor to the ice bin wall using the nut driver.
7 - I threaded the connector up to the control board and pushed it into place. (This step was the most difficult for me... I had to use the mirror to confirm that I was properly aligned.)
8 - Turned on the power (and shut off the "FAST ICE" option -- may not be available on all ice maker models).
9 - I scooped out a gallon of ice for my tea maker.
10 - A few hours I checked the bin level to confirm that the ice maker was behaving.
All in all, a very simple repair and certainly beats paying someone $200 or $300 for a five minute job.
-
Ronald from EADS, TN
-
Difficulty Level:Very Easy
-
Total Repair Time:Less than 15 mins
-
Tools:Nutdriver
1 person
found this instruction helpful.
Was this instruction helpful to you?
Thank you for voting!
Ice bin overflowing not shutting off. Kept making ice
Pull cover off in front of ice tray and ice grid cutter to make easy to get at temperature sensor wire connector. remove connection plug to temperature sensor remove screw on side of ice bin that holds sensor in position.
Put sensor in a class of ice 32 degrees and measured resistance read 6.2K should of been read 8.7K Ordered a new Temperature sensor from partselect.com . Installed in 5 min working like a champ again.
The instructions book call the part I need a Bin Thermister instead off temperature sensor.
Put sensor in a class of ice 32 degrees and measured resistance read 6.2K should of been read 8.7K Ordered a new Temperature sensor from partselect.com . Installed in 5 min working like a champ again.
The instructions book call the part I need a Bin Thermister instead off temperature sensor.
-
Donald from LITITZ, PA
-
Difficulty Level:Really Easy
-
Total Repair Time:Less than 15 mins
-
Tools:Nutdriver, Pliers
1 person
found this instruction helpful.
Was this instruction helpful to you?
Thank you for voting!
Replaced the bin thermostat.
Followed YouTube instructions. Went flawlessly!
-
David from JACKSONVILLE, FL
-
Difficulty Level:Very Easy
-
Total Repair Time:Less than 15 mins
-
Tools:Nutdriver, Screw drivers
1 person
found this instruction helpful.
Was this instruction helpful to you?
Thank you for voting!
Ice bin overfilling
I'm an hvac/r technician, and regularly work on ice machines. Begin my pulling the white over beneath the control panel. It snaps in place so pull on the bottom then left out. 1/4 nut driver is all you need, and remove the screw holding the bin thermistor clip to the side. Up to the right , beneath the control panel, behind the plastic panel you previously removed is the mollex connector. Unplug the thermistor and follow instructions in reverse to reinstall.
-
Travis from N CHESTERFLD, VA
-
Difficulty Level:Very Easy
-
Total Repair Time:Less than 15 mins
-
Tools:Nutdriver
12 of 14 people
found this instruction helpful.
Was this instruction helpful to you?
Thank you for voting!
The ice machine was overfilling with ice
Pull the white cover from the front of the machine. Remove the screw that holds the thermistor body in place. Disconnect the old thermistor. Plug in the new thermistor. Snap the new thermistor body into the cover and reinsert the screw to the sidewall. Replace white cover. Complete!
-
Jeffrey from COLLEYVILLE, TX
-
Difficulty Level:Really Easy
-
Total Repair Time:15 - 30 mins
-
Tools:Screw drivers
1 person
found this instruction helpful.
Was this instruction helpful to you?
Thank you for voting!
Ice machine would not turn off when bin was full.
This is the second time for this repair. Seems to occur after cleaning. Make sure you get the right part. Look at the old thermistor for correct model number, they look the same but are different. Turn off machine, unsnap cover plate, unplug old thermistor, remove holding screw with nut driver, replace in reverse order, turn on ice machine. Next time I clean the machine I may remove the thermistor.
-
Robert from PROSPECT, KY
-
Difficulty Level:Very Easy
-
Total Repair Time:Less than 15 mins
-
Tools:Nutdriver
1 person
found this instruction helpful.
Was this instruction helpful to you?
Thank you for voting!
Too much ice
Replaced thermistor u
-
Patrick from ROME, GA
-
Difficulty Level:Very Easy
-
Total Repair Time:30 - 60 mins
-
Tools:Nutdriver
4 of 9 people
found this instruction helpful.
Was this instruction helpful to you?
Thank you for voting!
- < Prev
- 1
- Next >
Questions and Answers
Ask our experts a question about this part and we'll get back to you as soon as possible!
- < Prev
- 1
- Next >
Sort by:
Search filter:
Clear Filter
Your search term must have 3 or more characters.
Keep searches simple. Use keywords, e.g. "leaking", "pump", "broken" or "fit".
Sorry, we couldn't find any existing answers that matched.Try using some different or simpler keywords, or submit your new question by using the "Ask a Question" button above!
Mike
November 17, 2017
Hello,I have a Maytag ice maker model # mim1555zrs0, it won't stop making ice. I cleaned the thermostat but it didn't solve the problem. Should I replace the thermostat? Part # wpw10511923 ?? Thanks
For model number M1M1555ZRS0
Hi Mike, Thank you for the question. I suggest replacing the thermostat first and if this does not fix the issue you may need to replace the Water Inlet Valve,PartSelect Number: PS11738179. Hope this helps!
5 people found this helpful.
Was this helpful?
Thank you for voting!
Ron
October 11, 2021
ICEMACHINE MAKING TOO MUCH ICE. FROM ANSWERS FROM OTHERS SOUNDS LIKE THERMISTOR IS BAD.WHERE IS THERMISTR AND HOW DOES ONE CHANGE IT
For model number KUIC15PHZS0
Hello Ron, Thank you for the question. The Thermistor is also called the Bin Temperature Sensor. You will need to pull the white cover off from the front of the machine. Remove the screw that holds the thermistor in place and unplug the plastic connector and reverse the steps to install. We hope this helps!
1 person found this helpful.
Was this helpful?
Thank you for voting!
Cheryl
August 8, 2018
How to replace the thermistor in a self standing ice maker
Hello Cheryl, thank you for your question. Once you locate the thermistor, it would simply unplug from the wire harness and the new thermistor would plug in and be remounted into its holder. If you would like to know where this part is located in your model, please resubmit a new question with the model number information. I hope this helps!
Was this helpful?
Thank you for voting!
Rodney
March 24, 2023
My 6 yr old Kitchen Aid ice maker stopped making ice. Ice plate gets frosty but the recirculation pump is not circulating water. I replaced the pump and that didn’t help, because the pump never gets the signal to start pumping water. Visual inspection of wire harness inside icebox looks good. The unit beeps every two minutes like it’s sending a start signal to the pump but the pump never cycles on. Any ideas on what and how to troubleshoot next?
For model number KUID508ESS1
Hi Rodney, thank you for reaching out. We have narrowed the issue down to the following parts: the water inlet valve, part number PS11765823, the water filter, part number PS8759230, the temperature sensor, part number PS11755842, and the control board, part number PS12346592. We hope this helps!
Was this helpful?
Thank you for voting!
Related Parts:
Matt
July 17, 2019
Our unit is not making ice. Water is running over the freeze plate but not freezing. Runs a clean cycle normally. It almost seems to be stuck in the defrost cycle to drop the ice on the wire cutters.
For model number KUIC18NNZS0
Hi Matt,
Thank you for your question. If the evaporator chill plate and heat exchanger is not making ice, check to make sure the compressor is coming on. If the compressor is running the issue may be with the sealed system and it will need to be checked by an appliance repairperson. I hope this helps. Thank you and have a great day!
Was this helpful?
Thank you for voting!
Cecil
April 28, 2023
Ice maker is not making ice
For model number KUIX305ESS1
Hi Cecil, thank you for the question. We would recommend checking the water tubes and the filter for clogging. If these are not the issues, then we would recommend checking the water inlet valve, part number PS11765823, to fix the issue. Glad to be of help!
Was this helpful?
Thank you for voting!
Related Parts:
Larry Davis
March 12, 2019
For some reason i can not find an owners manual to download. I am trying to replace the thermistor in the ice bin which should be a simple task if i could just find a manual to tell me how to disassemble the plastic in the front of the bin!
For model number G115NDXZB1
Hi Larry,
Thank you for your question. Here is a link that we found online where you may reference the model number for your ice maker, http://www.manualsdir.com/manuals/496131/whirlpool-gi15ndxzs.html?page=17. I hope this helps. Thank you and have a great day!
Was this helpful?
Thank you for voting!
Steve
December 1, 2022
My ice maker does not seem to shut off and continues to make ice so the fill sensor is bad. Is this the part, WPW10511923, I need to fix that issue? I believe its part #9 in your diagram. Thanks for all of your help.
For model number KUIX505ESS2
Hello Steve, thank you for contacting us. We have researched your model and would recommend checking the following parts to fix your issue: temperature sensor, part number PS11755842, water inlet valve, part number PS11765823, control board, part number PS12346592, and control electric, part number PS11759613. If you need help placing an order for it, please feel free to give us a call. We look forward to hearing from you!
Was this helpful?
Thank you for voting!
Related Parts:
- < Prev
- 1
- Next >
✖
Ask a Question
Ask our experts a question on this part and we'll respond as soon as we can.
Something went wrong. Please try again later.
Your Question Has Been Submitted!
Our experts will send you an email as soon as your question has been answered.
Model Cross Reference
This part works with the following models:
PartSelect Number: PS11755842
Manufacturer Part Number: WPW10511923
Brand
Model Number
Description