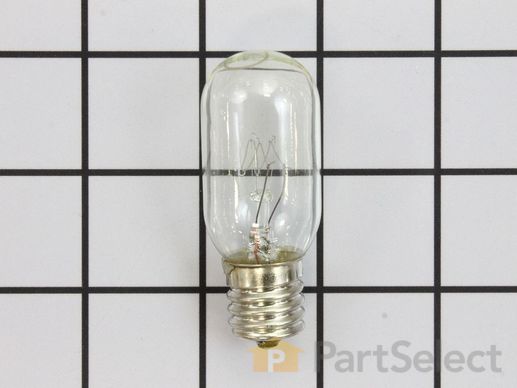
Light Bulb - 120V 25W WPA3073101
Rated by 9 customers
Really Easy
Less than 15 mins
Ratings submitted by customers like you who bought this part.
Get this part fast! Average delivery time for in-stock parts via standard shipping: 1.8 days.
Light Bulb - 120V 25W Specifications

How Buying OEM Parts Can Save You Time and Money
Replacing your Amana Refrigerator Light Bulb - 120V 25W

-
5 Stars 7
-
4 Stars 1
-
3 Stars 0
-
2 Stars 0
-
1 Star 2
- < Prev
- 1
- Next >
- < Prev
- 1
- Next >
- < Prev
- 1
- Next >
-
Janet from PITTSFORD, NY
-
Difficulty Level:Really Easy
-
Total Repair Time:Less than 15 mins
-
Tools:Pliers
Removed screw (1)
Removed light bulb
Put in new light bulb
Closed door to bulb compartment
Returned screw.
Pro tip! Check how many bulbs you need before ordering. Mine only needed two. I got two. I suspect I’ll buy a new microwave before new bulb burns out again. Ordering/deliv ... Read more ery was fast. No need to have spare on hand.
-
Vincent from CHICAGO, IL
-
Difficulty Level:Very Easy
-
Total Repair Time:Less than 15 mins
-
Tools:Screw drivers
-
KELVIN from SOUTHFIELD, MI
-
Difficulty Level:Very Easy
-
Total Repair Time:Less than 15 mins
-
Andy from Somerset, KY
-
Difficulty Level:Easy
-
Total Repair Time:Less than 15 mins
-
Tools:Nutdriver, Pliers, Screw drivers
-
Arau from Haverhill, MA
-
Difficulty Level:Really Easy
-
Total Repair Time:Less than 15 mins
-
Tools:Nutdriver, Screw drivers, Wrench (Adjustable)
As for the thermostat, I loosened the temperature control cover in the top of the refrigerator by pulling down on it, needed to pull out a bit to clear the control levers-easier if they're centered on the 5. I removed the retaining screw in the center of the rear of the cover using a nutdriver, and that lowered the cover enough to remove the screws that held the thermostat assembly in the upper right (also using the same nutdriver that worked on everything else). I removed the electrical connector from the old thermostat and attached it to the new one. The old thermostat didn't have a cover on it like the new one, and it was easier to make sure that the electrical connector was attached by popping the cover apart-attaching the connector, and then snapping it back together. The new unit snapped into place by pressing down firmly, then I re-assembled the cover plate doing the reverse of the removal.
If you don't count the two hours that I spent defrosting the freezer coils with a hair dryer-these were FAST repairs, and the refrigerator is running like new again
-
Bradley from Cosmopolis, WA
-
Difficulty Level:Easy
-
Total Repair Time:15 - 30 mins
-
Tools:Nutdriver, Screw drivers
-
Michael from Chesterfield, VA
-
Difficulty Level:Easy
-
Total Repair Time:30 - 60 mins
-
Tools:Screw drivers
-
Herman from Hughesville, PA
-
Difficulty Level:Easy
-
Total Repair Time:15 - 30 mins
-
Tools:Nutdriver, Screw drivers
lost the owners manual,
part select's schematics were very helpful
thanks
-
THOMAS from STOW, OH
-
Difficulty Level:Really Easy
-
Total Repair Time:Less than 15 mins
- < Prev
- 1
- Next >
Ask our experts a question about this part and we'll get back to you as soon as possible!
- < Prev
- 1
- 2
- Next >

8 people found this helpful.

7 people found this helpful.

3 people found this helpful.


3 people found this helpful.

1 person found this helpful.

1 person found this helpful.

1 person found this helpful.


- < Prev
- 1
- 2
- Next >
Manufacturer Part Number: WPA3073101

Item is in stock and will ship today if your order is placed before 4:00 PM Eastern Standard Time.
If your order is placed after 4:00 PM EST, the in stock items will ship on the next business day.
Item is not in stock and usually ships 3-5 business days from the time you place your order.
Item is not in stock and usually ships 10-15 business days from the time you place your order.
This item is no longer being made by the manufacturer, and cannot be added to your shopping cart.


