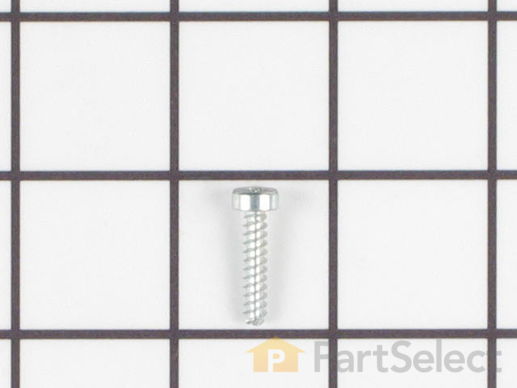
Torx Screw WP3368921
Rated by 5 customers
A Bit Difficult
1- 2 hours
Ratings submitted by customers like you who bought this part.
Get this part fast! Average delivery time for in-stock parts via standard shipping: 1.8 days.
Torx Screw Specifications

How Buying OEM Parts Can Save You Time and Money
- < Prev
- 1
- Next >
-
Scott from BAYSIDE, WI
-
Difficulty Level:A Bit Difficult
-
Total Repair Time:30 - 60 mins
-
Tools:Nutdriver, Pliers, Screw drivers
-
bill from spokane valley, WA
-
Difficulty Level:A Bit Difficult
-
Total Repair Time:15 - 30 mins
-
Tools:Screw drivers, Socket set
-
Ray from Grand Rapids, MN
-
Difficulty Level:Really Easy
-
Total Repair Time:1- 2 hours
-
Tools:Screw drivers, Wrench set
-
Mike from Big Canoe, GA
-
Difficulty Level:Easy
-
Total Repair Time:15 - 30 mins
This was made more difficult by the fact that the screws that hold the burners to the range top were rusted and ... Read more had to be drilled out so the the burners could be released from the top.
1. Disconnect the power to the range.
2. Open the top oven door.
3. Remove 2 - 1/4" sheet metal screws at the front corners of the range top assy. Remove the Burner knobs and the two Phillps screws that holds the gas valve assembly to the range top.
4. With a drill, remove the tops of the screws to release the burners from the range top. If the screws are in good condition and just unscrew them and the upper burners from the Orifice Holders. (I had to replace the orifice holders because the screws were stuck in them due to rust).
5. When the burners are free, lift the range top at the front and remove it from the range. Disconnect the ignitor wires from the ignitors on each holder.
6. To replace the Orifice Holders, disconnect the gas supply pipes from each holder by loosening the compression nut at the holder using an adjustable wrench. Secure the Orifice Holders when loosening the fittings, BE CAREFUL not to damage the aluminum gas supply pipes.
7. Note that there are 3 different Holders, be sure to use the holder that matches the specific location.
8. For LP gas fueled ranges ONLY, remove the small gas jets from the old holders and install them in place of the parts supplied with the new orifice holders. The new parts contain NATURAL GAS jets which are not compatible with LP gas. Each Different Orifice Holder uses a specific orifice or jet, make certain that the orifice matches the orifice holder. Check for leaks at the gas connections using soapy water.
9. Carefully raise the old ignitor switches (4) off the shafts of the gas valves. Note the top and bottom configuration of the switches
10. Carefully release the wires that come from the rear of the range from the rearmost switch. Press a suitable pin or other suitable tool in a the hole, beside the wire, just enough to release the wire. (Look at the NEW switch assemble to see how this works). Remove the wires from the NEW switch first to see how it is done. Repeat the process on the old switches. (you will re-use the wires that come up from the rear of the range.
11. Install the new switch assembly over the four (4) burner gas valves, take care to align the "D" shaped shafts with the holes in each valve.
12. Insert the wires in the two connections on the rearmost switch. CAUTION!!! Be sure to install the wires so that the color codes agree with the wires on the new switch assembly. Black to black and gray to gray.
13. Install the 4 clear plastic "shields" over the shafts and against the top of each switch.
14. Re-connect the ignitor wires to the burners and Re-Install the range top, in the reverse order of dis-assembly.
-
Michael from Dardanelle, AR
-
Difficulty Level:Difficult
-
Total Repair Time:More than 2 hours
-
Tools:Pliers, Screw drivers, Socket set, Wrench (Adjustable), Wrench set
- < Prev
- 1
- Next >
Ask our experts a question about this part and we'll get back to you as soon as possible!
- < Prev
- 1
- Next >

2 people found this helpful.

1 person found this helpful.

1 person found this helpful.


- < Prev
- 1
- Next >


Manufacturer Part Number: WP3368921

Item is in stock and will ship today if your order is placed before 4:00 PM Eastern Standard Time.
If your order is placed after 4:00 PM EST, the in stock items will ship on the next business day.
Item is not in stock and usually ships 3-5 business days from the time you place your order.
Item is not in stock and usually ships 10-15 business days from the time you place your order.
This item is no longer being made by the manufacturer, and cannot be added to your shopping cart.


