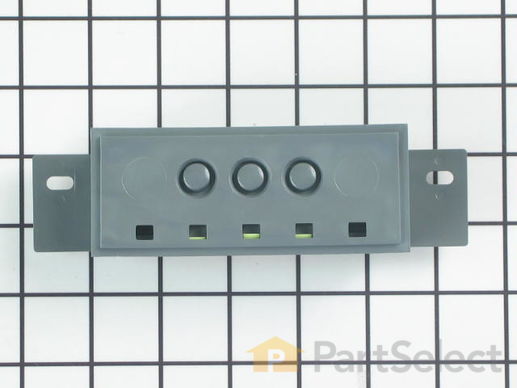
Won’t start | Doesn’t stop at end of compacting cycle
This part works with the following products:
Trash Compactor, Dryer.
Part# W10813586 replaces these:
9871824, W10723644, WP9871824
Customer Reviews
Average Rating:
★★★★★
★★★★★
6 Reviews
4.7
Filter By Rating:
5 Stars
5
4 Stars
0
3 Stars
1
2 Stars
0
1 Star
0
Sort by:
< Prev
1
Next >
Search filter:
Clear Filter
Your search term must have 3 or more characters.
Keep searches simple. Use keywords, e.g. "leaking", "pump", "broken" or "fit".
Sorry, we couldn't find any existing reviews that matched. Try using some different or simpler keywords.
★★★★★
★★★★★
Brad M - August 4, 2023
Verified Purchase
Overpriced
The part itself was not difficult to replace and was the part I needed to repair the old part.
With that said it is way overpriced for being a part that appears to be made up entirely of plastic.
This part goes to my Trash Compacter that is only a few years old. The button that activates the compacter stopped working requiring me to get a new part
★★★★★
★★★★★
Steve B - September 15, 2022
Verified Purchase
easy repair. worked fine.
part was in great condition
★★★★★
★★★★★
Nina B - November 17, 2019
Verified Purchase
Easily installed!
The part fit perfectly.....easily stalled.
Thumbs up!??
★★★★★
★★★★★
Karen C - October 10, 2019
Verified Purchase
Easy Repair
Perfect perfect perfect!! Compactor runs down, up and shuts off like it's supposed to again!
★★★★★
★★★★★
Jim R - August 25, 2018
Verified Purchase
Easy - 4 screws
Fast shipment. Right part.
★★★★★
★★★★★
Cynthia R - July 4, 2018
Verified Purchase
WORKED AS EXPECTED - EXTREMELY PLEASED!!!
OUR TRASH COMPACTOR IS BACK WORKING AGAIN AFTER A YEAR OF SEARCHING FOR SOMEONE TO COME OUT TO REPAIR IT AND UNABLE TO FIND ANYONE!!!!. My husband decided to try to fix it himself before we just bought a new one. We received great advice over the phone from your representative and received exactly the correct part. It took him less than 30 minutes to repair and working perfectly now. We would definitely recommend your company!
< Prev
1
Next >
Customer Repair Stories
Average Repair Rating: 4.4 / 5.0, 5 reviews.
What's this?
Sort by:
< Prev
1
Next >
Search filter:
Clear Filter
Your search term must have 3 or more characters.
Keep searches simple. Use keywords, e.g. "leaking", "pump", "broken" or "fit".
Sorry, we couldn't find any existing installation instruction that matched.
Appliance would not power on
Unplug appliance. Open trash compactor drawer. Remove two small Phillips screws on tabs of control panel. Lift control panel up and out. Mark location of wires on old circuit board. Disconnect wires. Remove two hex head screws retaining circuit board. Discard old board. Place new board in position and reattach with screws. Reconnect wires
... Read more. Replace control panel. Replace two Phillips screws securing panel. Close drawer. Reconnect appliance. Test.
Read less
Ernest from CORP CHRISTI, TX
Difficulty Level:
Easy
Total Repair Time:
Less than 15 mins
Tools:
Nutdriver, Screw drivers
1 of 2 peoplefound this instruction helpful.
Was this instruction helpful to you?
Thank you for voting!
replacing parts that were beginning to rust from outdoor exposure.
I had no problem. My husband is an engineer, so the repairs went well. The only problem I did have was that one of the parts did not arrive. come to find out that it was on backorder and arrived a day or two after I called. The person I spoke with when I inquired was most helpful and expeditious. All in all, my experience was excelle
... Read morent.
the selector off switch was broke so it just kept running
too the switch out and put in new one replaced the front and screwed back together. really easy
ivan from BELTON, TX
Difficulty Level:
Really Easy
Total Repair Time:
15 - 30 mins
Tools:
Screw drivers
1 of 2 peoplefound this instruction helpful.
Was this instruction helpful to you?
Thank you for voting!
trash compactor would not turn on
removed two screws that hold on control panel and then removed three wires to switch then removed two screws that hold switch. I replaced switch and put everything back together. very simple and easy
heather from atco, NJ
Difficulty Level:
Really Easy
Total Repair Time:
Less than 15 mins
Tools:
Screw drivers
1 of 2 peoplefound this instruction helpful.
Was this instruction helpful to you?
Thank you for voting!
motor would not stop at end of cycle
Remove compactor drawer Remove screws holding compactor to counter screw in adjustable feet a short distance slide compactor out far enough to unplug loosen top screws that hold tiedown strips and move tie down strips out of way remove two phillips screws on control panel push control panel assymbly up and ou
... Read moret of front of compactor remove and replace wires one at a time onto new switch remove two phillips screws on old switch and removeswitch.install new switch with same screws install front switch assy by inserting in front panel of compactor and pushing down untill two holes match up for phillip screws. install screws realign both tie down straps and tighten screws plug in compactor push compactor back into place level compactor with adjustable feet replace tiedown screws to underside of counter replace compactor drawer push on/off switch to on. push start switch to start compactor. watch as compactor stops at end of cycle. Hurrah!!
Read less
John from Sandy, UT
Difficulty Level:
Easy
Total Repair Time:
15 - 30 mins
Tools:
Nutdriver, Screw drivers
17 of 23 peoplefound this instruction helpful.
Was this instruction helpful to you?
Thank you for voting!
< Prev
1
Next >
Questions and Answers
We're sorry, but our Q&A experts are temporarily unavailable.
Please check back later if you still haven't found the answer you need.
1 question answered by our experts.
Sort by:
< Prev
1
Next >
Search filter:
Clear Filter
Your search term must have 3 or more characters.
Keep searches simple. Use keywords, e.g. "leaking", "pump", "broken" or "fit".
Sorry, we couldn't find any existing answers that matched.Try using some different or simpler keywords, or submit your new question by using the "Ask a Question" button above!
Oscar
November 28, 2023
Won’t cut off when it comes back up after going down it just sits there and runs bumping I replaced the switch that is supposed to cut it off but it did not stop it from bumping
For model number 66514729112
Hello Oscar, Thank you for your inquiry. We would recommend checking the directional switch, and the drive gear kit if you have already replaced the off switch. We hope this helps.