Washer Drums and Tubs
- Search your model number to find:
- Genuine OEM parts guaranteed to fit
- Free manuals and guides
- Repair instructions and videos
Popular Washer Drums and Tubs
Your Price
$14.29
In Stock
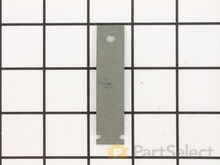
Washer Drum Bearing Slide - Green (Sold individually)
PartSelect Number PS6447706
Manufacturer Part Number WE1M1067
This original equipment manufacturer Drum Bearing Slide is a plastic, green, easy-to-install part for your dryer. It replaces the dryer's front drum slide to allow for easier movement. You'll know if this part is an issue if your dryer is unable to tumble properly or is very noisy. Damage can come from regular use. As the slides start to break down it may cause your dryer to make noise or not dry clothes in the usual amount of time. You will need to purchase two for both sides of your dryer. They attach to the outer-most sides of the bearing. The manufacturer recommends replacing both slides at the same time. Take this opportunity to clean out the lint and dust in the dryer, to keep it running smoothly. This is a genuine replacement part that comes directly from the manufacturer. This item is sold individually. The part attaches to the outermost side of the bearing. Although this part is denoted as being "Green" in its title, many users and technicians have noted that its true colour is closer to a dark gray or black.
Fixes these symptoms
- Marks left on clothes
- Noisy
- See more...
Installation Instructions
Matthew from Plainfield, IL
Due to over loading of the dryer the drum ruined the slides and was making a bad noise due to plastic rubbing plastic
It was pretty easy. After already taking apart the dryer to install a new belt I knew exactly my plan of action. I removed the two screws that hold the top panel of the dryer to the front panel. I then removed the top panel and removed the screws that hold the front to each side panel. I than pulled the front away from the cabinet and drum. I put the new slides in place and installed a new felt strip. I put it back together and that was that. Very easy.
Read more...
Your Price
$18.58
In Stock
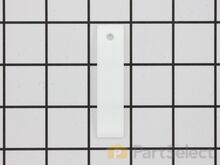
Washer Drum Bearing Slide - White (Sold individually)
PartSelect Number PS755842
Manufacturer Part Number WE1M504
This authentic, white Drum Bearing Slide, also known as the bearing drum slide, glide, or pad, is a plastic, easy-to-install part for your dryer. It replaces the dryer's front drum slide to allow for easier movement. You'll know if this part is an issue if your dryer is unable to tumble properly or is very noisy. Damage can come from regular use. The part attaches to the outermost side of the bearing. Check both slides for signs of wear, because they often wear at the same rate, and should be replaced at the same time; there are 2 of these particular slides per dryer. This part is sold individually, so you'll need to purchase multiple parts if replacing both at the same time.
Fixes these symptoms
- Marks left on clothes
- Noisy
- See more...
Installation Instructions
Matthew from Plainfield, IL
Due to over loading of the dryer the drum ruined the slides and was making a bad noise due to plastic rubbing plastic
It was pretty easy. After already taking apart the dryer to install a new belt I knew exactly my plan of action. I removed the two screws that hold the top panel of the dryer to the front panel. I then removed the top panel and removed the screws that hold the front to each side panel. I than pulled the front away from the cabinet and drum. I put the new slides in place and installed a new felt strip. I put it back together and that was that. Very easy.
Read more...
Your Price
$13.17
In Stock
Washer Drum Glide Bearing - White (Sold individually)
Reviewed YouTube videos.
Patience is required, take your time, take photos of the wires and also make a written wiring chart. This was the flaw in my planning. Reference the schematics from PartsSelect to number the controls. Do NOT use masking tape to identify the wires as they will have all stuck together by the time you go to reinstall them.
Most difficult process was removing and identifying the numerous wires to the back panel. They have push connectors, but some were very difficult to remove. The people doing the "how to" videos no doubt had them partially released and that made it look easy. Examine the connectors before removing to identify how they are captured by the connector. A paper clip "tool" I made enabled me to release some of the capture lugs, but some were so tight, I had to use small needle-nose pliers to open up the lug to release the wire on the connector.
When reinstalling, re-tighten those connectors.
Replacing the parts was much easier than the wiring disconnect/reconnect process. I'm happy to report that replacing the rear bearing and the front 2 green and 2 white shim/bearings immediately and completely solved my problem. For about $150, I restored my dryer to "like-new" functionality and got a lot of satisfaction from doing it. The project took about 4 hours, which could have been reduced to 2 hours had I know about the clip release and wiring identification process. Also, make sure you thoroughly vacuum out your unit while it is disassembled. Good luck!!! Read more...
PartSelect Number PS4704230
Manufacturer Part Number WE3M51
This drum glide bearing is an authentic OEM replacement part that is compatible with dryers. It is white in color and made of highly durable plastic. The bearing allows the drum to rotate smoothly and dry your clothes thoroughly and evenly. It keeps the drum stable and protects it from excessive friction damage. Over time, the bearing may wear down or break due to normal aging or wear from repeated use. If the bearing is no longer able to support the drum, you will likely notice unusually loud grinding or squeaking noises from the dryer. You may also notice increased drying times due to poor drum rotation. Inspect all the bearings on your dryer, as they tend to wear down at the same time. Each drum glide bearing is sold individually.
Fixes these symptoms
- Marks left on clothes
- Noisy
- See more...
Installation Instructions
mike from SUMMERVILLE, SC
Dryer was making increasingly loud "thumping" sound.
Parts were shipped quickly, packaged correctly, and were in original GM packages - very reassuring. BTW, your customer service is excellent.Reviewed YouTube videos.
Patience is required, take your time, take photos of the wires and also make a written wiring chart. This was the flaw in my planning. Reference the schematics from PartsSelect to number the controls. Do NOT use masking tape to identify the wires as they will have all stuck together by the time you go to reinstall them.
Most difficult process was removing and identifying the numerous wires to the back panel. They have push connectors, but some were very difficult to remove. The people doing the "how to" videos no doubt had them partially released and that made it look easy. Examine the connectors before removing to identify how they are captured by the connector. A paper clip "tool" I made enabled me to release some of the capture lugs, but some were so tight, I had to use small needle-nose pliers to open up the lug to release the wire on the connector.
When reinstalling, re-tighten those connectors.
Replacing the parts was much easier than the wiring disconnect/reconnect process. I'm happy to report that replacing the rear bearing and the front 2 green and 2 white shim/bearings immediately and completely solved my problem. For about $150, I restored my dryer to "like-new" functionality and got a lot of satisfaction from doing it. The project took about 4 hours, which could have been reduced to 2 hours had I know about the clip release and wiring identification process. Also, make sure you thoroughly vacuum out your unit while it is disassembled. Good luck!!! Read more...
Your Price
$34.80
In Stock
Washer Upper Drum Glide
What I would add to previous reviews is to pull the front off or the little acces grill in back and check to see what kind of belt you have. According to the model #, It showed the wide flat belt when in fact I had the smaller ribbed belt. Glad I checked before ordering.
A few things that will make your life easier is once you have the old upper guide/seal removed, put down the glue then use several med sized plastic spring clamps to hold the seal in place while the glue sets up, (@ 20-30 min). Their cheap and you should have some around anyway. When replacing the seals I would go ahead and replace the belt too. It's cheap and if your machine is 5+ yrs old probably is worn. Total cost of repair was about $60 (inc shipping). Took about 1 hr 20 min total time. Most of that time was scrapping the old seal material/ glue off the dryer front. Actual disassembly and repair maybe 1/2 hour. Other little tip is the clips for the lid of dryer is to use a flat screwdriver and gently push straight in until it's compressed enough to release the lid, it will pop up when pushed in far enough. That one took me a while to figure out.
Thanks to Part Select for such a helpful site. My dryer is like new again. Read more...
PartSelect Number PS470317
Manufacturer Part Number 5303937139
The upper drum glide is attached to the front panel of your dryer, you can locate it by removing the top portion of your dryer. The drum glide allows the drum to rotate with ease and little sound. The front upper felt glide pad with three nylon glides also includes adhesive, essential for mounting accurately. For this project you will need a putty knife, Phillips screwdriver, and a wire brush. This repair is meant to fix issues such as an abnormal amount of noise or the dryer not tumbling as it should. Consider replacing your belt at the same time if you have a dryer more than 5 years old, as it is likely worn.
Fixes these symptoms
- Marks left on clothes
- Noisy
- See more...
Installation Instructions
Matthew from Portland, OR
Clothes getting scorch marks, drum noise
First and foremost, I read the repair reviews here at parts source and found that a) Other people had the same symptoms, b)following their repair tips made it super easy.What I would add to previous reviews is to pull the front off or the little acces grill in back and check to see what kind of belt you have. According to the model #, It showed the wide flat belt when in fact I had the smaller ribbed belt. Glad I checked before ordering.
A few things that will make your life easier is once you have the old upper guide/seal removed, put down the glue then use several med sized plastic spring clamps to hold the seal in place while the glue sets up, (@ 20-30 min). Their cheap and you should have some around anyway. When replacing the seals I would go ahead and replace the belt too. It's cheap and if your machine is 5+ yrs old probably is worn. Total cost of repair was about $60 (inc shipping). Took about 1 hr 20 min total time. Most of that time was scrapping the old seal material/ glue off the dryer front. Actual disassembly and repair maybe 1/2 hour. Other little tip is the clips for the lid of dryer is to use a flat screwdriver and gently push straight in until it's compressed enough to release the lid, it will pop up when pushed in far enough. That one took me a while to figure out.
Thanks to Part Select for such a helpful site. My dryer is like new again. Read more...
Your Price
$63.95
In Stock
Washer Baffle
PartSelect Number PS11744968
Manufacturer Part Number WP8182233
This part moves the clothes around inside your dryer/washer and helps to direct the flow of hot air during the drying cycle. Sold individually.
Fixes these symptoms
- Marks left on clothes
- Will not agitate
- See more...
Installation Instructions
Carole from Colorado City, AZ
Washer baffle broke off
I snapped the piece into place. It took two people to do the job....one to hold the washer basket from moving and the other to snap it in place. It did take some hard pushing but it worked out great!!!! The repair man quoted me $130.00 for the installation only. And I installed myself it in less than 5 minutes!
Read more...
Washer Drum Baffle
PartSelect Number PS11751921
Manufacturer Part Number WPW10283356
Sold individually. Baffle only. No screws are required. The baffle has hooks that slide onto the basket.
Fixes these symptoms
- Will not agitate
- See more...
Washer HUB
PartSelect Number PS2581262
Manufacturer Part Number W10324651
Fixes these symptoms
- Shaking and Moving
- Will not agitate
- See more...
Your Price
$63.56
In Stock
Washer Tub Baffle
PartSelect Number PS11746266
Manufacturer Part Number WP8540360
This is the replacement tub baffle for your washer. It is made of black plastic and is approximately 13 inches by 2 inches. This part is sold individually and is an OEM part sourced directly from the manufacturer. The tub baffle is found inside the washer tub, and it helps tumble your clothes. If the baffle is damaged or missing, you may notice marks being left on your clothes. The main reason you would replace the baffle is if you notice these marks, or if the baffle is broken, or keeps falling off.
Fixes these symptoms
- Marks left on clothes
- See more...
Installation Instructions
Bud from BUFFALO, NY
baffle broke off
ordered another baffle 5 minutes to install 40 dollars to order .and I saved my self 80 dollars service fee plus parts and laborer.
Read more...
Washer Drum Baffle
PartSelect Number PS3408272
Manufacturer Part Number 134952702
Sold individually.
Your Price
$90.76
In Stock
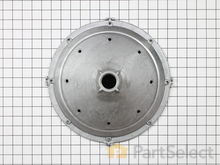
Washer Inner Tub Base Hub
PartSelect Number PS273296
Manufacturer Part Number WH45X10027
This part is the replacement inner tub base hub for your washer. It is made of metal and is approximately 15 inches in diameter. The inner tub base hub fits between the wash tub and the spin basket, and it holds the spin basket on the gear case shaft. The main reason you would want to replace the hub, is if the washer will not agitate, or if you notice excessive noise or shaking when the washer is in use. Be sure to disconnect the washer from the water and power sources before you begin this repair. This part is sold individually and is and OEM part from the manufacturer.
Fixes these symptoms
- Will not agitate
- See more...
Installation Instructions
Joe from Lucedale, MS
The Hub Under the Spinner basket broken/ Deteriorated
Removed front cover, Control panel, top Cover, slasher unit, all very smiple stuff. the hub was broken and the spinner basket came right out. One half Hub attached to Spinner, Other half attached to Hub drive shaft. removing the Hub nut was the hard part. tried impack & socket, No luck. in removal. Had to usr Hammer & Chisel and bust Old Alum. Nut off. Clean up and replace parts. OK. Had to remove water pump and clear debree that went in pump when spinner Hub broke off . the spinner also bursted a crack in the outer poly tube when it cam apart.. Sanded the dmage area and Patched with a good coat of JB Weld. machine is working Like new. The parts all worked Great. the break down Chart was a great Help to get the right parts needed. Thanks
Read more...


