


Appliance Parts
- Accessories
- Dishwasher
- Dryer
- Stove / Oven
- Microwave
- Refrigerator
- Washer
- See more... See less...
Lawn Equipment Parts
- Lawn Mower
- Chainsaw
- Blower
- Generator
- Air Compressor
- Lawn Tractor
- Pressure Washer
- See more... See less...
Shop With Confidence


How To A Fix Refrigerator That's Not Dispensing Water

Click a Part Below to Start Your Repair:
Ice & Water Filter Water Inlet Valve Water Dispenser Actuator Micro Switch Dispenser Control BoardAbout this repair:
- Rated as EASY
- 1940 repair stories
- 29 step by step videos
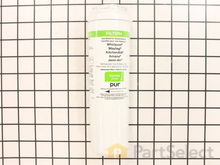
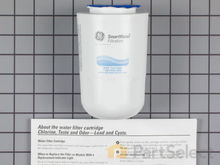
Ice & Water Filter
If so equipped, the ice and water filter in your refrigerator is responsible for removing any debris or contaminants from your water that may remain after local water treatment. Most filters contain and are made up of carbon and a fabric filter. Over time the filter may become restricted and reduce or stop the water flow to the dispenser. Most manufacturers recommend replacing the filter every 6 months, but local water conditions may require that you replace more frequently.
How to inspect your refrigerator’s ice and water filter:
- Consider when you last changed your ice and water filter. How frequently you need to change your filter varies by model and local water conditions, but you should never exceed 12 months of use per filter.
- Find and remove your water filter. The exact location differs from model to model, but it is commonly located in the water line leading to the fridge, behind the base grill, or inside the unit attached to the rear corner or ceiling. If your filter is in the water line, you will need to disconnect the water supply before beginning.
- With the variety of locations and removal instructions, we recommend you follow brand specific directions, or refer to your owner’s manual for specific directions. Take note of the installation date on your calendar before installing the new filter.
- If your filter is damaged or clogged, or if you have exceeded the manufacturers’ recommended guidelines, you will need a replacement ice and water filter.

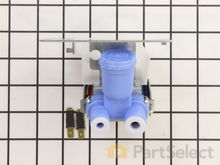
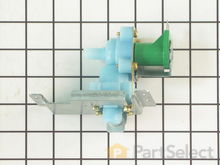
Water Inlet Valve
The water inlet valve is a solenoid-operated device that supplies water to the dispenser when activated. When water is selected at the dispenser control panel, line voltage is supplied to the solenoid of the water inlet valve to allow water to flow. Verify that you have adequate pressure at the inlet to the valve, that the inlet screen is not plugged and that there are no restrictions in the inlet or outlet tubing.
How to test your refrigerator’s water inlet valve with a multi-meter:
- After disconnecting the water supply and unplugging your refrigerator, remove the rear access panel and locate the water inlet valve. It is usually found near the bottom of the fridge.
- Begin by inspecting all the tubing, and their respective connections, for leaks, damage, wear, abrasions, or brittle tubing.
- If you do not locate the source of the leak in the above checks, remove the water inlet valve to test it.
- With a multi-meter in Rx1 mode, touch the terminals with the probes to test for continuity. A functional water inlet valve should put off a reading of 200 to 500 ohms.
- If you receive any other reading, you need a replacement water inlet valve.

Water Dispenser Actuator
The water dispenser actuator is the mechanical part that activates the dispenser micro switch. It is normally a plastic lever that pivots when depressed by your water glass, and it may be covered with a soft plastic pad. You can usually hear a click when the switch is contacted.
How to inspect a refrigerator water dispenser actuator:
- Unplug your appliance and turn off the water supply to the refrigerator.
- Remove the control panel cover and verify that the actuator contacts the dispenser switch properly and if not, check the actuator housing bracket, switch mounting bracket and the actuator pivot itself.
- If you find any issues, you may need a replacement water dispenser actuator. If the actuator is contacting the switch, you will need to check the switch or control board for the source of the problem.


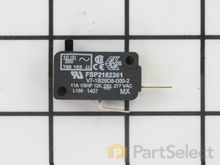
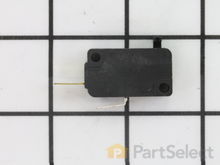
Micro Switch
The dispenser micro switch is a momentary contact switch that when actuated will supply power to the solenoid on the water inlet valve.
How to test a refrigerator micro switch with a multi-meter:
- Disconnect the refrigerator from the power source and turn off the water supply before beginning.
- Remove the control panel of your refrigerator to locate the switch. It will be found behind the pad or lever that is pressed to dispense water.
- After removing the switch, set your multi-meter to the Rx1 setting to test your switch for continuity. You should receive a reading of 200 to 500 ohms.
- If you receive any other reading, you need a replacement micro switch.

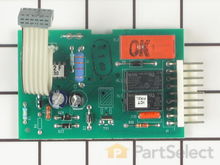
Dispenser Control Board
Some models of refrigerators use an electronic control to supply power to the water inlet valve. If you have verified that the water inlet valve is not getting power and the actuator and switch are operating properly, then you may have a defective electronic control.
How to inspect a refrigerator’s dispenser control board:
- Begin by turning off the water supply and unplugging your refrigerator.
- The dispenser control board is usually located on the freezer door and it’s where you select all the settings for your refrigerator.
- Remove the frame holding the control board in place, using caution to not break or crack the frame as your remove it.
- Inspect the dispenser control board for any signs of damage, wear, burning, or shorted connections.
- If you find any of the above issues, you will need a replacement dispenser control board.


More Repair Parts
Still not sure which part is broken? We can offer you custom troubleshooting help if you search with your model number.
