We're sorry, but our Q&A experts are temporarily unavailable.
Please check back later if you still haven't found the answer you need.
3 questions answered by our experts.
< Prev
1
Next >
Sort by:
Search filter:
Clear Filter
Your search term must have 3 or more characters.
Keep searches simple. Use keywords, e.g. "leaking", "pump", "broken" or "fit".
Sorry, we couldn't find any existing answers that matched.Try using some different or simpler keywords, or submit your new question by using the "Ask a Question" button above!
Matthew
March 26, 2018
Do these baffles come with the screws that hold them? If not where can i find them?
For model number Ghw9200lq
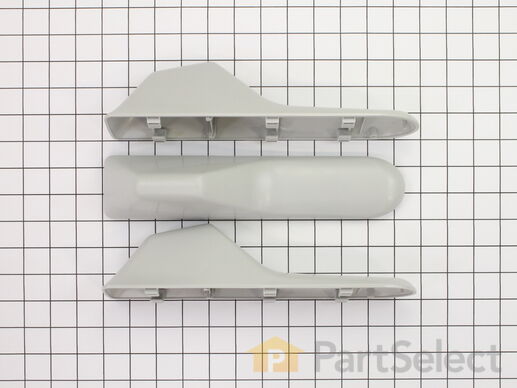
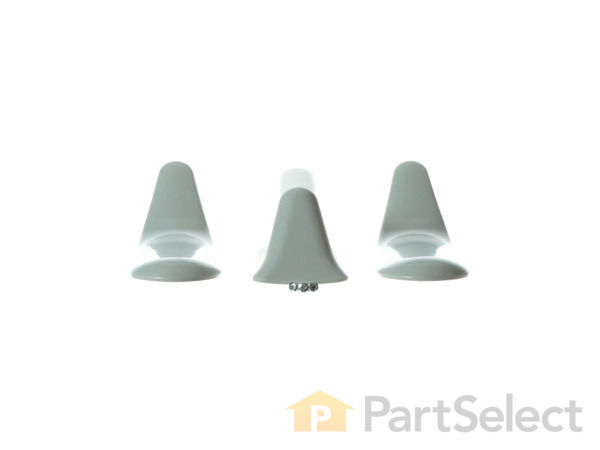
Hello Matthew, thank you for your question. This Baffle Set part number 285976 does not come with the screws. The baffle screw is part number 3196427 Screw. They are sold individually. I hope this helps! Good luck with your repair!
6 people found this helpful.
Was this helpful?
Thank you for voting!
Anna
May 5, 2023
Does this part fits a kenmore washer he3 model no 11042832200?
For model number 11042832200
Hi Anna, thank for reaching out. Yes, the given part is compatible with your model. We hope this helps, good luck with this repair!
1 person found this helpful.
Was this helpful?
Thank you for voting!
Abraheem
June 12, 2023
What baffle model is compatible with the above model number. Thanks.
For model number Wfw9400sw03
Hi Abraheem, thank you for reaching out. The baffle set you mentioned is not compatible with your model. The compatible part which comes with your model is the baffle, part number PS11751113. We hope this helps!
Average Repair Rating: 4.0 / 5.0, 9 reviews.
What's this?
< Prev
1
Next >
Sort by:
Search filter:
Clear Filter
Your search term must have 3 or more characters.
Keep searches simple. Use keywords, e.g. "leaking", "pump", "broken" or "fit".
Sorry, we couldn't find any existing installation instruction that matched.
Baffle broke off
The baffles do push thru slots in the drum and by then pulling them towards you, it moves slightly locking them into place. There are screws supplied and they could be installed to aid in the baffles not coming off as ofter but this cannot by done by the average person for you would need special tools and allot of fixet smarts and patience. My washer can be set at a higher spinout speed and this does save on drying costs but the trade off is the baffles break off way too often. There are metal tabs in the drum that are raised up and snap behind tabs on the underside of the baffles as you slid them towards you install them. If you rebend these tabs up with a longnose pliers twice as high as they are, they will have more holding force, keeping the baffles from coming off as often. In my opinion, the baffles should have been designed to slide backwards to lock them in place, not foward. If you look at how they are shaped, they natually have pressure pushing them towards the back of the drum in the spin cycle which just contributes to the problem of them coming off in the first place.
Robert from Ellison Bay, WI
Difficulty Level:
Really Easy
Total Repair Time:
Less than 15 mins
3 of 4 peoplefound this instruction helpful.
Was this instruction helpful to you?
Thank you for voting!
baffle broke off
snapped in place
Debra A. from Cinnaminson, NJ
Difficulty Level:
Really Easy
Total Repair Time:
Less than 15 mins
2 of 5 peoplefound this instruction helpful.
Was this instruction helpful to you?
Thank you for voting!
All 3 baffles had broken
Repair was described as a simple 5 minute job following the enclosed directions. There were no directions included. Customer service replied they could not provide any instructions. I located a technical manual online and determined the steps necessary to replace the baffles. While some may just click them in, a proper repair requires the control pannel and machine housing to be removed. Then the tub assembly must be removed and the plastic tub separated from the basket. Three screws (one for each baffle must be installed. (I recommend using blue loctite to keep the screws from backing out). The entire process must then be reversed. This is a slightly complicated (note the pencil is to mark the locations of clips for ease of reinstallation. I am an Engineer and this process took over 2 hours and required a significant amount of space to lay out the parts as the machine was totally disassembled. This assembly is best accomplished with 2 people and an entire afternoon without interruption. It can be done by anyone with some mechanical skills, but find the consumer services technical manual first and be prepared to keep track of a lot of small and large parts. This is not the simple 5 minute job described by others (unless you just want to snap the baffles on the basket and not lock them down). In that case go ahead and order a few more sets as the clips will break and the baffles will slide off and you will be replacing them about every 6 months.
Jennifer from Christiansburg, VA
Difficulty Level:
Very Difficult
Total Repair Time:
More than 2 hours
Tools:
Screw drivers, Socket set, Wrench (Adjustable), Wrench set
4 of 9 peoplefound this instruction helpful.
Was this instruction helpful to you?
Thank you for voting!
Missing 2 Baffles
Easy to install. Baffles came with 3 screws and no directions. The screws unnecessary and we easily figured out how to install. Quick delivery, 1-2 days.
leigh from Chapel Hill, NC
Difficulty Level:
Really Easy
Total Repair Time:
Less than 15 mins
3 of 4 peoplefound this instruction helpful.
Was this instruction helpful to you?
Thank you for voting!
Broken baffle in tub
First I removed the remain remaining baffle using a screw driver to gently pry and break the plastic tabs which held it to the drum. I replaced all three in the event that the balance could be affected if I were to only replace the broken ones. The replacements slid in and locked into place easily but I did have to gently apply pressure with a large-shanked screwdriver using the rear of the drum to push off of. The hardest part was being able to see what I was doing inside of the dark tub! I needed an extra hand to hold a flashlight. I then discovered the worth of my black and Decker light bar which has a magnetic base! Perfect for the job! I agree with an earlier post that there is no need to suffer the effects of a washer with a missing baffle when you can replace it so easily.
Donna from Salineville, OH
Difficulty Level:
Really Easy
Total Repair Time:
Less than 15 mins
Tools:
Screw drivers
4 of 5 peoplefound this instruction helpful.
Was this instruction helpful to you?
Thank you for voting!
one of the baffles came off
The design of the baffle assembly must be a little off. Seems that the baffles must come loose at the screw and it tends to cause the attachment nubs to wear. The parts were delivered in no time, had the screws to replace the old screws (which was cool) all in all, the install went without a hitch. Plus, the site is great, easy to identify parts and the order process is a piece of cake. Maybe your folks could come over and redesign our parts site!
Tim from Kent, WA
Difficulty Level:
Really Easy
Total Repair Time:
15 - 30 mins
Tools:
Nutdriver, Screw drivers
2 of 4 peoplefound this instruction helpful.
Was this instruction helpful to you?
Thank you for voting!
One of the Baffle's had broken free from the drum.
While looking at the new baffle it became evedent that I would need to remove the top of the unit to secure the new baffle to the drum. This was easly done by removing the top of the unit. I removed the three screws from the top back of the unit. Once the top was off I located the inlet tube for the detergent to the drum. I was able to spin the drum and locate the underside of the baffle by looking through the hole where the tube had been attached . I then installed the baffle and snapped it in place. I turned the drum to locate the hole again and installed the screw that was supplied with the new baffle. I then returned the tube back to the location it had orginally been installed. I returned the top and reinstalled the screws to the back of the unit. Whrilpool wanted to replace the entire drum at a cost of $480.00 for the part alone. This is much more cost effective with just a small bit of work. I have contacted Whrilpool for the part number and they would only tell me that I needed a whole drum. I was contacted by a rep from Whrilpool and she told me that I was wrong I could not have done this without replacing the whole drum. My wife will tell all who ask that this unit is working wonderfully.
Loren from Brownsboro, AL
Difficulty Level:
Really Easy
Total Repair Time:
Less than 15 mins
Tools:
Screw drivers
45 of 49 peoplefound this instruction helpful.
Was this instruction helpful to you?
Thank you for voting!
Broken baffle
I wasted 2 years washing clothes in mu Duet before I repaired it in just two minutes. In those 2 years we destroyed numerous articles of clothing because the missing baffle left sharp metal corners that cut holes in to so many of our clothes. The replacement baffle was easy to find on partselect.com as were installation guides. I can't believe how easy it was!
michael from barrington, RI
Difficulty Level:
Really Easy
Total Repair Time:
Less than 15 mins
16 of 22 peoplefound this instruction helpful.
Was this instruction helpful to you?
Thank you for voting!
Baffle broke.
The baffle just slipped on with no tools required. The best thing was that we received our parts the next day after ordering them, and we just paid for regular shipping!
Erin from Coldwater, MS
Difficulty Level:
Really Easy
Total Repair Time:
Less than 15 mins
3 of 6 peoplefound this instruction helpful.
Was this instruction helpful to you?
Thank you for voting!
< Prev
1
Next >
Customer Reviews
Average Rating:
★★★★★
★★★★★
6 Reviews
4.8
Filter By Rating:
5 Stars
5
4 Stars
1
3 Stars
0
2 Stars
0
1 Star
0
< Prev
1
Next >
Sort by:
Search filter:
Clear Filter
Your search term must have 3 or more characters.
Keep searches simple. Use keywords, e.g. "leaking", "pump", "broken" or "fit".
Sorry, we couldn't find any existing reviews that matched. Try using some different or simpler keywords.
★★★★★
★★★★★
Derek R - August 29, 2021
Verified Purchase
Easy to install
Fit great and simple to install. I only needed one but I replaced all three. Works great and would definitely buy again.
★★★★★
★★★★★
Michael C - March 12, 2020
Verified Purchase
Just what I needed.
Easy installation and helpful video to do the repair.
★★★★★
★★★★★
David B - August 21, 2018
Verified Purchase
Worked just as shown on youtube.
Fit perfect! Was shocked to see all the screws on the original baffles were missing.
★★★★★
★★★★★
Mike W - July 19, 2018
Verified Purchase
Right part! Great service!
The part was exactly what I needed, and the installation couldn't have been easier,
★★★★★
★★★★★
Markley B - April 4, 2018
Verified Purchase
WRONG PARTS
Parts select people were great but evidently Whirlpool does not offer the correct baffle for my washer tub . Very disappointed in Whirlpool and now forced to purchase a new washer even though mine would work good if I could get the right part . So off to buy new Kenmore this weekend .
★★★★★
★★★★★
Randy J - March 15, 2018
Verified Purchase
Baffle Set repaired the off balance.
Our Whirlpool Duet washer had a couple of the baffles break loose and were tumbling with the clothes. One was still attached. I looked for repair parts and the replacement parts were ordered. They came a day earlier than proposed. That was good because the laundry was piling up. Though not exactly the same shape as the original they fit and work just as well. The three screws to hold the baffles were included, though this review says they are sold separately. Unfortunately your site did not provide any instructions on removal or installation of the new parts. I thought that maybe I should call in a repair specialist to do the job but I was able to view a "You tube" video that explained perfectly how to do the job. It was very simple to do.
< Prev
1
Next >
Model Cross Reference
This part works with the following models:
PartSelect Number: PS970109
Manufacturer Part Number: 285976
With the Fix app, you can quickly and easily find information on your appliance, along with videos and articles to help you fix it.
"Like magic. I took a picture of the model number on my refrigerator, and the app identified it right away … Very convenient. I'm impressed." ★★★★★ - Clever Jeff
★★★★★
You added 1 item to your cart
✖
$
Qty:
Total item(s) in cart:
Order Subtotal
$
*Taxes and shipping will be applied during checkout