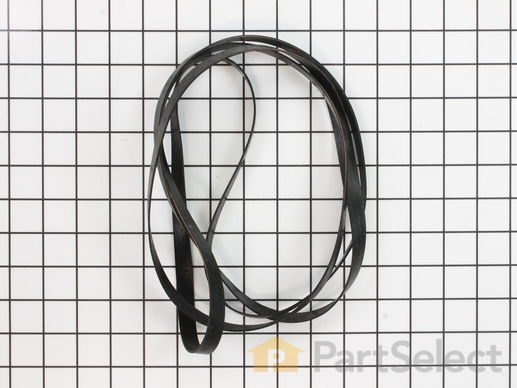
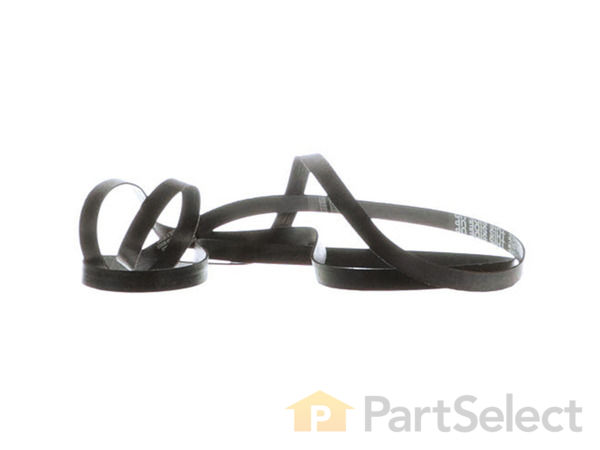
Flat Style Belt
$
27.11
In Stock
Get this part fast! Average delivery time for in-stock parts via standard shipping: 1.8 days.
PartSelect Number PS459830
Manufacturer Part Number 5303281154
Manufactured by
Frigidaire

Check if this fits your product and find model diagrams
Need help finding your model number?
Product Description
Flat Style Belt Specifications
This is a flat style ridgeless dryer belt.

How Buying OEM Parts Can Save You Time and Money
Troubleshooting
This part fixes the following symptoms:
Noisy
This part works with the following products:
Dryer.
This part works with the following products:
Frigidaire, Westinghouse, Kelvinator, Gibson.
Part# 5303281154 replaces these:
AP2142651, 3372, 08015141, 3281154, 5303281154-, 8015141, Q000063806, Q000063807, Q000063808, Q000063812, Q63806, Q63807, Q63808, Q63811, Q63812, WQ63807, WQ63808, WQ63812
Questions and Answers
Ask our experts a question about this part and we'll get back to you as soon as possible!
- < Prev
- 1
- Next >
Sort by:
Search filter:
Clear Filter
Your search term must have 3 or more characters.
Keep searches simple. Use keywords, e.g. "leaking", "pump", "broken" or "fit".
Sorry, we couldn't find any existing answers that matched.Try using some different or simpler keywords, or submit your new question by using the "Ask a Question" button above!
Larry
November 5, 2018
Drum turns until you put clothes in. White Westinghouse dryer
For model number DE170ADD1

Hello Larry, Thank you for the question. I suggest checking the belt, Part Number: PS459830. Make sure it does not have wear or is lose and slipping with the weight int he drum. If the belt is good you may have a defective or weak motor. I looked up the part and it is listed as No Longer Available/Discontinued. There is no part substitutions listed. My suggestion here would be to call the manufacturer and see if they can provide you with a substitution for these part numbers. Hope this helps!
1 person found this helpful.
Was this helpful?
Thank you for voting!
- < Prev
- 1
- Next >
✖
Ask a Question
Ask our experts a question on this part and we'll respond as soon as we can.
Something went wrong. Please try again later.
Your Question Has Been Submitted!
Our experts will send you an email as soon as your question has been answered.
Customer Repair Stories
Average Repair Rating: 3.1 / 5.0, 20 reviews.
What's this?
- < Prev
- 1
- 2
- Next >
Sort by:
Search filter:
Clear Filter
Your search term must have 3 or more characters.
Keep searches simple. Use keywords, e.g. "leaking", "pump", "broken" or "fit".
Sorry, we couldn't find any existing installation instruction that matched.
Broken Dryer Belt
1st I pried the dryer top open then disconnected the two wires for the auto shut-off. Removed four nuts with driver that opens front and releases dryer barrel. Lifted front up a bit to remove from two lower tabs at bottom of unit and put aside.
I then slid the belt over the barrel noting the side up directions on the belt. On the lower left on the back of unit I opened up the vented cover to reveal the motor pulley and belt tension pulley. I put the belt on the pulley and brought the belt tension pulley over the belt. I then aligned the belt to the proper point on the barrel and reattached the front being careful to center the barrel onto the rim that is built into the front. Take care to align all the tabs and shims in the correct order so that barrel rotates freely. Replace auto shut off wires to switch on inside of front and close top.
-
Tod from West Springfield, MA
-
Difficulty Level:A Bit Difficult
-
Total Repair Time:1- 2 hours
-
Tools:Nutdriver, Screw drivers, Wrench set
21 of 27 people
found this instruction helpful.
Was this instruction helpful to you?
Thank you for voting!
Belt Broke
Very easy install. Removed the top and front of dryer, and put new belt on drum. Also replaced Idler Pulley (altho didn't really need to.)
I've had the dryer more than 20 years, so I am really glad such a simple repair will keep it going!
Parts arrived very quickly - great service from PastSelect!
I've had the dryer more than 20 years, so I am really glad such a simple repair will keep it going!
Parts arrived very quickly - great service from PastSelect!
Other Parts Used:
-
Patricia from Clifton Park, NY
-
Difficulty Level:Really Easy
-
Total Repair Time:15 - 30 mins
-
Tools:Nutdriver
9 of 12 people
found this instruction helpful.
Was this instruction helpful to you?
Thank you for voting!
belt broke
first I remove the top cover,then the front cover. Then slide in the belt. that it.
Other Parts Used:
-
Tony from Flushing, NY
-
Difficulty Level:Really Easy
-
Total Repair Time:15 - 30 mins
-
Tools:Screw drivers, Socket set
8 of 17 people
found this instruction helpful.
Was this instruction helpful to you?
Thank you for voting!
Broken belt
My local repair parts shop did not have the part in stock. Shipping was really fast, so I repaired the dryer in less time than it would have taken if I had let my local shop order the belt for me. Repair was simple, just unplug dryer, pry up the front of the top, remove 4 screws from the top inside of front panel, disconnect two wires from door switch, pull front off, and slip belt around tub. Remove small panel on rear (2 screws), place belt around pulley and move tensioner in place. Reassemble front panel and rear panel.
-
Jerry from Hartselle, AL
-
Difficulty Level:Really Easy
-
Total Repair Time:Less than 15 mins
-
Tools:Nutdriver, Screw drivers
5 of 5 people
found this instruction helpful.
Was this instruction helpful to you?
Thank you for voting!
Belt broken, drum did not rotate, broken lint screen
First of all, check the feedback on your parts installation at partselect.com. You can learn alot and make the job that much easier. I simply popped the top lid on the dryer, remove the electrical connections to the front panel shut off, then removed the screws and popped the tabs for the front panel to install the new belt around the drum. I then opened the back louvered panel to loop the belt correctly around the pulley and proceeded to reinstall both the front and top panels. The lint screen is a simple two screw installation with little or no issues. Once installation was complete the dryer fired up and the drum began to spin once again. A simple repair done at a great savings!
Other Parts Used:
-
John from Rutherford, NJ
-
Difficulty Level:Easy
-
Total Repair Time:1- 2 hours
-
Tools:Pliers, Screw drivers, Socket set
4 of 5 people
found this instruction helpful.
Was this instruction helpful to you?
Thank you for voting!
Drive belt broke
Removed 4 screws from 8" service panel from rear of dryer removed panel
Removed 4 screws holding rear of dryer top, removed rear brackets. compressed spring retainers on front of dryer top, removed dryer top.
Removed 2 screws from inside of dryer front, removed dryer front.
Removed old belt, cleaned machine, installed new belt on dryer drum, inspected rear service panel to insure belt had reached the drive motor.
Reinstalled front of dryer, being sure to hold drum up in position to match front panel..
Went back to rear service panel and installed belt on motor pulley and tension pulley.
Set top back on dryer, test ran dryer for short time to ensure all was functioning properly.
Installed dryer top, and brackets.
Installed service panel.
-
William from Pearce, AZ
-
Difficulty Level:Difficult
-
Total Repair Time:More than 2 hours
-
Tools:Screw drivers
4 of 5 people
found this instruction helpful.
Was this instruction helpful to you?
Thank you for voting!
Dryer drum would not turn
I first removed a vent cover in the back where the idler is located. With pliers I removed the tension off the spring. Next I simply slide the idler off the post. I pulled up on the top panel which opened like a clam shell. I used a flat blade screw driver to separate the front panel from the dryer so I could slide the new belt around the drum. I reversed the steps. All in all it was easy. It took me about 30min including cleanup.
Other Parts Used:
-
Ben from Weaverville, NC
-
Difficulty Level:Easy
-
Total Repair Time:15 - 30 mins
-
Tools:Nutdriver, Pliers, Screw drivers
3 of 5 people
found this instruction helpful.
Was this instruction helpful to you?
Thank you for voting!
broken belt and pulley
First of all, I've purchased a belt from local service center that cost me more than $21 (local tax is 8.5%). But, I can not find the idel pulley assembly so I searched on the Internet and ordered from PartSelect.com.
Surprisedly, my order came just one day - they must cross-ship from local distribution that it's even faster than to get those in local stores (driving .. and hope they have what I want ..).
I've replaced the belt 2 days ago - it's easy with 4 screws removed to pull out the front door. The back panel is opened with 2 screws remove, and very easy to replace the pulley.
It's a heavy duty gas dryer made in 1989 and this is the third time I changed the belt and the first time to change a new pulley. I would recommend to change the idle pulley because I may not need to change the belt if I have had replaced it last time. A broken or not functional idle pulley may damage the belt in a short time.
Appliance such as gas dryer like mine will last forever with replaceable belt and pulley. I'm really happy to see a working dryer (almost 20 years old) and my wife is asking a small component for her washer .. that I think I can easily fix that too .. with the help of PartSelect search.
Hope this will help.
John
Other Parts Used:
-
John from Temple City, CA
-
Difficulty Level:Easy
-
Total Repair Time:Less than 15 mins
-
Tools:Nutdriver, Pliers, Socket set, Wrench (Adjustable)
3 of 7 people
found this instruction helpful.
Was this instruction helpful to you?
Thank you for voting!
worn belt and squeaky bearring
remove the top and front of the dryer, then removed the idler assembly. This enabled me to rimove the belt form the drum and replace it and the idler assembly. Not difficult at all.
Other Parts Used:
-
Robert from Philipsburg, MT
-
Difficulty Level:Easy
-
Total Repair Time:More than 2 hours
-
Tools:Nutdriver, Pliers, Screw drivers, Socket set
3 of 8 people
found this instruction helpful.
Was this instruction helpful to you?
Thank you for voting!
Dryer wouldn't spin, belt broken
Popped the top of the dryer off. Removed 3 screws from lower front panel. Removed front panel slide belt over drum, remove 2 bolts from rear panel and installed belt over motor and around idler tensioner. Reinstalled front panel and top of dryer . Also greased idler pulley to shaft , beings tensioner was okay. Plugged in and tested dryer, it was okay.
We went to PartSelect. com and order the belt and it was fast shipping. We couldn't find the belt anywhere else. Thanks for PartSelect.
-
Reveice E from Arcadia, FL
-
Difficulty Level:Really Easy
-
Total Repair Time:15 - 30 mins
-
Tools:Nutdriver, Screw drivers
3 of 4 people
found this instruction helpful.
Was this instruction helpful to you?
Thank you for voting!
- < Prev
- 1
- 2
- Next >
Customer Reviews
Filter By Rating:
- < Prev
- 1
- Next >
Sort by:
Search filter:
Clear Filter
Your search term must have 3 or more characters.
Keep searches simple. Use keywords, e.g. "leaking", "pump", "broken" or "fit".
Sorry, we couldn't find any existing reviews that matched. Try using some different or simpler keywords.
Teodor C - May 11, 2022
Verified Purchase
Replacing belt
Perfect fit, great price and fast delivery. I highly recommend this seller.
John F - January 7, 2022
Verified Purchase
Successful dry repair
Parts arrived in a timely manner, were easy to install and worked as desired.
Joan N - March 27, 2021
Verified Purchase
Quick and easy
The new part came quickly and was exactly what was needed to repair my dryer.
Alan D - September 17, 2019
Verified Purchase
Perfect Fit
Slow shipper but very good parts. Order when you have some time to complete the repair. Very good selection of parts so I will re-order but will schedule appropriately.
David S - December 10, 2018
Verified Purchase
Worked as expectes
Was leary of ordering the part but so far I'm pretty happy I did. The belt appears to be holding up well.
Mike S - February 2, 2018
Verified Purchase
Works as good as new
Nothing more to say
- < Prev
- 1
- Next >
You May Also Need?
Model Cross Reference
This part works with the following models:
PartSelect Number: PS459830
Manufacturer Part Number: 5303281154
Brand
Model Number
Description