Keep searches simple. Use keywords, e.g. "leaking", "pump", "broken" or "fit".
Sorry, we couldn't find any existing reviews that matched. Try using some different or simpler keywords.
★★★★★
★★★★★
Russel E - May 21, 2022
Verified Purchase
Works great
Works great easy install
★★★★★
★★★★★
Ray C - November 10, 2020
Verified Purchase
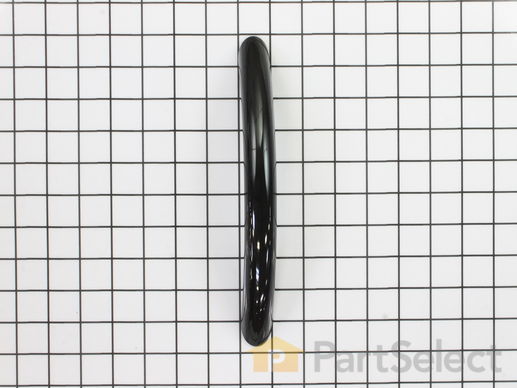
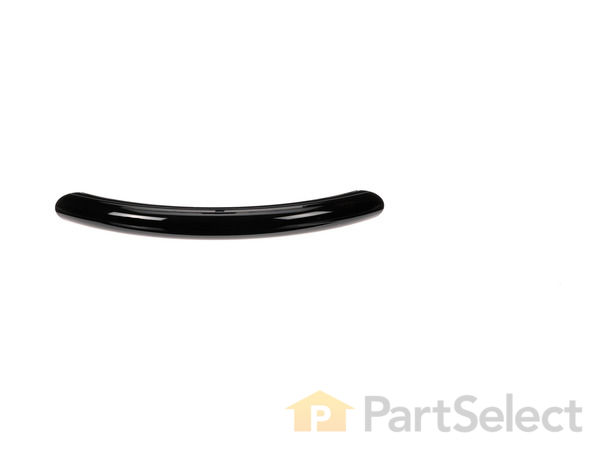
Great handle
Exactly what I needed. Description was right on!!
★★★★★
★★★★★
Tony C - July 21, 2020
Verified Purchase
easy to repair after getting the front part of door off
part is correct replacement !!!!!
★★★★★
★★★★★
Dean M - April 5, 2019
Verified Purchase
Worked out well
I have had this microwave for 17 years and didn't think the handle would fit. I am happy to report it fit perfect.
I did strip one of the wholes with the existing screws but I had another a bit longer and it worked great.
★★★★★
★★★★★
Carol S - January 14, 2019
Verified Purchase
Microwave door handle
Received as advertised
★★★★★
★★★★★
Wendy M - December 30, 2018
Verified Purchase
Hard to change
The part was perfect, but there were no instructions on how to replace the handle, after awhile and with help was able to replace the broken handle.
★★★★★
★★★★★
David B - November 9, 2018
Verified Purchase
Quick and Easy
The part was delivered within a few days and I was ale to install it quickly. Overall good experience
★★★★★
★★★★★
George M - July 10, 2018
Verified Purchase
Easy Repair, Worked as Expected
Part worked as expected. Had to pry the door off before I removed the old handle but after that it was smooth sailing.
★★★★★
★★★★★
Joseph A - May 13, 2018
Verified Purchase
Wrong Part, I Paid Return Postage
I ordered a part by giving the model number of my microwave which included SS for stainless steel. I received a black handle. When I contacted PartSelect I was told I ordered a black handle even though my model # indicated stainless and that I would be responsible for the cost of returning the part. When asked if I wanted to reorder the part I said I will get it from another company. I will not do business with PartSelect EVER!!!!!!!!! Wish I could rate them with zero stars !!!!!!!
★★★★★
★★★★★
Brent C - May 2, 2018
Verified Purchase
handle of gold
$60 bucks...really???
< Prev
1
Next >
Customer Repair Stories
Average Repair Rating: 3.3 / 5.0, 7 reviews.
What's this?
Sort by:
< Prev
1
Next >
Search filter:
Clear Filter
Your search term must have 3 or more characters.
Keep searches simple. Use keywords, e.g. "leaking", "pump", "broken" or "fit".
Sorry, we couldn't find any existing installation instruction that matched.
Door handle discintegrated
Had left the small break in the handle go too long, There fore the screw holes in the door had wallowed out. Had to put some small washers in to bridge the wallowed out screw hole. The ends of the handle had broken off on the end of the mounting screws, had to use pliers and the screwdriver to get the plastic mounts off. There was enoug
... Read moreh room for the washers so no additional adaptation was needed. It all went back together very easily.
Read less
Stephen from ELIZABETH, CO
Difficulty Level:
Really Easy
Total Repair Time:
1- 2 hours
Tools:
Pliers, Screw drivers
1 personfound this instruction helpful.
Was this instruction helpful to you?
Thank you for voting!
Door Handle failed (cracked at mount)
KitchenAid Microwave [Model: KHMS 145 JBS-0]Door Handle Repair Tools and Parts • Door Handle [Part # PS390101] • Putty Knife • Phillips Screwdriver • Tray (cup) for parts during disassembly/reassembly (3 screws on door; 2 screws on handle; spacer on top-door edge). Instructions • Preparation o Di
... Read moresassembly can be managed with the door mounted on the unit. The handle is attached by 2-screws that can be accessed only by separating the outer/inner door panels. o Before starting the project, watch the Youtube.com video for a GE Microwave, which is the most applicable video for removing the collar [i.e., plastic bezel around the viewing window on the inner door) and for separating the outer/inner door panels ].
• Remove the collar Photo 1: Inner-side clip (bottom of collar) used on 3-sides of the collar (top edge is a spacer) Photo 2: Hinge side clip (right edge)
o As indicated in the video, small clips are on the inner-side of the collar on 3-sides (top, bottom, and open-door edge). o The clips are on the outside of the collar for the door-hinge side. o These clips are small and somewhat fragile – once a few are popped, finger pressure will generally pop the remaining clips.
• Separate the outer/inner door panels
Photo shows the inner/outer doors separated, and the 3-screws removed. o Remove the 3-screws on the door edge before separating the outer door panel. o There is a plastic spacer on the top, outside edge of the door that is not cemented. Remove the spacer after separating the door panels. o Use a putty knife to pop the clips for the outer-door panel around the top, bottom, and open-door sides. o The top door corner (the spacer edge) is tight and should be gently pushed back. o The outer door panel will remain attached on the hinged edge and function like a second door – move gently. o The viewing glass is clamped in place; but, handle with caution.
• Remove the Door Handle o With the outer/inner panels separated, remove the two screws holding the handle and remove the handle. o Retain the screws for later use.
• Install the new Door Handle o Reuse the original screws (Note, [Part # W10841091 – screw] is a different thread, and is not self-tapping) o The door-handle screw holes are not tapped; so insert the old screws in the handle to tap before installing the handle, leaving approximately 1/8 - 3/16” exposed. o Remove the screws and reuse to install the handle.
Comparison of 2-original screws vs. replacement screw (note thread gauge differences). • Reinstall the Outer Door Panel o Align the spacer with the inner-panel edge in the upper corner. o Close the outer panel, gently snapping the clips into place. o Reinstall the 3-screws on the door edge.
• Reinstall the Collar o Snap the hinge side in place. o Gently snap the remaining sides in place
Broken handle (top of the handle actually broke off the screw)
After taking the three screws out of the side of the door, I actually had to get help from my Dad who came over and was able to pry the top corner of the door out of the casing. I was afraid I was going to break the door. Once he got the door pried apart, I was able to replace the handle, clean the entire door and quickly snap it back i
... Read morento place and then replaced the screws.
Read less
Jennifer from Seymour, TN
Difficulty Level:
A Bit Difficult
Total Repair Time:
15 - 30 mins
Tools:
Screw drivers
1 personfound this instruction helpful.
Was this instruction helpful to you?
Thank you for voting!
Replaced the door handle
It's a simple repair but costly. Just open the door remove the three screws on the side of door. Now use a small screw driver or metal putty knife to remove the chooker collar around the door " be careful this can easly be broken". Okay now the metal inner door is easier to remove if you slightly bend the tabs up around the door. Look car
... Read moreefully you should be able to see where they catch. Once you do that carefully seperate the outter door cover. Careful sometimes it will pop right out and fall. Please no more further repairs needed. Just screw in the new handle push tabs back out on the metal inner door then snap everything back together and reinstall the three screws.
Read less
Wesley from Yuma, AZ
Difficulty Level:
A Bit Difficult
Total Repair Time:
15 - 30 mins
Tools:
Screw drivers
1 personfound this instruction helpful.
Was this instruction helpful to you?
Thank you for voting!
Door handle on microwave replacement
I opened the door to the microwave, I removed any screw visible with a screwdriver that's behind the door itself. Next you need to get inside of the door frame, so you need to slip something thin, like a metal putty knife in between and slowly pry it open, it comes out real easy. Now the screws that hold the handle are visible and easily
... Read morereached. When your finished replacing the handle, carefully squeeze with your hands the two pieces together again and put back the screws. Thats it.
Read less
sal from Brooklyn, NY
Difficulty Level:
Easy
Total Repair Time:
Less than 15 mins
Tools:
Screw drivers
60 of 88 peoplefound this instruction helpful.
Was this instruction helpful to you?
Thank you for voting!
Cracked front panel and door handle
Used flathead screwdriver around the interior edges of the front panel to pry off the front panel. The handle comes with it and along with a glass panel inside. Pry off that glass panel and transer it to the new front panel and pop it back in. I removed the two screws from the cracked handle and used them to install the handle to the n
... Read moreew front panel. But, before this I added a couple of plastic washers to hopefully distribute the load better against the front panel and maybe prolong the life of the repair. I cleaned the interior glass, since that's hopefully the last we'll ever see of it. Take the whole assy and just snap it back in place on the door. This $100 in parts probably saved me $600-700 for a new microwave / over-oven install charge.
I removed the plastic exterior of the door. The plastic exterior has to be pried off. The handle is fastened to the new exterior plastic face, and this is snapped on.
We're sorry, but our Q&A experts are temporarily unavailable.
Please check back later if you still haven't found the answer you need.
7 questions answered by our experts.
Sort by:
< Prev
1
Next >
Search filter:
Clear Filter
Your search term must have 3 or more characters.
Keep searches simple. Use keywords, e.g. "leaking", "pump", "broken" or "fit".
Sorry, we couldn't find any existing answers that matched.Try using some different or simpler keywords, or submit your new question by using the "Ask a Question" button above!
Susan
August 28, 2017
Does this handle #8169738 have two plastic tube like pieces on the top and bottom to attach to the door? My previous one did, and those tube things cracked in half, so half is still stuck onto the door. I'm not sure if i should order a new handle only, or just replace the whole microwave. I'm not able to just find those tiny tube pieces to attach the handle back on.
For model number Whirlpool MH1150xms-1
Hi Susan,
Thank you for your inquiry. Yes, this handle will have the same connections as the old one. For information on how to install the handle scroll down the page and there is information on how to install the handle. I hope this helps. Thank you and have a great day!
5 people found this helpful.
Was this helpful?
Thank you for voting!
Colby
July 31, 2019
I purchased a replacement handle and I am having a hard time prying off the door. After reading the other reviews, I do not know if it is supposed to be so difficult.
For model number MH1150XMS1
Hi Colby,
Thank you for your question. Before you begin any repair please unplug the appliance from the electrical outlet. You will need to remove the plastic lining around the inside of the door. There are retainer clips holding the liner in place and you will need to use a putty knife to remove it. Depending on the type of microwave you have, you may have to come in from the bottom or from the top to remove the lining. Gently slide the putty knife in between the lining and the frame and go around the frame and gently pry it loose. On the hinge side you will need to come in from the backside to pry the lining off. If after you remove the lining you only see 2 screws, unthread them to see if the handle will come off. If it does not come off, you will have to remove the inside door panel in the same way you removed the lining. Once removed, unthread the remaining 2 screws and remove the old handle. Install the new door handle and reinstall both the inner door panel and the lining. Restore power to the microwave and everything should now work for you. I hope this helps. Thank you and have a great day!
3 people found this helpful.
Was this helpful?
Thank you for voting!
Karen
December 3, 2018
Is this handle the correct one for my model and is it silver?
For model number KHMS155LSSO
Hello Karen, Thank you for contacting us. I have researched the model you have provided and have found the part you’re looking for is Part Number: PS556624 for the Silver Handle. Thank you for your inquiry, good luck with this repair!
Does the inner door need to be removed on this model to replace the handle or just the trim piece?
For model number MH1150XMS1
Hello Harry, Thank you for the question. The Inner Panel will need to be replaced. Thank you for your question. Before you begin any repair please unplug the appliance from the electrical outlet. You will need to remove the plastic lining around the inside of the door. There are retainer clips holding the liner in place and you will need to use a putty knife to remove it. Depending on the type of microwave you have, you may have to come in from the bottom or from the top to remove the lining. Gently slide the putty knife in between the lining and the frame and go around the frame and gently pry it loose. On the hinge side you will need to come in from the backside to pry the lining off. If after you remove the lining you only see 2 screws, unthread them to see if the handle will come off. If it does not come off, you will have to remove the inside door panel in the same way you removed the lining. Once removed, unthread the remaining 2 screws and remove the old handle. Install the new door handle and reinstall both the inner door panel and the lining. Restore power to the microwave and everything should now work for you. We hope this helps!
1 person found this helpful.
Was this helpful?
Thank you for voting!
Sandra
September 23, 2019
Do you have a handle part to replace on this model i found part number 8169738 will this fit thank you
For model number YKHMS1850SB0
Good Day Sandra. Thank you for your question in regards to your unit (Model Number YKHMS1850SB0). Based on our research the handle that is compatible with your unit was sold as part of a Door Assembly Kit which has been discontinued by the manufacturer. We unfortunately no longer have any left in our inventory. We would recommend reaching out to the manufacturer as they may be able to advise of an alternative part that would be compatible with your unit. Best Regards.
Was this helpful?
Thank you for voting!
Maria
February 8, 2022
Hi I have a Whirlpool Range that the heat doesn't hold. I think the thermostat needs to be replace but I don't see the part available for this model?
For model number WERP4120P2
Hello Maria, Thank you for contacting us. We have researched the model you have provided and have found the part you are looking for is PartSelect Number PS11749737. If you need help placing an order, customer service is open 7 days a week. Please feel free to give us a call. We look forward to hearing from you!
I have a similar question: Part # 8169738 is the correct handle for this model, but I also need the two two plastic retainer pins on the top and bottom to attach the handle to the door. The answer provided here separately confirms these pins do not come with the new handle and are sold separately. So what part no are those pins?
For model number MH1150XMS3
Hello Max, Thank you for the question. The Pins that are attached to the handle that the screw goes into is sold as part of the handle. If you need help placing an order, customer service is open 7 days a week. Please feel free to give us a call. We look forward to hearing from you!