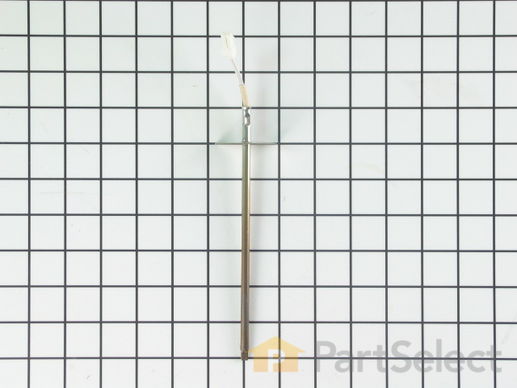
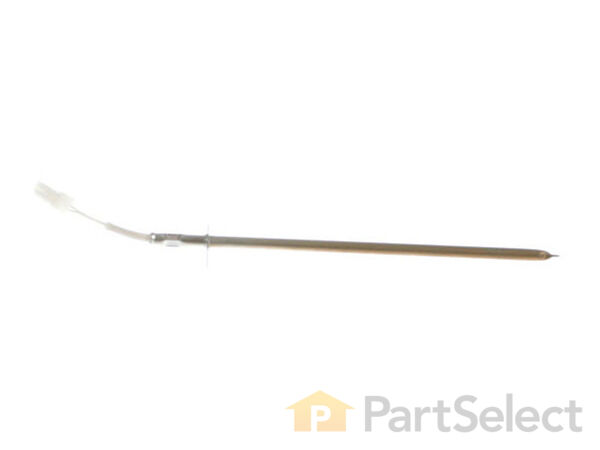
This oven temperature sensor, for ranges, works together with the oven control board to measure and regulate the oven temperature. The sensor detects the temperature in the oven cavity. If the following symptoms occur, replacing the temperature sensor could be the solution: Little or no heat when baking, oven not heating evenly, oven will not start, and/or oven is overheating. Often, if the sensor is defective, the oven temperature will fluctuate and be inaccurate by more than 50 degrees. The tool needed for this replacement is a #2 square head screwdriver or a #2 Philips screwdriver. Remember to unplug the range before installing the part.
Keep searches simple. Use keywords, e.g. "leaking", "pump", "broken" or "fit".
Sorry, we couldn't find any existing reviews that matched. Try using some different or simpler keywords.
★★★★★
★★★★★
Shane B - June 20, 2019
Verified Purchase
Easy to replace and great price
This took me a few minutes to repalce and with the help of an online video I got it done like a pro. Thanks for fair pricing and not incredulous markup to make up for so many appliances being made to be "throw aways" now a days.
★★★★★
★★★★★
Michael S - November 20, 2022
Verified Purchase
Perfect All Around
Fast delivery of accurate part. Fair price.
★★★★★
★★★★★
Roger H - September 30, 2022
Verified Purchase
easy repair
It came quickly and gives great heat accuracy
★★★★★
★★★★★
George B - January 26, 2021
Verified Purchase
Easy repair
The part was excellent.. thank you
★★★★★
★★★★★
Judy H - June 7, 2018
Verified Purchase
Oven sensor
Came quickly. Easy to install. Now going to replace the other one.
★★★★★
★★★★★
Marilyn G - March 6, 2023
Verified Purchase
Extremely Easy Repair!!!
I was so nervous about doing the repair myself; however, the part was very easy to install! It took no time at all. I was also impressed with the quick delivery of the part. If I ever need parts again, this will definitely be my "go-to" store.
★★★★★
★★★★★
Sharon W - December 7, 2019
Verified Purchase
Easy fix
This was the easiest fix I’ve ever done. The video was great. It took 5 minutes.
★★★★★
★★★★★
John W - April 17, 2018
Verified Purchase
Fixed my oven.
Part was easy to install with a video of how to replace it.
★★★★★
★★★★★
Brad M - December 25, 2024
Verified Purchase
Easy to replace
My old probe was causing erratic temps at higher temps. This probe was easy to replace and the erratic temp variations leveled out.
★★★★★
★★★★★
Julie L - January 26, 2018
Verified Purchase
Quick & Easy Fix. Worked Perfectly!
Fast shipping. Arrived in perfect condition. Quick and easy replacement and worked as promised.
< Prev
1
2
3
Next >
Customer Repair Stories
Average Repair Rating: 4.3 / 5.0, 17 reviews.
What's this?
Sort by:
< Prev
1
2
Next >
Search filter:
Clear Filter
Your search term must have 3 or more characters.
Keep searches simple. Use keywords, e.g. "leaking", "pump", "broken" or "fit".
Sorry, we couldn't find any existing installation instruction that matched.
My gas oven would take a long time to ignite. It would also struggle to maintain temperature, and give false readings.
I removed the oven door first, then pulled the unit away from the wall being careful of the floors. I unplugged the oven, and turned off the gas feed. I worked on the thermostat first. I followed the wiring from the inside of the unit to the back panel, and disconnected the cable. Two philips head screws held in place - swapped it out for
... Read more the new one - and there you go. Some insulation might also poke out when your snaking the wired through, so just tuck that back in as best you can. Then I moved onto the igniter. I followed the wiring, and disconnected it at the back panel. The igniter was held in place with two hex bolts ( I can't remember the exact sizing since I just kept going down in sizes until it fit snugly on the bolt head). The metal plate they bolt into was warped, but with a little persuasion from some pliers it was easy to bend for better access to the bolts. Be careful if you are doing this since the bracket is attached to the burner tube and too much torque is always bad for hollow metal parts. Attach and wire up the new igniter, still being careful to replace any insulation that creeps out. Plug the unit back in. Turn on the gas feed. Push it back into place. Replace the oven door - and there you go. I had also purchased an oven thermometer that hangs from the wire racking. I had the oven on at 350 for 30 minutes and the temperature never really swayed more than 15 degrees. It also heated up substantially faster.
after watching the video, installed the temp sensor. Super easy
Paul from HARMONY, MN
Difficulty Level:
Very Easy
Total Repair Time:
15 - 30 mins
1 personfound this instruction helpful.
Was this instruction helpful to you?
Thank you for voting!
Oven stopped heating, error message stated heating element
Very easy. Pulled the stove away from the wall. Used a screw driver to remove the two nuts to release the heat sensor, disconnected the wire, removed the sensor. Inserted the new sensor, plugged back into the circuit. put the two nuts back. Beware, if the first time you put the oven on, if the error message comes back up (mine did
... Read more) push the cancel/off button, wait a few minutes, put oven back on. System probably needed to reset. Mine worked perfectly after.
Read less
Lana from WATERVILLE, ME
Difficulty Level:
Really Easy
Total Repair Time:
Less than 15 mins
Tools:
Screw drivers
3 of 3 peoplefound this instruction helpful.
Was this instruction helpful to you?
Thank you for voting!
range would not heat right
very easy watched the howto you gave
bobby from HERSCHER, IL
Difficulty Level:
Really Easy
Total Repair Time:
30 - 60 mins
Tools:
Screw drivers
1 personfound this instruction helpful.
Was this instruction helpful to you?
Thank you for voting!
Oven not reaching temperature
Simple-pulled range away from wall, unplug from socket. Removed back panel unscrewed thermoses and replace. Put back panel back on plug in, tested temperature setting before sliding range back on place
Marsha from Clermont, FL
Difficulty Level:
Really Easy
Total Repair Time:
Less than 15 mins
Tools:
Screw drivers
2 of 2 peoplefound this instruction helpful.
Was this instruction helpful to you?
Thank you for voting!
Oven sensor was not regulating heat set for oven
Following your installation, the old part came out easily, with new part installing easily., oven heat is being regulated properly..with range pulled out for part replacement, got that area cleaned too
Linda from SAINT CLOUD, MN
Difficulty Level:
Really Easy
Total Repair Time:
30 - 60 mins
Tools:
Screw drivers
3 of 3 peoplefound this instruction helpful.
Was this instruction helpful to you?
Thank you for voting!
Oven would not maintain temperature and LR burner would not turn on
Oven temperature sensor was very easy to replace - just need a Philips screw driver. Gas manifold valve for burner was a little awkward but not hard to do - I used pliers to undo because I didn't have a wrench to fit. It all went fine.
I watched the repair video on this site and another on YouTube before I started. The rear panel has a different shape and two additional screws on the bottom edge. The power clip was easy to manipulate. This was an easy fix for a seventy year-old like me!
David from BURNSVILLE, MN
Difficulty Level:
Really Easy
Total Repair Time:
15 - 30 mins
Tools:
Screw drivers
3 of 3 peoplefound this instruction helpful.
Was this instruction helpful to you?
Thank you for voting!
temp sensor went oven not heating
the hardest part was moving stove to trplace part
patrick from HUGHESTOWN, PA
Difficulty Level:
Very Easy
Total Repair Time:
Less than 15 mins
Tools:
Screw drivers
4 of 5 peoplefound this instruction helpful.
Was this instruction helpful to you?
Thank you for voting!
Oven temperature was 50 degrees off
Unplugged stove. Pulled stove out. Unscrewed screws and removed cover. Removed & replaced sensor. Reinstalled cover & screws. Plugged in stove and pushed back in. Only problem was when I pulled stove out, lid opened and disconnected the gas line to a burner.
Gregory from BRIDGEBORO, GA
Difficulty Level:
A Bit Difficult
Total Repair Time:
30 - 60 mins
Tools:
Screw drivers
1 of 2 peoplefound this instruction helpful.
Was this instruction helpful to you?
Thank you for voting!
< Prev
1
2
Next >
Questions and Answers
We're sorry, but our Q&A experts are temporarily unavailable.
Please check back later if you still haven't found the answer you need.
119 questions answered by our experts.
Sort by:
< Prev
1
2
3
Next >
Search filter:
Clear Filter
Your search term must have 3 or more characters.
Keep searches simple. Use keywords, e.g. "leaking", "pump", "broken" or "fit".
Sorry, we couldn't find any existing answers that matched.Try using some different or simpler keywords, or submit your new question by using the "Ask a Question" button above!
Miguel
August 28, 2017
After the oven reach preheat set point we put the food in but just 5 minutes later foods burn up, and came up with a fault detected disable power to clear, which part can be bad? Thanks
For model number gfe461lvs0
Hi Miguel,
Thank you for the question. Sounds like you need to replace the oven temperature sensor. The sensor detects the temperature in the oven cavity. If the following symptoms occur, replacing the temperature sensor could be the solution: Little or no heat when baking, oven not heating evenly, oven will not start, and/or oven is overheating.
Hope this helps!
32 people found this helpful.
Was this helpful?
Thank you for voting!
Richard
January 7, 2018
Why is the temperature 25 degrees less in our oven? Why when the oven is set for 350 does it only reach 325 degrees?
For model number Rf111pxsq1
Hi Richard, Thank you for the question. This sounds like an issue with the Oven Sensor, PartSelect Number: PS11749737.This oven temperature sensor, for ranges, works together with the oven control board to measure and regulate the oven temperature.Testing the temperature sensor probe on your oven is easy. With the sensor at room temperature, measure the resistance between the two prongs at the end of the sensor connector. The resistance of the sensor should read approximately 1080 – 1090 ohms at room temperature. Hope this helps!
31 people found this helpful.
Was this helpful?
Thank you for voting!
Jim
August 9, 2017
How do you test the temperature sensor (probe) with a multimeter?
For model number KERS202BWH0
Hi Jim,
Thank you for your inquiry. To test your probe with a multi-meter. First you must set your meter to the lowest setting. Then calibrate your meter so that the needle is on zero. Disconnect the power to your appliance and then remover your sensor. At the end of your sensor, the little plug in has two separate holes on the inside. Take the probes on each end of your meter, place one in each hole. If your meter stays at zero, your sensor will need to be replaced. I hope this helps!
13 people found this helpful.
Was this helpful?
Thank you for voting!
Greg
November 2, 2017
When my oven preheat alarm goes off, the indicator reads 350 but the oven actual temp is only 250.
For model number WFG231LVS0
Hi Greg,
Thank you for your question. It sounds like you may want to replace your oven temperature sensor. You can test it with a multi meter to double check though. The part should read 0 when tested. If your meter does not move then the part is bad and needs to be replaced. Good luck with your repair.
13 people found this helpful.
Was this helpful?
Thank you for voting!
Ashley
April 26, 2018
I cannot get a multimeter to read my sensor. I ordered a new one and same issue. Could something be shorting it out? Also how do I test my control board to make sure it isn't bad? The oven has been overheating.
For model number MER8775AB0
Hi Ashley, Thank you for the question. You should be able to get a reading on the sensor since it is not installed on the appliance during testing, so if there is a short in the appliance it should not effect the sensor.Testing the temperature sensor probe on your oven is easy. With the sensor at room temperature, measure the resistance between the two prongs at the end of the sensor connector. The resistance of the sensor should read approximately 1080 – 1090 ohms at room temperature. If the oven is not coming on at all I suggest replacing the control board. Unfortunately there is no way to test the board its self but you can see if the board is receiving 120 vac. Hope this helps!
7 people found this helpful.
Was this helpful?
Thank you for voting!
John
April 29, 2018
I have error code F3E0. Is this the oven temperature sensor?
For model number WFG361LVQ0
Hello John,
Thanks for your question. Yes, this indicates an issue with the oven temperature sensor, and it should be replaced.
I hope this helps.
7 people found this helpful.
Was this helpful?
Thank you for voting!
Chera
November 29, 2018
My oven keep burning food and it now has a error code f3e2 not sure what this is. Please help since i cant use my oven for 3 min without the food burning and the alarms going off
For model number MER8775AS
Hi Chera,
Thank you for your question. The F3 E2 error code senses the temperature in the oven is too high and that you may have a failed sensor. You will need to test the sensor with a multimeter. When testing the sensor with a multimeter, the sensor should be tested at room temperature and it should be unplugged from the oven. You will need to measure the resistance between the two prongs at the end of the sensor connector. Replace the oven sensor if the reading is less than 900 Ohms or more than 1200 Ohms. I hope this helps. Thank you and have a great day!
7 people found this helpful.
Was this helpful?
Thank you for voting!
Marianne
August 8, 2017
What does error code f3e2 mean on the control panel when my oven beeps slowly and constantly until we turn off the oven?
For model number TES325MQ0
Hello Marianne, thank you for contacting us. That code is telling you the electronic control on the range detected a high temperature in the oven. This can be caused by a defective oven temperature sensor or the electronic range control board. You can test the temperature sensor (probe) with a multimeter. Hope this helps!
6 people found this helpful.
Was this helpful?
Thank you for voting!
Janey
November 12, 2017
Hello, we had a power surge at our house and now my oven barley heats up. The broiler works and the stovetop works, but the oven does not get above 200 degrees. Do i just need to ordered the baking sensor? Thank you!
For model number MAYTAG mer8775as0
Hi Janey,
Thank you for your inquiry. If the oven is not heating evenly, then you will need to check both the oven sensor and the bake element with a multimeter to verify which part is causing the issue. I hope this helps. Thank you and have a great day!
6 people found this helpful.
Was this helpful?
Thank you for voting!
Don
August 25, 2017
While trying to bake, the entire stove shuts off. It stays off for a minute of two, and then turns back on, but have lost the oven temp. When i reset the bake temp, oven turns back on for a while, then entire stove shuts off. I suspect the oven does not ever get up to full temperature.
For model number RF362LXTQ
Hello Don, thank you for contacting us. Yes, It does sound like the oven sensor could be at fault. You can test this with a multi-meter. Hope this helps!
6 people found this helpful.
Was this helpful?
Thank you for voting!
< Prev
1
2
3
Next >
Model Cross Reference
This part works with the following models:
PartSelect Number: PS11749737
Manufacturer Part Number: WPW10181986