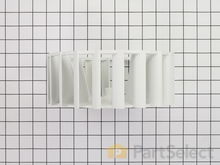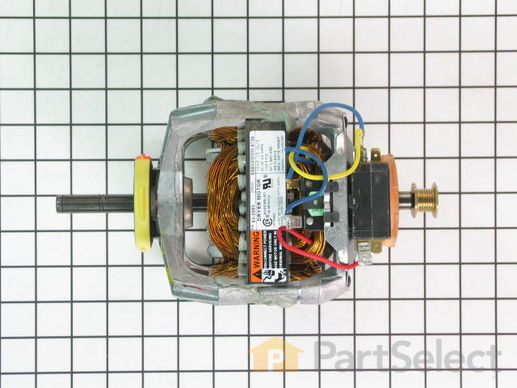
Drive Motor W10410996
Rated by 7 customers
Easy
30 - 60 mins
Ratings submitted by customers like you who bought this part.
Get this part fast! Average delivery time for in-stock parts via standard shipping: 1.8 days.
Drive Motor Specifications

How Buying OEM Parts Can Save You Time and Money
-
5 Stars 1
-
4 Stars 0
-
3 Stars 0
-
2 Stars 0
-
1 Star 0
- < Prev
- 1
- Next >
- < Prev
- 1
- Next >
- < Prev
- 1
- Next >
-
Richard from Ames, IA
-
Difficulty Level:Easy
-
Total Repair Time:1- 2 hours
-
Tools:Nutdriver, Pliers, Screw drivers
-
Marty from Sterling heights, MI
-
Difficulty Level:Easy
-
Total Repair Time:30 - 60 mins
-
Tools:Socket set
2. Removed two screws and pulled front cover off.
3. Removed drive belt from tensioner pulley and moved to back of dryer.
4. Pulled drum off rear guide wheels and lifted drum out of dryer.
5. Unplugged motor electrical connector and removed idle ... Read more r wheel spring and idler assembly.
6. Removed screws holding blower wheel cover to case.
7. Removed snap ring and spring clamp from blower wheel and pulled blower wheel off motor shaft.
8. Popped rear motor clamp off with screwdriver.
9. Unscrewed screw holding rear motor support to dryer bottom and removed rear motor support.
10. Twisted motor assembly 1/8 turn to right and pulled motor rearward out of blower housing.
11. Removed blower rear snap ring from old motor and moved to new motor shaft.
12. Reversed procedures 1-10 to install motor, connector, idler, blower wheel, blower wheel cover, drum, belt, front cover and top cover.
-
Craig from Westfield, IN
-
Difficulty Level:A Bit Difficult
-
Total Repair Time:30 - 60 mins
-
Tools:Nutdriver, Screw drivers
-
Randy from Loganville, GA
-
Difficulty Level:A Bit Difficult
-
Total Repair Time:30 - 60 mins
-
Tools:Nutdriver, Pliers, Screw drivers, Wrench (Adjustable)
Pick the top up at the front and swing up. Inside each side of the front is a screw to remove. Do not forget to unhook the door switch wires. Pull the drum. Push belt off as you remove the drum. Works better to reach in at the lower right and take the belt off of the tighener first.
After you clean o ... Read more ut any lint in area unplug the wires from the motor and snap off the hold down clamp on the back bearing.
The blower needs to be released fromt he shaft. The snap ring in front of the blower needs to be taken off. This can be done with a screw driver by prying off the flat spot on the shaft. However, a snap ring pliers would be better. The front of the blower housing must come off as the blower must come off. There is a snap ring behind the blower that must come off also.
The biggest problem I had was removing the front motor bearing housing from the plastic blower housing. It is easy once you see that the front bearing housing is held in by four tabs in the plastic housing. By rotating the front bearing housing 90 degrees you will be able to pull it out.
From there just reverse your action. The belt went on ok. I found by putinng the belt on the drum and the motor drive pully first I was able to reach in an put the belt over the tighener.
-
Jeffrey from Rogers City, MI
-
Difficulty Level:A Bit Difficult
-
Total Repair Time:30 - 60 mins
-
Tools:Nutdriver, Screw drivers
Reached in above motor to remove belt from around pulley and tensioner wheel, Pulled drum and belt out of machine.
Removed approxim ... Read more ately 10 screws around perimeter of blower housing and removed cover to access blower wheel. Removed outer lock ring from shaft and clamp from blower wheel hub, and removed blower wheel.
Took out tensioner assembly.
Disconnected wiring connector from motor.
Removed three screws that held blower housing to bottom and removed retainer around rubber motor mount at pulley end of motor. Lifted out motor, blower housing and vent pipe as one unit.
Removed 2nd outer lock ring from motor shaft.
Rotated motor frame 45 degrees to free the rubber mount from the blower housing.
Screwed new pulley onto new motor shaft and cleaned blower housing and vent pipe.
Assembly is reverse of disassembly.
Inspected and lightly greased the glides and inspected the idler wheels before reinstalling drum.
Dryer works perfectly.
Five to ten minutes also spent unscrewing and replacing timer knob and hinge pins on lid of matching washer Crosley cw22b5v.
Very simple repair.
-
Don from Elma, IA
-
Difficulty Level:Easy
-
Total Repair Time:30 - 60 mins
-
Tools:Nutdriver, Pliers, Screw drivers, Wrench (Adjustable)
-
William from Marion, VA
-
Difficulty Level:Really Easy
-
Total Repair Time:30 - 60 mins
-
Tools:Screw drivers
- < Prev
- 1
- Next >
Ask our experts a question about this part and we'll get back to you as soon as possible!
- < Prev
- 1
- Next >

6 people found this helpful.

5 people found this helpful.

2 people found this helpful.

1 person found this helpful.


- < Prev
- 1
- Next >


Manufacturer Part Number: W10410996

Item is in stock and will ship today if your order is placed before 4:00 PM Eastern Standard Time.
If your order is placed after 4:00 PM EST, the in stock items will ship on the next business day.
Item is not in stock and usually ships 3-5 business days from the time you place your order.
Item is not in stock and usually ships 10-15 business days from the time you place your order.
This item is no longer being made by the manufacturer, and cannot be added to your shopping cart.


