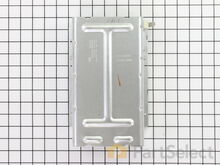
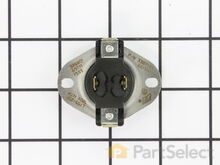
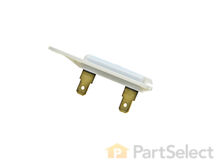
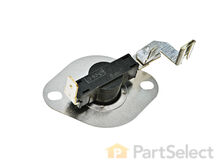
Part Location Diagram of 279816 Whirlpool Thermal Cut-Off Kit
See part 9 in the diagram
Replacing your Whirlpool Dryer Thermal Cut-Off Kit
( Grid squares measure 1x1 inch )
Customer Service Representative

Get in touch, we're here to help!

Monday to Saturday
8am - 9pm EST

customerservice@partselect.com

Thermal Cut-Off Kit 279816

 Fits your KEYS677EQ0!
★★★★★
★★★★★
137 Reviews

Rated by 121 customers 

Easy 

30 - 60 mins 

Ratings submitted by customers like you who bought this part.

$ 36.55
  In Stock

Get this part fast! Average delivery time for in-stock parts via standard shipping: 1.8 days.

 Fits your KEYS677EQ0!
PartSelect Number PS334299
Manufacturer Part Number 279816
Manufactured by Whirlpool for Whirlpool, Kenmore, Maytag, Roper
Product Description

Thermal Cut-Off Kit Specifications

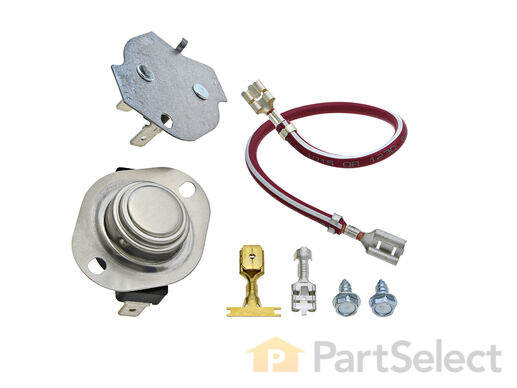
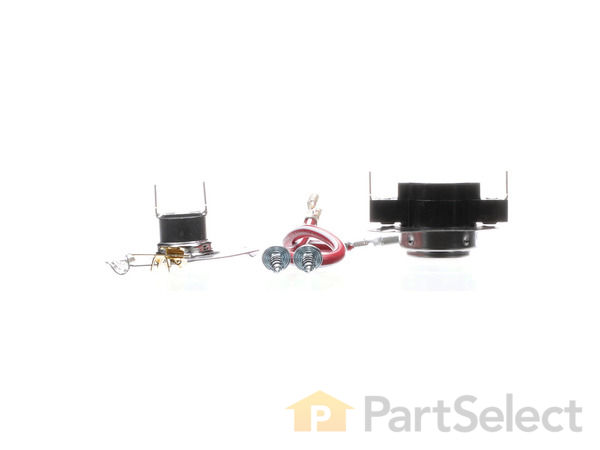
The thermal cut-off (Dryer Thermal Cut-Off Fuse Kit, Dryer Thermal Cut-Off Kit) prevents the dryer from overheating when the dryer high limit thermostat fails in a closed circuit condition. This part fails when the heater housing does not have adequate airflow through it; this is normally caused by restriction in the exhaust vent, plugged lint screen, or broken blower wheel. If this part fails, the dryer may not produce any heat. This kit includes one high-limit thermostat with a limit of 250 degrees Fahrenheit, and one thermal cut-off fuse (309 degrees), jumper wires, and new female spade terminals. Both components are mounted on the heater housing, and measure approximately 2 inches long and 1.5 inches wide each. This kit comes in silver and is constructed of metal.
How Buying OEM Parts Can Save You Time and Money

How Buying OEM Parts Can Save You Time and Money

Part Videos
Difficulty: Easy | Tools Required: Nutdriver,Screw drivers
Repair Tip: Determine the cause of the reduced airflow that caused the thermostat and thermal cut-off to fail.

Replacing your Whirlpool Dryer Thermal Cut-Off Kit

Replacing your Whirlpool Dryer Thermal Cut-Off Kit

Test If Your Electrical Part is Failing - Multimeter Tool

Test If Your Electrical Part is Failing - Multimeter Tool
Troubleshooting
This part fixes the following symptoms:
Too hot | Not Heating | Heat stays on after drum has stopped
This part works with the following products:
Dryer, Washer Dryer Combo.
Part# 279816 replaces these:
AP3094244, 2651, 279816, 279816, 279816VP, 3399848, 3977393
Back to Top
Customer Reviews
Average Rating:
★★★★★
★★★★★
137 Reviews
4.7
Filter By Rating:
  • 5 Stars
    113
  • 4 Stars
    15
  • 3 Stars
    2
  • 2 Stars
    2
  • 1 Star
    5
Sort by:
  • 1
  • 2
  • 3
Sorry, we couldn't find any existing reviews that matched. Try using some different or simpler keywords.
  • 1
  • 2
  • 3
Customer Repair Stories
 Average Repair Rating: 3.7 / 5.0, 121 reviews. What's this?
Sort by:
  • 1
  • 2
  • 3
Sorry, we couldn't find any existing installation instruction that matched.
The dryer took at least 3 rounds to dry light clothes and 4-5 for towels.
This was my second time making repairs. The only difference this time I replaced all parts from top to bottom. When I pulled the heating element out only one coil was working the others had burned out. It was easy to do and the videos on the site are very helpful and informative. I followed the steps and if I thought I missed a step I replayed it again. I am a woman and found it very easy and not at all intimidating at all. I am going to hopefully have it for another 10 yrs. You guys keep up the good work.
Other Parts Used:
Timer - 230V 60Hz Push-To-Start Switch Lint Trap Housing Seal Dryer Thermal Fuse Dryer Cycling Thermostat Heating Element - 240V 5400W Thermal Cut-Off Kit
  • Stacey from CHUNCHULA, AL
  • Difficulty Level:
    Easy
  • Total Repair Time:
    1- 2 hours
  • Tools:
    Nutdriver, Socket set
10 of 15 people found this instruction helpful.
Was this instruction helpful to you?
Thank you for voting!
Dryer was not heating in timed mode. It was heating in other modes. Thermal cut-off broke in testing.
1/4 inch nut driver to remove panel back cover(6), timer unit(2), and cut-off(1).
Pliers to aid in removing single wires from components.
Most wires on timer were in position specific connectors.
Other Parts Used:
Timer - 60Hz Thermal Cut-Off Kit
  • Bill from LANCASTER, OH
  • Difficulty Level:
    Really Easy
  • Total Repair Time:
    30 - 60 mins
  • Tools:
    Nutdriver, Pliers
2 of 2 people found this instruction helpful.
Was this instruction helpful to you?
Thank you for voting!
No heat on any applicable settings
Cleaned entire unit, replaced all thermostat assemblies and exhaust seal
Other Parts Used:
Dryer High Limit Thermostat Lint Trap Housing Seal Dryer Cycling Thermostat Thermal Cut-Off Kit
  • Russell from LOUISVILLE, KY
  • Difficulty Level:
    Easy
  • Total Repair Time:
    30 - 60 mins
  • Tools:
    Nutdriver, Pliers, Screw drivers
5 of 5 people found this instruction helpful.
Was this instruction helpful to you?
Thank you for voting!
Dryer runs, but won't heat.
First only replaced the high temp cut off switch which allowed the element to heat. However, after one heat cycle the switch would not reset. Then changed the thermostat (included in the kit). After tapping the cut off switch lightly to manually reset it, the dryer ran perfectly. Moral of the story: always change all parts included with a repair kit!
  • Eric from DELHI, NY
  • Difficulty Level:
    Really Easy
  • Total Repair Time:
    30 - 60 mins
  • Tools:
    Nutdriver, Pliers
2 of 2 people found this instruction helpful.
Was this instruction helpful to you?
Thank you for voting!
Dryer not drying items after one cycle, although dryer was getting hot.
Followed the video instructions that I was directed to through this site. The time it took me includes the time I used to vacuum out the back of the dryer and remove lint build up. The repair was very easy since the video provides all the information you need in an easy to follow format. I used my cell phone and paused when I needed to. Great site, great access to parts and great service. My parts were delivered in 2 days!
Other Parts Used:
Dryer Lint Screen Filter Thermal Cut-Off Kit
  • Lori from GAINESVILLE, GA
  • Difficulty Level:
    Easy
  • Total Repair Time:
    15 - 30 mins
  • Tools:
    Nutdriver, Pliers, Screw drivers
2 of 2 people found this instruction helpful.
Was this instruction helpful to you?
Thank you for voting!
No heat
Replaced thermal sensors.
  • Ronald from DRIPPING SPGS, TX
  • Difficulty Level:
    Easy
  • Total Repair Time:
    30 - 60 mins
  • Tools:
    Nutdriver, Pliers, Screw drivers
1 person found this instruction helpful.
Was this instruction helpful to you?
Thank you for voting!
dryer not hot enough, too long to dry.
Installed thermal cut-off kit. Dryer works fine now. Kit very easy to install.
  • Willis from GRAND FORKS, ND
  • Difficulty Level:
    Really Easy
  • Total Repair Time:
    15 - 30 mins
  • Tools:
    Nutdriver, Pliers
2 of 2 people found this instruction helpful.
Was this instruction helpful to you?
Thank you for voting!
No heat
Followed the video - easy!
Other Parts Used:
Dryer Cycling Thermostat Thermal Cut-Off Kit
  • Doug from NEW BRAUNFELS, TX
  • Difficulty Level:
    Really Easy
  • Total Repair Time:
    30 - 60 mins
  • Tools:
    Nutdriver, Pliers
1 person found this instruction helpful.
Was this instruction helpful to you?
Thank you for voting!
N O heat
Did not have a voltmeter to diagnose so bought several thermostats ,fuses, heating element .Replaced them all and the culprit was one of the the thermostats.Good investment and easy install.
Other Parts Used:
Dryer High Limit Thermostat Dryer Thermal Fuse Dryer Cycling Thermostat Thermal Cut-Off Kit
  • Bob from SOUTH WINDSOR, CT
  • Difficulty Level:
    Easy
  • Total Repair Time:
    1- 2 hours
  • Tools:
    Pliers, Screw drivers, Socket set
2 of 2 people found this instruction helpful.
Was this instruction helpful to you?
Thank you for voting!
NO HEAT
I highly recommend using a multi-meter to test for continuity on the thermistors and the heating element. It will likely save you a lot of time and you can replace the correct part the first time. I found the high limit thermostat to be open. Also note that if you find the same part open, it is most always caused by another part failure or the dryer vent to be clogged up with lint. I also cleaned out the lint chamber which was in pretty bad shape and likely caused my failure. But, the parts were not expensive and were replaced while I was doing the trouble shooting. The video is excellent and if followed all will turn out ok. This is my third different appliance repair, and the parts are always in stock, the standard shipping was 7 days, and everything you need is provided.
  • Larry from ARAB, AL
  • Difficulty Level:
    Really Easy
  • Total Repair Time:
    30 - 60 mins
  • Tools:
    Nutdriver, Pliers, Screw drivers
1 of 3 people found this instruction helpful.
Was this instruction helpful to you?
Thank you for voting!
  • 1
  • 2
  • 3
Questions and Answers

We're sorry, but our Q&A experts are temporarily unavailable.
Please check back later if you still haven't found the answer you need.

161 questions answered by our experts.
Sort by:
  • 1
  • 2
  • 3
Sorry, we couldn't find any existing answers that matched.Try using some different or simpler keywords, or submit your new question by using the "Ask a Question" button above!
Kyle
July 20, 2017
My dryer is having trouble heating up, or heating at all. Based on what your site is saying it may be the thermostat with the thermal fuse. Does that sound right, and is this what I need to make the repair?
PartSelect logo
Hi Kyle, your diagnosis is correct. This assembly 279816 is what you will need to repair your dryer, and it is the right part for your model. Best of luck with this repair.

74 people found this helpful.

Was this helpful?
Thank you for voting!
Steve
February 13, 2018
Okay, i have now replaced thermal fuse and internal bias thermostat. Dryer runs with much heat and shuts off as expected, at end of cycle. Just for diagnostic purposes, i ran the dryer on the air only cycle/no heat. However, the dryer still producing heat. Is this normal? I suspect it is not, do i need to replace other parts as well. Thank you for your help. All the symptoms i was viewing were describing no heat, and it appears as if i have too much heat. Thanks again.
For model number IED4400VQ1
PartSelect logo
Hello Steve, thank you for your question. I would recommend replacing the Thermal Cut-Off Kit part number 279816. The thermal cut-off turns off the heating component when the dryer overheats, ensuring there is a consistent level of heat at all times. If the unit isn't cycling off properly, the unit will get too hot. I hope this helps!

30 people found this helpful.

Was this helpful?
Thank you for voting!
Dion
August 23, 2017
Hello. For the past two weeks when running my dryer it shuts off after 5 mins. As of 08-21-17 it will not turning on at all. Could this part fix this issue? Thank you in advance.
For model number GEQ8858EQ0
PartSelect logo
Hi Dion, Thank you for the great question. The first part we suggest you replace is the Thermal Fuse. This thermal fuse is designed for use in dryers. It is a safety mechanism that stops the flow of electricity to the heating element when a dryer overheats. When this fuse is faulty, your dryer will not start or it will not heat properly and shuts off to soon. This is a one-time fuse, meaning it cannot be re-set, It must be replaced. Hope this helps!

16 people found this helpful.

Was this helpful?
Thank you for voting!
Related Parts:
Micha
July 20, 2017
I am getting no heat but i have continuity and the heating coils have voltage.
PartSelect logo
Hi Micha, we recommend first disconnecting the wires to the heater and checking them for 240 volts across both. If you do not have the 240, you need to find where you are losing the rest. I hope this helps.

11 people found this helpful.

Was this helpful?
Thank you for voting!
Kim
October 21, 2017
My Whirlpool dryer does not heat. I found that there was no continuity between the two connectors on the thermal cut off. Would this mean the this part is bad?
For model number LER4600PQ1
PartSelect logo
Hi Kim, Thank you for your question. Yes, you would have to replace that part if there is no continuity. Good luck with your repair.

10 people found this helpful.

Was this helpful?
Thank you for voting!
Jonathan
July 20, 2017
What is wiring order for this repair?
PartSelect logo
Hello Jonathan, the order of the wiring from your motor should go to the heater, then to the thermal cut off, and from there to the high limit, and then to the timer. Please let us know if you have any further questions.

8 people found this helpful.

Was this helpful?
Thank you for voting!
Larry
February 17, 2018
My dryer heats up in less than a minute. It is hot enough to burn your fingers on the rear of the drum. Changing the heat setting does not appear to do anything. Where do I start, and how can I test the components in question? Thank you!
For model number WED4800BQ1
PartSelect logo
Hello Larry, Thanks for your question. You will want a multimeter to test a few different internal parts. Replace any that do not show electrical continuity. Also be sure to clean out the venting if that is clogged. Test the internal-bias thermostat, the thermal fuse, the high-limit thermostat, and the heating element. Visually inspect the belt as well for any signs of wear and tear. I hope this helps.

8 people found this helpful.

Was this helpful?
Thank you for voting!
Related Parts:
Brian Engelhard
February 22, 2018
I have an Admiral electric dryer, aed4475tq1. Lately on autodry, it mostly dries the cloths but then i have to use the 20 30 time dry to finish drying the cloths. Basically, the dryer is shutting off just a little too early on autodry. I don't think this dryer has a moisture sensor to clean. Ventilation is good and there is no build up of lint internally or on the filter.
For model number AED4475TQ1
PartSelect logo
Hello Brian, thank you for your question. The issue is most likely with a thermostat. There are a few thermostats in the unit. With a multimeter, these parts can be tested very easily. The parts you will want to check are Thermostat, Internal-Bias Part Number: WP3387134, Thermal Cut-Off Kit Part Number: 279816 and Thermostat, High Limit 221 F ( Part Number: WP3977767. Set your multimeter to the R X 1 setting. Take each of your meter's probes and touch one to each terminal. You are testing for continuity, and you should receive a reading of either zero or infinity. At room temperature, testing the thermostat should produce a reading of zero. But if a thermostat is tested when it is heated to its limit, a reading of infinity should be produced. We strongly recommend that you test your thermostat at room temperature. If the test you conduct with your thermostat does not produce these results, then you should replace the component. I hope this helps. Thank you and have a great day!

7 people found this helpful.

Was this helpful?
Thank you for voting!
Jenny
April 8, 2018
Will part # 279816 work with my Kenmore dryer and do i have to use jumper wire? This part was bought for a previous dryer which i think was wrong and never used it. Thank you.
For model number 66901691
PartSelect logo
Hello Jenny, thank you for your question. Unfortunately, that cut off kit will not work with your model number. The Thermal Cut-Off Kit for your model is part number 279769. There is an installation video on our site on how to install that kit. Please enter the part number into the site for current price and availability. Good luck with your repair!

7 people found this helpful.

Was this helpful?
Thank you for voting!
Wes
January 6, 2018
Our dryer has plenty of heat and the drum seems to be rotating, but the clothes won't dry. What would you recommend? Thanks!
For model number len2000pw1
PartSelect logo
Hello Wes, Thank you for your inquiry. We would recommend checking the following parts to fix your issue: blower wheel, moisture sensor, lint filter, drum seal, lint chute seal, and front seal. Also make sure that the air flow is not constricted in any way. Hope this helps!

7 people found this helpful.

Was this helpful?
Thank you for voting!
  • 1
  • 2
  • 3
You May Also Need ?
Model Cross Reference
This part works with the following models:
PartSelect Number: PS334299
Manufacturer Part Number: 279816
Brand
Model Number
Description
Kenmore
11060012000
Dryer
Kenmore
11060012001
Dryer
Kenmore
11060012002
Dryer
Kenmore
11060022010
Dryer
Kenmore
1106012510
Dryer - ELECTRIC DRYER
Kenmore
1106012990
Dryer - Kenmore Dryer Model 110.6012990 (1106012990, 110 6012990) Parts
Kenmore
11060172000
Dryer
Kenmore
11060172001
Dryer
Kenmore
11060172002
Dryer
Kenmore
11060202990
Dryer
Kenmore
11060212990
Dryer
Kenmore
11060222511
Dryer - ELECTRIC DRYER
Kenmore
11060232000
Dryer
Kenmore
11060232001
Dryer
Kenmore
11060232002
Dryer
Kenmore
11060522900
Dryer
Kenmore
11060602990
Dryer
Kenmore
11060612990
Dryer
Kenmore
1106062110
Dryer
Kenmore
11060622990
Dryer
Kenmore
11060702990
Dryer
Kenmore
11060712990
Dryer
Kenmore
1106072011
Dryer - ELECTRIC DRYER
Kenmore
11060722990
Dryer
Kenmore
11060724990
Dryer
Kenmore
11060727990
Dryer
Kenmore
11060802990
Dryer
Kenmore
11060812990
Dryer
Kenmore
11060814990
Dryer
Kenmore
11060817990
Dryer
Customer Service Representative

Get in touch, we're here to help!

Monday to Saturday
8am - 9pm EST

Contact Customer Service