Part Location Diagram of 279769 Whirlpool Thermal Cut-Off Kit
See part 20 in the diagram
Replacing your Kenmore Dryer Thermal Cut-Off Kit
( Grid squares measure 1x1 inch )
Customer Service Representative

Get in touch, we're here to help!

Monday to Saturday
8am - 9pm EST

customerservice@partselect.com

Thermal Cut-Off Kit 279769

 Fits your KEYE950VAL0!
★★★★★
★★★★★
64 Reviews

Rated by 70 customers 

Easy 

30 - 60 mins 

Ratings submitted by customers like you who bought this part.

$ 28.82
  In Stock

Get this part fast! Average delivery time for in-stock parts via standard shipping: 1.8 days.

 Fits your KEYE950VAL0!
PartSelect Number PS334278
Manufacturer Part Number 279769
Manufactured by Whirlpool for Kenmore, Whirlpool, KitchenAid, Roper
Product Description

Thermal Cut-Off Kit Specifications

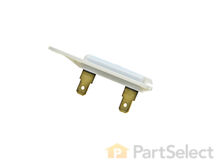
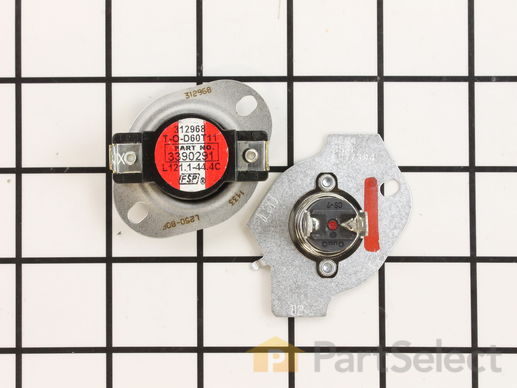
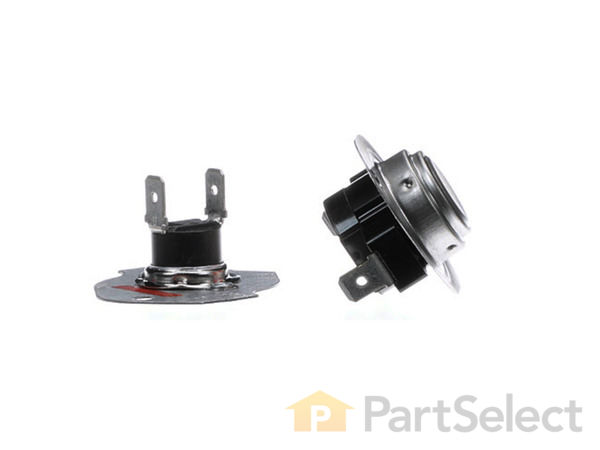
This kit includes one high limit thermostat with a limit of 250 degrees Fahrenheit, and one thermal cut-off fuse with a limit of 360 degrees Fahrenheit. The thermostat and fuse help prevent the dryer from overheating.
How Buying OEM Parts Can Save You Time and Money

How Buying OEM Parts Can Save You Time and Money

Part Videos

Replacing your Kenmore Dryer Thermal Cut-Off Kit

Replacing your Kenmore Dryer Thermal Cut-Off Kit
Troubleshooting
This part fixes the following symptoms:
Not Heating | Too hot
This part works with the following products:
Dryer, Washer Dryer Combo.
Part# 279769 replaces these:
AP3094224, 2821, 279769, 2004, 279548, 2796769, 279769VP, 3387812, 3389946, 3398671, 3977394, 695563, 80001
Back to Top
Customer Reviews
Average Rating:
★★★★★
★★★★★
64 Reviews
4.8
Filter By Rating:
  • 5 Stars
    55
  • 4 Stars
    6
  • 3 Stars
    1
  • 2 Stars
    1
  • 1 Star
    1
Sort by:
  • 1
  • 2
  • 3
Sorry, we couldn't find any existing reviews that matched. Try using some different or simpler keywords.
  • 1
  • 2
  • 3
Customer Repair Stories
 Average Repair Rating: 3.8 / 5.0, 70 reviews. What's this?
Sort by:
  • 1
  • 2
  • 3
Sorry, we couldn't find any existing installation instruction that matched.
Dryer quit heating.
This dryer is 30 plus years old. I am a 71 year old female that has never taken on this type of repair. First I very carefully ordered all parts possibly associated with this problem. Watched all videos available for this model. Could not find one at Parts Select that addressed this particular dryer. Model number was correct. Finally found YouTube video that addressed an "Old Kenmore Wood Top". It showed the correct way to remove the Heating Element unit. Also Parts Select never mentions that fuses and sensors are not "polarized". Very important info for a novice. But Google helped me with that. Heating Element is "polarized", very important not to cross wires. I did order a couple Heating Element Connection Wire Kits that were not needed for this repair. Got all parts replaced, put dryer back together, crossed my fingers and turned it on, so far it has been working really well. I chose to replace all the parts I did because of the dryers age, plus I am not familiar with multimeters. Didn't want to risk one old part messing up a new part. Thank you Parts Select.
It is not a 2 hr. repair, but I worked slowly, didn't want to make any mistakes. It would be good if everyone is aware of some of the above information and the YouTube video done by an individual on this particular dryer.
Other Parts Used:
Heating Element Dryer Thermal Fuse Dryer Cycling Thermostat Thermal Cut-Off Kit Heating Element Connection Wire Kit
  • Jo from BANDON, OR
  • Difficulty Level:
    Easy
  • Total Repair Time:
    More than 2 hours
  • Tools:
    Pliers, Screw drivers, Socket set
25 of 29 people found this instruction helpful.
Was this instruction helpful to you?
Thank you for voting!
Connection to heating element were loose.
I squeeze the cable connection to heating element so the thermal fuse does not cut the electrical current. The loose connection cause the thermal fuse to blow.
Other Parts Used:
Thermal-Limiter Heating Element Dryer Cycling Thermostat Thermal Cut-Off Kit
  • Nestor from MIAMI, FL
  • Difficulty Level:
    Really Easy
  • Total Repair Time:
    30 - 60 mins
2 of 2 people found this instruction helpful.
Was this instruction helpful to you?
Thank you for voting!
No heat.
Removed and replaced the recommended parts purchased from the site.
Other Parts Used:
Dryer Thermal Fuse High Limit Thermostat Dryer Cycling Thermostat Thermal Cut-Off Kit
  • Christopher from WILTON, CT
  • Difficulty Level:
    Really Easy
  • Total Repair Time:
    30 - 60 mins
  • Tools:
    Nutdriver, Screw drivers, Socket set
1 person found this instruction helpful.
Was this instruction helpful to you?
Thank you for voting!
no heat
unplug the dryer used nut drive to take the back off unhook the hose from dryer . disconnect the wires. remove the 2 screws from thermal cut -off . install the new parts
  • DAVID from DANVILLE, VA
  • Difficulty Level:
    Really Easy
  • Total Repair Time:
    30 - 60 mins
  • Tools:
    Nutdriver
2 of 2 people found this instruction helpful.
Was this instruction helpful to you?
Thank you for voting!
The dryer would not heat up.
Tested the two thermostats, thermal fuse and the hi limit cut off for conductivity. The hi limit tested open. The others tested closed. Replaced the hi limit. Cleaned lint from the lint duct assembly after removing the two hex head screws that hold the assembly to the blower housing. The lint was packed in there solid. Cleaned up all around. Reassembled everything. Looks and works like brand new. Access was completely from the front panel. CAUTION: The rear panel is spot welded on although it has eight or nine hex head screws also, and when you remove them, the holes don't line up for replacing them. Took a lot of head scratching and time to get things lined up so the screws would go back in again. Don't try to remove the rear panel like the video shows.
  • Arthur from OXFORD, CT
  • Difficulty Level:
    Easy
  • Total Repair Time:
    More than 2 hours
  • Tools:
    Nutdriver
1 person found this instruction helpful.
Was this instruction helpful to you?
Thank you for voting!
Dryer would not heat
Remove the back panel. Remove wires from top sensor and bottom sensor and remove old sensors. Install new sensors and replace wires. Dryer works great.
  • Robert from ROCHESTER, MN
  • Difficulty Level:
    Really Easy
  • Total Repair Time:
    30 - 60 mins
  • Tools:
    Nutdriver
1 person found this instruction helpful.
Was this instruction helpful to you?
Thank you for voting!
Dryer don't get hot !
It's a electric dryer, I knew it was related with the thermal !
Other Parts Used:
High Limit Thermostat Thermal Cut-Off Kit
  • ENGEL from TRENTON, NJ
  • Difficulty Level:
    Easy
  • Total Repair Time:
    15 - 30 mins
  • Tools:
    Nutdriver
2 of 2 people found this instruction helpful.
Was this instruction helpful to you?
Thank you for voting!
No Heat
Removed back cover and replaced thermal cutoff, installed new push on terminals. Bolted back on and dryer is working like new again.
  • Michael from DAYTON, TX
  • Difficulty Level:
    Really Easy
  • Total Repair Time:
    30 - 60 mins
  • Tools:
    Nutdriver, Pliers, Wrench (Adjustable)
1 person found this instruction helpful.
Was this instruction helpful to you?
Thank you for voting!
Dryer ran but without heat.
Turned off my circuit breaker first. Removed back panel with a 1/4 nut driver. Replaced the dryer fuse first. Very easy but did not fix the problem. Watched how to videos to narrow down the parts I might need. Purchased the thermal cut off kit. Installed the High limit thermostat first. Tested the dryer, no dice. Finally installed the Thermal cutoff. BAM!! I have heat. Since this is an older dryer I did need to use some WD40 to loosen some of the connections. Total cost of parts including tax and quick delivery was $48.30. Fantastic. My old man told me it was unfixable. He was wrong. I WIN. This site is a great teaching site. Thank you!
  • barbara from SOUTHAMPTON, PA
  • Difficulty Level:
    Really Easy
  • Total Repair Time:
    30 - 60 mins
  • Tools:
    Nutdriver, Screw drivers
2 of 2 people found this instruction helpful.
Was this instruction helpful to you?
Thank you for voting!
Dryer rotates but there is no hot air.
Our dryer produced no heat. I thought that it was the electrical heating element because this part had failed a number of years ago. But when we received the heating element, and I opened up the back of the dryer to install it, I found that the element was OK. (Visual inspection as well as using an ohm meter.) I then ordered the thermal cut-off kit, (which was over a week in getting to us because Fed-Ex misdirected the shipment). Once the kit arrived it was very simple to remove the Allen-head screws on both parts, install the two new parts, reconnect the wires, replace the back panel on the dryer and hook up power and the dryer vent hose. The dryer works just fine.
  • Lawrence from GOLDENDALE, WA
  • Difficulty Level:
    A Bit Difficult
  • Total Repair Time:
    30 - 60 mins
  • Tools:
    Nutdriver, Socket set
1 person found this instruction helpful.
Was this instruction helpful to you?
Thank you for voting!
  • 1
  • 2
  • 3
Questions and Answers

Ask our experts a question about this part and we'll get back to you as soon as possible!

28 questions answered by our experts.
Sort by:
  • 1
  • 2
  • 3
Sorry, we couldn't find any existing answers that matched.Try using some different or simpler keywords, or submit your new question by using the "Ask a Question" button above!
David
September 21, 2017
Dryer is turning off prematurely. I input my model number into the website to see what might be the problem and it looked like it could be the cycling thermostat (thermostat internal bias part # wp3387134) . However, i do not see that part in my dryer. Instead, i see the high limit thermostat and fuse cut-off. Is there a cycling thermostat and a high limit thermostat in this unit, and if so, where exactly is the cycling thermostat located?
For model number 110.67902791
PartSelect logo
Hi David, Thank you for the question. The cycling thermostat is attached to the blower housing. Hope this helps!

8 people found this helpful.

Was this helpful?
Thank you for voting!
Steph
October 5, 2017
Replaced heating element but still no heat. Heat went out after running several loads on high heat to curb a flea outbreak. Suggestions?
For model number 11062942100
PartSelect logo
Hi Steph, Thank you for the question. I suggest replacing the Thermal Cut-Off Kit,PartSelect Number PS334278.The thermostat and fuse help prevent the dryer from overheating and may have blew. Hope this helps!

6 people found this helpful.

Was this helpful?
Thank you for voting!
David
September 17, 2017
Mr Whirlpool electric dryer clothes coming out are extremely hot where they are burning me when i take them out of the dryer. I am confused on which part i may need. One part includes the thermal cut off kit that includes both of these 2 parts a 250 degree high limit thermostat and a thermal cut off fuse limit 360 degrees. The other part i am thinking i may need is the cycling thermostat limit 135/155. If you can lead me in the right direction, i would appreciate it.
For model number LE5600XSW0
PartSelect logo
Hi David, Thank you for your question. I would actually suggest testing all of your thermostats with a multimeter to see if they are all working correctly. I hope that helps. Good luck with your repair.

4 people found this helpful.

Was this helpful?
Thank you for voting!
Geln Van Clief
May 2, 2018
No heat. Checked parts, had bad fuse on heater housing, installed both new parts. Had heat for a minute. Bad fuse again. What should i check next?
For model number LE5700XSW0
PartSelect logo
Hello Glen, thank you for your question. I would recommend replacing the Thermal Cut-Off Kit PartSelect Number: PS334278, and the Cycling Thermostat - Limit 135/155 Part Number: WP694674. I hope this helps!

4 people found this helpful.

Was this helpful?
Thank you for voting!
Tim
May 6, 2018
No dryer heat
For model number 96588210
PartSelect logo
Hello Tim, thank you for your question. I would recommend testing the thermostats in the appliance first. Alot of times, the Thermostat, Internal-Bias Part Number: WP3387134 and Disposable Thermal Fuse - Two Terminal Part Number: WP3390719 are the most common thermostats to go. However, I would recommend testing all the thermostats first to be sure there isn't another blown thermostat. I hope this helps!

3 people found this helpful.

Was this helpful?
Thank you for voting!
Steph
October 5, 2017
Is there a diagram of exactly how the wires go back on the thermal cut-off?
For model number 11062942100
PartSelect logo
Hi Steph, Thank you for the question. We do not have a wiring diagram sorry but here is a video that should be helpful. Good luck with the repair! https://www.youtube.com/watch?v=scgftb8_06c

3 people found this helpful.

Was this helpful?
Thank you for voting!
David
January 20, 2018
My dryer does not work on the high heat or cotton setting but works on all of the others. I am not sure what part needs to be replaced, please advise?
For model number 110.67741600
PartSelect logo
Hello David, Thanks for your question. You will want to test the thermal fuse, thermal cut-off kit, internal-bias thermostat, heating element, and high limit thermostat with a multimeter to see if they have continuity. Replace any that do not have electrical continuity. I hope this helps.

3 people found this helpful.

Was this helpful?
Thank you for voting!
Related Parts:
Diane
September 16, 2017
I have a Kenmore dryer and the heating element would stay on even after the dryer shut off and now it doesnt heat at all. Could it need a heating element and thermostat? Im not sure if i want to tackle the job or not but i love this dryer. Thank you! Diane
PartSelect logo
Hello Diane, thank you for contacting us. This could be from a bad heating element, if it has shorted out it could keep creating heat. You can inspect the element to see if it is broken and welded to the housing/ground. Good luck with the repair!

2 people found this helpful.

Was this helpful?
Thank you for voting!
David
September 21, 2017
I found the cycling thermostat on the blower housing just where you said it would be. However, even after removing the lint trap and lint trap housing, the cycling thermostat is pretty tightly pinned between the blower housing and the upper drum. Do i have to remove the blower housing just to get to the cycling thermostat? If so, i may have to turn this over to a professional.
For model number 110.67902791
PartSelect logo
Hi David, Thank you for your question. You usually do not have to. We do have an installation video for this kit: https://youtu.be/scgftb8_06c . If you need to remove the blower however, you may have to contact a technician to help you. I hope that helps. Good luck with your repair.

2 people found this helpful.

Was this helpful?
Thank you for voting!
Jose
January 29, 2018
My dryer doesn't heat up at all and there is power at the heater element what could be the problem? Thanks
For model number 11065922400
PartSelect logo
Hi Jose, Thank you for your question. If the dryer is not heating, the thermal cut-off is one part that you will have to check. There are some other parts that you will need to check to see which one is causing the issue. You will need to check the thermal fuse, the internal bias thermostat, the heating element, the heating element connection wire, the high limit thermostat, the electrode sensor and the door switch. I hope this helps. Thank you and have a great day!

1 person found this helpful.

Was this helpful?
Thank you for voting!
  • 1
  • 2
  • 3
You May Also Need ?
Model Cross Reference
This part works with the following models:
PartSelect Number: PS334278
Manufacturer Part Number: 279769
Brand
Model Number
Description
Kenmore
11060052990
Dryer
Kenmore
11060052991
Dryer
Kenmore
11060056990
Dryer
Kenmore
11060056991
Dryer
Kenmore
1106007299
Dryer - Kenmore Dryer Model 110.6007299 (1106007299, 110 6007299) Parts
Kenmore
11060072990
Dryer
Kenmore
11060072991
Dryer
Kenmore
11060092990
Dryer
Kenmore
11060092991
Dryer
Kenmore
11060094990
Dryer
Kenmore
11060094991
Dryer
Kenmore
11060096990
Dryer
Kenmore
11060096991
Dryer
Kenmore
11060097990
Dryer
Kenmore
1106090199
Dryer - Kenmore Dryer Model 110.6090199 (1106090199, 110 6090199) Parts
Kenmore
11060901990
Dryer
Kenmore
1106090299
Dryer - Kenmore Dryer Model 110.6090299 (1106090299, 110 6090299) Parts
Kenmore
11060902990
Dryer
Kenmore
11060904990
Dryer
Kenmore
1106090799
Dryer - Kenmore Dryer Model 110.6090799 (1106090799, 110 6090799) Parts
Kenmore
11060907990
Dryer
Kenmore
11060912990
Dryer
Kenmore
1106092299
Dryer - Kenmore Dryer Model 110.6092299 (1106092299, 110 6092299) Parts
Kenmore
11060922990
Dryer
Kenmore
11060924990
Dryer
Kenmore
1106092799
Dryer - Kenmore Dryer Model 110.6092799 (1106092799, 110 6092799) Parts
Kenmore
11060927990
Dryer
Kenmore
1106093299
Dryer - Kenmore Dryer Model 110.6093299 (1106093299, 110 6093299) Parts
Kenmore
11060932990
Dryer
Kenmore
1106093699
Dryer - Kenmore Dryer Model 110.6093699 (1106093699, 110 6093699) Parts
Customer Service Representative

Get in touch, we're here to help!

Monday to Saturday
8am - 9pm EST

Contact Customer Service