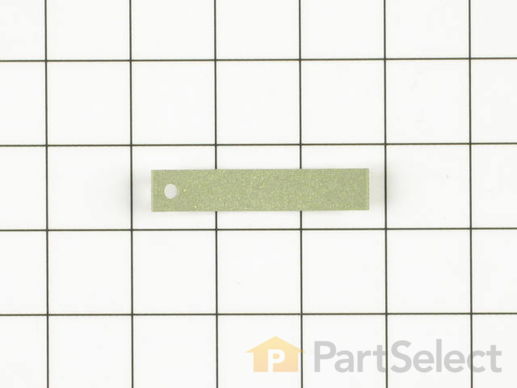
Drum Slide
$
17.55
In Stock
Get this part fast! Average delivery time for in-stock parts via standard shipping: 1.8 days.
PartSelect Number PS267877
Manufacturer Part Number WE3X87
Manufactured by
GE

Check if this fits your product and find model diagrams
Need help finding your model number?
Product Description
Drum Slide Specifications
This slide is sold individually. Some dryers require up to three of these slides . Be sure to check to make sure you order the necessary amount for your dryer.

How Buying OEM Parts Can Save You Time and Money
Troubleshooting
This part fixes the following symptoms:
Noisy | Marks left on clothes
This part works with the following products:
Dryer.
This part works with the following products:
General Electric, Hotpoint.
Part# WE3X87 replaces these:
AP2042543, 2305, WE03X0076, WE03X0083, WE03X0084, WE03X0087, WE3X76, WE3X83, WE3X84
Questions and Answers
Be the first to ask our experts a question about this part!
✖
Ask a Question
Ask our experts a question on this part and we'll respond as soon as we can.
Something went wrong. Please try again later.
Your Question Has Been Submitted!
Our experts will send you an email as soon as your question has been answered.
Customer Repair Stories
Average Repair Rating: 3.4 / 5.0, 16 reviews.
What's this?
- < Prev
- 1
- 2
- Next >
Sort by:
Search filter:
Clear Filter
Your search term must have 3 or more characters.
Keep searches simple. Use keywords, e.g. "leaking", "pump", "broken" or "fit".
Sorry, we couldn't find any existing installation instruction that matched.
Loud scraping noise when drum rotated
1. Opened door.
2. Using phillips head screwdriver. Removed two screws holding down top of machine.
3. Swung machine top lid back.
4. Disconnect two wires from door switch.
5. Using socket wrench removed two hex head machine screws holding front panel onto machine.
6. While reaching in through door to hold drum, Swung entire front panel down and away from machine and carefully rested drum on frame.
7. Using flat head screwdriver, pryed worn drum bearing off of front panel.
8. Removed Support Spanner (white flexible plastic piece approx 8" x 2") from old drum bearing and put on new drum bearing.
9. Put new teflon drum slides (this model takes 3) on replacement drum bearings.
10. Snapped new drum bearing in place on front panel.
11. Reverse step 1-6 above.
TIME: APPROX 20-30 MINUTES.
Other Parts Used:
-
Henery from Ramsey, NJ
-
Difficulty Level:Easy
-
Total Repair Time:15 - 30 mins
-
Tools:Screw drivers, Socket set
35 of 43 people
found this instruction helpful.
Was this instruction helpful to you?
Thank you for voting!
drive belt broke
I unplugged the machine, then unscrewed two screws that hold the top and front together, and lifted off the front door. When I pulled the drum out through the front, the belt came out broken. It was the original, so this is not a surprise. I ALWAYS take this dryer apart once a year to vacuum it out, clean all the ducts and fan, and check everything. This dryer is fifteen years old, and has survived three teenage daughters with their laundry. This time I noticed that the sliders on the front door were worn, blower wheel was loose, and rear bearing was loose,so I ordered everything. The parts came in three days. By then, you could no longer see the basement floor with piles of laundry and Friday night dates looming. I had everything replaced and working in under an hour, after which there was a conflict over who gets to use it first. Hey, I only fixed it, then I walked away. So, for 140 bucks, I have now replaced virtually every critical part, and with no rust, this thing will last as long as these guys have parts. I'm happy, my daughters are happy, and that means the wife is happy. And we all know what that means...
Other Parts Used:
-
Brian from Yarmouth, MA
-
Difficulty Level:A Bit Difficult
-
Total Repair Time:30 - 60 mins
-
Tools:Nutdriver, Screw drivers, Wrench (Adjustable)
27 of 48 people
found this instruction helpful.
Was this instruction helpful to you?
Thank you for voting!
Horrible screeching sound when dryer was running.
It took more time to figure out how to get the dryer apart than it did to fix it. Unfortunately I ordered the wrong parts the first time but Part Select was very helpful and efficient in helping me get the correct parts. I located the two screws that hold the top onto the machine inside the door frame at the top. Once the top was off, there were two screws that held the front door assembly to the dryer. The old parts (very worn and next to totally gone = none of the slides were remaining) were easy to snap out and the new parts easy to snap in to place. The Spa is happy that the dryer is quiet again and can be run when we have clients waiting. Thanks to you Part Select.
Other Parts Used:
-
Summit Health and Fitness from Flagstaff, AZ
-
Difficulty Level:Really Easy
-
Total Repair Time:Less than 15 mins
-
Tools:Screw drivers
16 of 19 people
found this instruction helpful.
Was this instruction helpful to you?
Thank you for voting!
Very Bad Squeak
I removed the top and layed it back with wires attached. Took out 2 screws and removed the front. I pulled out the drum and throughly cleaned away all lint and dust from motor, etc. Removed worn parts and reinstalled new parts in same fashion. Reassemble cabinet and check operation. . . . . Great. No new dryer needed!
Other Parts Used:
-
ROBERT from CLIMAX, NC
-
Difficulty Level:Easy
-
Total Repair Time:30 - 60 mins
-
Tools:Nutdriver, Screw drivers
11 of 16 people
found this instruction helpful.
Was this instruction helpful to you?
Thank you for voting!
dryer made screeching noise when running
removed top by removing two screw inside door,
found felt was out of place and ruined--found some wear on bearing at rear of drum--decided to
replace these parts plus fround bearing--also
new belt ,since it was apart---to remove the drum
you have to remove front panel,which required
removing two bolts from inside at top--front of
dryer just lays down--then you can pull tub out-
I read other customers repair storys ,which made it real easy.
Other Parts Used:
-
Terry from Huntingdon, PA
-
Difficulty Level:Really Easy
-
Total Repair Time:30 - 60 mins
-
Tools:Nutdriver, Pliers, Screw drivers, Wrench set
5 of 5 people
found this instruction helpful.
Was this instruction helpful to you?
Thank you for voting!
clothing was getting stuck on inside near top of door
I followed instructions provided by other users of this site. Two screws removed allowed the top to be raised. Two more screws allowed the front to be removed and swung to the side. I removed the felt, and replaced it, after looking which way the bevelled edge faced. The teflon drum slide bearings were simple to replace. The front drum bearing was a little difficult to remove, but I just kept prying with a flathead screwdriver and it eventually began to pop off. I vacuumed and removed a ton of lint from everywhere I could get at, and the dryer now runs quieter with no more clothing getting hung up inside.
Other Parts Used:
-
Robert from Avon, NY
-
Difficulty Level:Easy
-
Total Repair Time:30 - 60 mins
-
Tools:Screw drivers, Wrench set
3 of 4 people
found this instruction helpful.
Was this instruction helpful to you?
Thank you for voting!
Loud screaching when turning
Open door,remove two screws at top,push top up unroll it is straight up,remove two wires for the door switch,remove the two sheet metal screws ,pull up on the complete front asembly then out,hold drum when doing this.then remove trim ring most likely you will need to break it because it's very hard to remove.replace ring and bearing slides
Other Parts Used:
-
robert from holliston, MA
-
Difficulty Level:A Bit Difficult
-
Total Repair Time:30 - 60 mins
-
Tools:Screw drivers
3 of 4 people
found this instruction helpful.
Was this instruction helpful to you?
Thank you for voting!
Squealing noise during tumbling (metal wear)
First read very helpful reviews on PartSelect from:
Summit Health and Fitness From Flagstaff AZ
and Michael From Warwick RI
The parts diagram on PartSelect is good as an overview. Having two people makes a big difference detaching and re-attaching the drum.
Knowing how to get the lid and front door off each specific model is important. That's where the stories mentioned above were essential. After that, many generic dryer repair stories will work.
I recommend changing all wearable parts while you are in there. I wish I had ordered some new felt, but I did rear bearing, slides, and belt even though the belt probably was good to go.
PartSelect shipped from Windsor Locks, CT. The parts were nearly exact replacements. Some fasteners were different, so I used the old ones and had the tap the sheet metal on the retainer with the fasteners before installing it.
Really glad to have stumbled on this site via Google.
Other Parts Used:
-
Joel from Bernardston, MA
-
Difficulty Level:A Bit Difficult
-
Total Repair Time:More than 2 hours
-
Tools:Nutdriver, Screw drivers, Socket set
3 of 4 people
found this instruction helpful.
Was this instruction helpful to you?
Thank you for voting!
When tub was turning it had a grinding sound.
First unplug the dryer from power. Now open the dryer door and remove the two phillips head screws that hold the top down. Then lift the top off and turn the dryer on it's back (this is not necessary but if you have the room it makes the job easier). Now remove the two hex head screws that hold the front on and remove the wires from the door switch. Now you can lift the front of the dryer off, door and all. This now allows you to replace the three (on this model) slide bearings and the felt. I also removed the belt and lifted the drum out and checked both the belt and the rear bearing. You can do it!
Other Parts Used:
-
Chuck from Cowiche, WA
-
Difficulty Level:Really Easy
-
Total Repair Time:30 - 60 mins
-
Tools:Nutdriver, Screw drivers
3 of 6 people
found this instruction helpful.
Was this instruction helpful to you?
Thank you for voting!
Dryer making load scraping noise
Unplug the appliance and open the dryer door, loosen screws located underneath door opening ridge remove top of dryer. Locate screws inside to take front off the appliance making sure the drum does not fall down. Unsnap drum bearing, remove old felt replace both. Replace bearing slides and put back together. Really easy and the dryer works great for arounf $50- 60.00.
-
Timothy from Sudbury, MA
-
Difficulty Level:Really Easy
-
Total Repair Time:15 - 30 mins
-
Tools:Nutdriver, Screw drivers
2 of 3 people
found this instruction helpful.
Was this instruction helpful to you?
Thank you for voting!
- < Prev
- 1
- 2
- Next >
Customer Reviews
Filter By Rating:
- < Prev
- 1
- Next >
Sort by:
Search filter:
Clear Filter
Your search term must have 3 or more characters.
Keep searches simple. Use keywords, e.g. "leaking", "pump", "broken" or "fit".
Sorry, we couldn't find any existing reviews that matched. Try using some different or simpler keywords.
Natalie P - January 7, 2020
Verified Purchase
Drum Slides
After spending approx. 44.00 on 3 new drum slides and installing them - come to find out that wasn't what was causing the loud squeaking....think what I really needed was a rear drum part. However, the drum slides did arrive promptly and if you need to order them you can do so at PartSelect.
Steven K - June 13, 2019
Verified Purchase
wrks great
part is brand new
Jim B - January 1, 2019
Verified Purchase
Parts worked as expected
The parts worked and they came in fast wow awesome
Curtis S - November 13, 2018
Verified Purchase
This is a slide surface for the drum to ride on.
This is a slide surface to ride on. All but one was missing and the large arched top drum bearing was worn and had holes in it. I replaced the top drum bearing surface and the three of these slide as well as the drum lower felt seal. Open the door and there are two screws in the top of the door opening, remove them. Lift the top of the dryer up nd pull to you and set aside. Pull the two wires off of the door switch at the top right of the door. There are two hex head screws one on each side at the split line flange for the front of the dryer. Remove both screws while pushing in on te front of the dryer with your knees. Holding the front against the dryer sides open the door and hold the drum up while leaning the front top out to clear the drum. Do not let the drum fall as it will come out of the rear bearing and be hard to put back. (Don't ask me how I know!) Replacement of the top plastic bearing must be pried out with a flat tip screw driver. Put the slides on the top bearing surface and slide it back in place at the bottom and snap in place the top, Replace the felt drum seal at the bottom and side. Sit the front bottom over the two ends of the adjustable front feet, open the door and hold the drum up with one hand as you push the front top to support the drum. Replace the two hex screw attach the two switch wires and replace the lid and screws and test.
- < Prev
- 1
- Next >
You May Also Need?
Model Cross Reference
This part works with the following models:
PartSelect Number: PS267877
Manufacturer Part Number: WE3X87
Brand
Model Number
Description