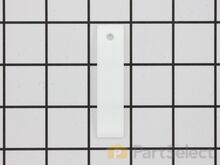
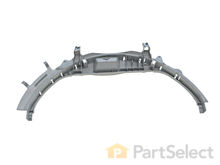
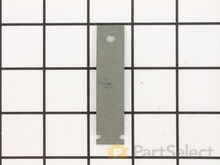
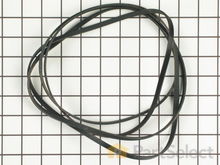
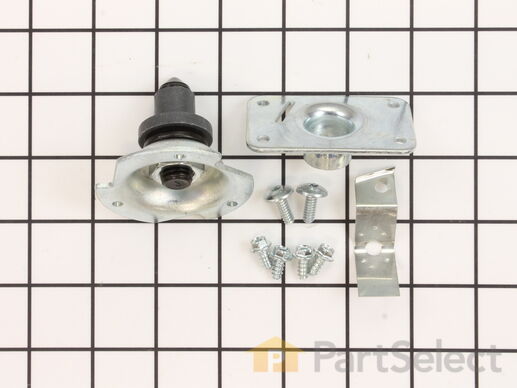
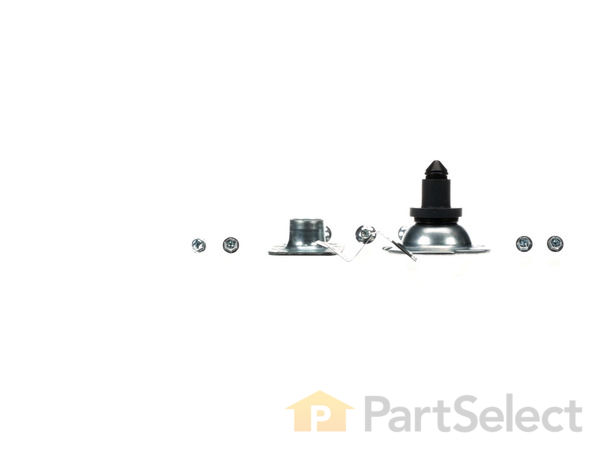
This rear drum bearing kit includes a shaft, ground strap, bearing, seven screws, and installation instructions. The bearing plate comes with a slot in it for the ground strap. This part helps keep your dryer running as smoothly as possible with as little noise as possible by supporting the back of the dryer drum and reducing friction as the drum rotates. Over time, your drum bearing will wear out, cause your dryer to be noisy, and you will have to replace it. There may be some sharp internal parts, so be sure to wear work gloves during repair.
We're sorry, but our Q&A experts are temporarily unavailable.
Please check back later if you still haven't found the answer you need.
11 questions answered by our experts.
< Prev
1
2
Next >
Sort by:
Search filter:
Clear Filter
Your search term must have 3 or more characters.
Keep searches simple. Use keywords, e.g. "leaking", "pump", "broken" or "fit".
Sorry, we couldn't find any existing answers that matched.Try using some different or simpler keywords, or submit your new question by using the "Ask a Question" button above!
Ron
April 23, 2018
Dryer only makes grinding, squeaking sound with clothes in it. W/o clothes it runs quietly. Would this be a rear bearing problem or could it be something else also?
For model number HTDX100EM1WW
Hi Ron,
Thank you for your question. If the dryer is making a squeaking noise, there are some parts that you will need to check to see which ones are causing the issue. You will need to check the drum bearing slides, the front drum bearing, the duct felt seal, the rear drum bearing kit and the drive belt. I hope this helps. Thank you and have a great day!
20 people found this helpful.
Was this helpful?
Thank you for voting!
Brenda
October 5, 2017
How can i determine for sure which parts i need for the symptom 'does not tumble'? I know for sure that i need the front bearing and slides that apparently attach to this bearing with adhesive or something. However i do not know if i need additional parts. When i start the dryer, the motor runs but the tumbler does not rotate unless i stop the motor and adjust the worn plastic front bearing (pulling it toward the front slightly)... after which it will turn. i know my belt is ok, but wonder about the pulleys. when the front panel is off the dryer should there be anything that holds the barrel up level? do you think replacing the front bearing will do the trick? i'm also a bit unsure as to the number of slides to get and whether or not i need to just purchase the slide or the slide kit. i do not see where a slide kit (with the metal bracket) would go.
For model number DBLR333ET0WW
Hi Brenda,
Thank you for your question. It sounds like you have figured out what parts are causing your issue. You can also check the rear drum bearing as well. The pulley would be easy to check. If you are able to spin your drum after adjusting your slides, then the pulley is fine. The belt runs over the pulley, so if it was not working you would not be able to spin your drum. Most dryers have anywhere between 2-4 slides. Good luck with your repair.
14 people found this helpful.
Was this helpful?
Thank you for voting!
Jennifer
December 12, 2018
Dryer is making a loud noise like shoes are in it or something heavy and bulky. Would that be a bearing or belt issue?
For model number dblr333eg6ww
Hello Jennifer, Thank you for the question. This sounds like an issue with the Rear Drum Bearing. If the belt was bad the drum would not tumble. Thank you for your inquiry, good luck with this repair!
10 people found this helpful.
Was this helpful?
Thank you for voting!
Richard
June 11, 2019
Replaced front bearing,rear bearing, drive belt. Dryer still has loud racheting sound coming fron bottom left side unit.
For model number DBXR463GD2WW
Hello Richard, thank you for inquiring. You will want to consider either the Duct Felt Seal part PS9861764, the Idler Pulley Wheel part PS265721, or the Drive Motor part PS1559768. We hope this helps.
2 people found this helpful.
Was this helpful?
Thank you for voting!
Debbie
February 18, 2018
Change the rotary start. Dryer will not start. If you hold the knob down the heat comes on. But the tumblr does not turn. What can be the problem,? I thought changing the rotary start would solve my problem but it did not. Please offer another suggestion.
For model number Dbsr453eb3ww
Hello Debbie, thank you for your question. This issue could be caused by a few different parts. I would suggest checking the Drive Belt PartSelect Number: PS1766009 as well as the Interlock Switch PartSelect Number: PS1481922 and the Drive Motor PartSelect Number: PS1559768 first. I hope this helps!
2 people found this helpful.
Was this helpful?
Thank you for voting!
John
December 28, 2021
Will this part work with this model number ?
I am having great difficulty finding the proper rear bearing kit for this model of dryer.
The serial number is RD862924C
Thank you!
For model number GTDP490GD4WS
Hello John, Thank you for your inquiry. We have researched the model number you have provided and confirm that this part is compatible. If you need help placing an order, customer service is open 7 days a week. Please feel free to give us a call. We look forward to hearing from you!
1 person found this helpful.
Was this helpful?
Thank you for voting!
John
November 8, 2019
Hi i want to fix my dryer but unsure what all i'll need. It has a high pitch short squeak every rotation. Also if it had a heavy load it seems fine. But when it dries and gets lighter it vibrates really bad. When you open the door it seems to be very jerky/grinding to a halt.
For model number GLDP280ED0WS
Hello John, thank you for writing. Replacing this Rear Drum Bearing Kit may fix the issue, but you will also want to consider the Drum Bearing Slide, part number PS755842, and the Drum Bearing Slide, part number PS6447706 for your dryer. Good luck with your repair!
1 person found this helpful.
Was this helpful?
Thank you for voting!
Cory
December 11, 2019
The dryer has been squeaking for some time. Looking into it i noticed the drum is leaning forward towards the door and has rubbed into the plastic around the door. Is there supports in the front i can replace? I’m also planning on replacing the rear bearing and belt.
For model number DCVH680EJ1MS
Hello Cory, thank you for your question. If the rear drum bearing is failing and the drum is leaning forward, the rear bearing should be replaced, as well as the front top bearing PartSelect Number: PS1766010 and you may want to check the slides which are PartSelect Number: PS755842 and PartSelect Number: PS6447706. I hope this helps!
1 person found this helpful.
Was this helpful?
Thank you for voting!
Tom
July 7, 2021
Hello, I see you have the whole kit, but I need the rear bearing only. Can you let me know p/n and if it's in stock? Thx.
For model number DBXR453EV0WW
Hello Tom, Thank you for the question. Very sorry, the Rear Bearing is only sold as part of the Kit. We hope this helps!
Was this helpful?
Thank you for voting!
Debby
August 15, 2022
Dryer is making a loud noise like shoes are in it or something heavy and bulky, also squeaks. Would that be a bearing or belt issue? We have replaced the Rear Bearing and all slides are good. They were replaced previously along with the belt.
For model number GE Dryer #DBXR453EV0WW
Hi Debby,
Thank you for your question. If your dryer is still making a noise after replacing these parts, you will need to check the front drum bearing, the idler pulley, the foam seal and the baffle. We have included a link that you may reference on how to check these parts. Once you have determined the part you need, please feel free to call customer service. We are open 7 days a week and anyone will be happy to assist you. We look forward to hearing from you!
Replacing your General Electric Dryer Rear Drum Bearing Kit
Customer Repair Stories
Average Repair Rating: 2.5 / 5.0, 60 reviews.
What's this?
< Prev
1
2
3
Next >
Sort by:
Search filter:
Clear Filter
Your search term must have 3 or more characters.
Keep searches simple. Use keywords, e.g. "leaking", "pump", "broken" or "fit".
Sorry, we couldn't find any existing installation instruction that matched.
Dryer making grinding noises
We live in a Condominium, space is tight especially in the Utility room where the washer/dryer are located. Turned dryer breaker off at the electical panel. Removed the top cover and front assembly w/door and front drum support, right where the unit was located. Had to gain rear access to loosen drum drive belt so undid the dryer vent hose to floor connection through a front acess hole. Moved the unit out to the breakfast nook as well as disconnecting the power cable from the wall socket. Removed the rear access panel covers and unhooked the drive belt. At the front removed the top screws off the lower cross member to allow spreading of the side covers to allow the removal of the drum. Removed drum and found the bearing bushing gone, reduced to powder. Using the supplied instuction sheet, replaced the rear bearing assembly, replaced the drum after vacumming the whole interior and started the reassembly of the unit using the new belt and moved the unit back into place. Reconnected the power cable and dryer vent then lastly replaced the lint filter and selector knob. Closed the breaker and turned on the machine, no noise!!! Incidently I am 78 years old. Thanks PartSelect.
the rear drum bearing was worn the dryer became very noisy
i removed the scews just above thr opened dryer door, i was then able to swing the dryer top cover back. i then removed the lower front panel screws ,the the screws securing the front of the dryer ( where the door is ) and removed it. there are just 2 wires to disconnect. after the front is removed you gain full access for drum removal, remove the belt make sure the wires are not in the way and remove the drum.i also used a vacuume to clean the inside of the dryer. the front drum slides are very easy to replace only 2 screws each.remove old parts install new parts then just put the dryer back together in the reverse order i took it apart. after re-assembly i turned the dryer on it was so quiet running my wife and dogs were very happy. ps. i just want to thank the people at partselect for having all my parts in stock and for the speed in which i received them. other than having to repair my dryer it was a very pleasant experiance.
Dryer would squeal when first starting and then gradually became very noisey.
The repair was done as follows:
1. Removed the door 2. Removed the two screws securing the top panel then removed the panel. 3. Removed the two screws securing the front panel then removed the panel. 4. Removed the screws securing the left side panel then removed side panel and the two leveling feet. 5. Tipped dryer over on its back (you will want to protect your floor, the four screws that attach the heater unit protrude through the back). 6. Disengaged the belt tensioner and removed the belt and the drum. 7. Removed the three Torx screws securing the drum bearing to the drum and discarded old bearing. 8. Removed the four screws securing the bearing retainer to the heater unit. 9. Removed the four screws securing the heater unit and two sensor wires. 10. Lifted heater unit just high enough to remove bearing retainer. Discarded bearing retainer.
The new drum bearing kit is supplied with self tapping screws. I installed the screws into the bearing parts to tap the holes and then removed them prior to assembly.
11. Installed new bearing retainer to back of heater unit using the supplied screws. Install the four screws by hand, finger tight. 12. Re-attached heater unit and tighten screws. 13. Re-attached sensor wires. 14. Tightened the four bearing retainer screws. 15. Attached new drum bearing to drum using the three supplied Torx screws. I used tape to hold everything together while installing the screws. Tightened the Torxscrews.
Next I used a vacuum to remove all the lint from inside the dryer. I also used a small plastic putty knife to remove the caked on lint on the impeller blades.
16. Inserted drum bearing into bearing retainer. 17. Installed drum belt and belt tensioner. 18. Installed left side panel and feet. 19. Replaced the two grey and two white slide bearings on the front panel. They just slip onto a small post and slide into a slot. 20. Installed front panel. (Rotate drum to help with installation) 21. Installed top panel and door
The weight of the front section of the drum in the dryer rides on 4 slim pieces of plastic. remove the screws that hold down the top of the dryer are in the front door at the top at each corner. remove the top, then remove 2 screws that hold down the front of the control panel to the cabinet at the base. remove the 2 screws at the of the front corners of the cabinet to separate the front door section from the rest of the dryer.Watch out for the wires the connect the door to the rest of the dryer. if you replace the bearing at the back of the dryer you need to take two screws out at the base of the cabinet one from each corner to let the sides of the cabinet to spread out and let the drum pass though the front of the dryer cabinet. the belt has to come off the motor by lifting it up an sticking your hand in under the drum and working it off the end of the motor. replaced the parts ad the dryer works like new.
If you're dis-assembling the dryer panels to remove the drum to acess the bearing located at the rear of the drum,don't hesitate to buy a idler pulley kit and a belt.It's easier to change them now,while it's apart. besides,their all pretty much in the same state of wear! In lew of prying my son away from the computer,an extra set of hands is a help, I used a scrap piece of 4x4 with a 1 inch whole bored in one side to place the bearing end into to steady it to get the screws started. otherwise you need to have 6ft.arms! re-assembly wasn't bad, a magnetic tipped #3 screw driver eliminates the frustration of dropping panel screws down inside the partially assembled body.
First i took the top cover off 2nd i took the front cover off disconnected the wires but make sure that you mark the wires first. 3rd I pull the drum forward removed the three scews holding the rear bearing . 4th I remove the four screws holding the bearing bracket from heating element.To remove the bracket you might have to remove the heating element i only remove three screws and was able to put my hand behind it and pull the bracket out. To put back just go in the reverse order. note: get some one to help you.
I've always heard it was a simple job to replace the belt and that would solve the problem. I'd defer to others online when they suggest to replace the rear bearing - they are totally right about that suggestion. My bearing basically fell apart in my hands. Not sure if I needed a belt or not, but it's worth replacing while you are tearing the thing apart. It took way longer to tear apart than to put back together. The parts and prices from PartsSelect were perfect. The parts were received in 4 business days as they said and were perfect replacement parts.
First, I loosened the the top control panel and then loosened the top flat roof panel which allowed me access to the inside of the dryer. Then, I removed the front panel which allowed access to the drum. I was amazed at the amount of lint that was inside the dryer itself. Most of my time was spent in the disassembly and cleaning of the internal cavity around the drum. I reached below the drum and removed the belt from the pulley wheels and then unscrewed the drum (from the inside) from the back of the dryer and bearing kit. I removed the diffuser and cleaned it thoroughly. Then I replaced the entire drum bearing kit - the old one was almost completely dissentigrated. I probably should have applied some kind of non-flammable lubricant to the new bearing kit - the instructions did not include this step but after about 3 loads a slight squeak (different). I put everything back together - applying the new drum kit will require 2 sets of hands (my 9-year old daughter did great at this). I re-assembled the dryer and it works great, again except for the slight squeak that's still there. I may disassemble it again and apply some lubricant but I do not know what kind to get; I need to check that out.
Jason from Cary, NC
Difficulty Level:
A Bit Difficult
Total Repair Time:
More than 2 hours
Tools:
Screw drivers, Socket set
31 of 34 peoplefound this instruction helpful.
Was this instruction helpful to you?
Thank you for voting!
Dryer squeaked when running
Everything is cleaned as it is removed.
Remove the two screws holding the top down. Disconnect two wires from door switch. Remove the two hex screws holding the front on. Remove the 4 screws holding the access panel on the back and disengage idler pulley to loosen the belt. Remove the drum. Label the wires then remove the heating element. Check orientation of ground strap before disassembling rear bearing. Remove four screws holding rear bearing to back of heating element. Install rear bearing and ground strap on to heating element. Reinstall heating element. Reconnect wires.
Most Important : Get help putting parts back on drum! I didn't and that's why it took over 2 hours. I will describe how I did it.
Unscrew bearing from inside of drum. Wrap screwdriver with tape to a little larger than the screw hole. Use small screwdriver to line up the drum, shim and deflector. Don't forget the brass shim. It wasn't on the parts diagram. Start two screws don't tighten them yet. Remove Screwdriver and start third screw. Tighten all three down. Put belt on drum. Install drum and belt. Reverse disassembly. When putting the front on make sure drum rests in the felt.
I rated this a bit difficult because I did it myself. With help this is a fairly easy repair.
Mark from Garrett, IN
Difficulty Level:
A Bit Difficult
Total Repair Time:
More than 2 hours
Tools:
Nutdriver, Screw drivers, Socket set
28 of 37 peoplefound this instruction helpful.
Was this instruction helpful to you?
Thank you for voting!
Drum in dryer making uneven grinding noise when turning.
I removed the top by removing the four screws holding the top on. Then I could access the screws holding the front of the dryer (including the door) on.
I removed the back panel so I could slip the belt off the idler pulley. There was also a small panel covering the back of the drum bearing. I removed the clip holding the drum bearing shaft in place. Then the entire drum assembly with the drum bearing was removed by shifting the drum toward the front and lifting it out.
I removed the drum bearing assembly by taking out the three screws holding it to the drum.
Once I received the drum bearing kit I reassembled it in reverse order.
The idler pulley had a clip holding the pulley on the shaft. I removed the clip, took off the old pulley and replaced it with the new one, replacing the clip. Then I rethreaded the drum belt around the motor shaft and ilder pulley and put the panels back on.
The Fix App makes it easy to manage all your stuff in one place. Just snap a photo and we'll find and store your user manuals, receipts, and product information in one easy-to-find place!
"Like magic. I took a picture of the model number on my refrigerator, and the app identified it right away … Very convenient. I'm impressed." ★★★★★ - Clever Jeff