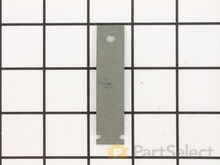
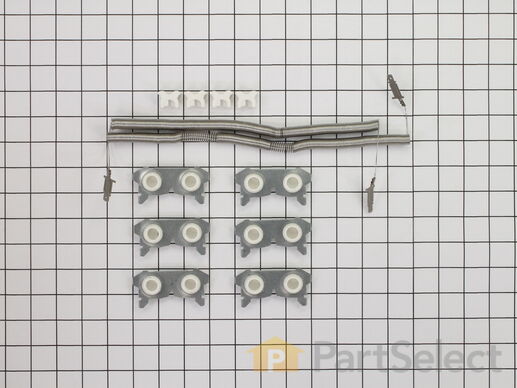
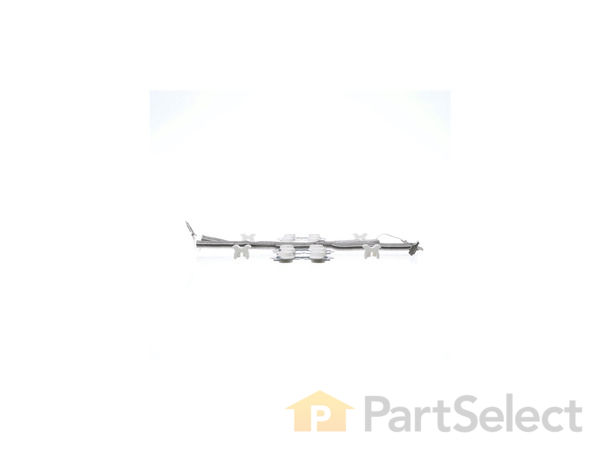
Heater Element Coil Kit
$
83.06
In Stock


Get this part fast! Average delivery time for in-stock parts via standard shipping: 1.8 days.
PartSelect Number PS265605
Manufacturer Part Number WE11X10007
Manufactured by
GE
You May Also Need?
Product Description
Heater Element Coil Kit Specifications
This is a restring kit only. This kit includes the 2 coils, insulators and coil supports.

How Buying OEM Parts Can Save You Time and Money
Troubleshooting
This part fixes the following symptoms:
No heat or not enough heat | Takes too long to dry
This part works with the following products:
Dryer.
This part works with the following products:
General Electric.
Part# WE11X10007 replaces these:
AP2620171, 824395, WE11M0016, WE11M0018, WE11M16, WE11M18, WE25M0027, WE25M27
Questions and Answers
Ask our experts a question about this part and we'll get back to you as soon as possible!
Search filter:
Clear Filter
Your search term must have 3 or more characters.
Keep searches simple. Use keywords, e.g. "leaking", "pump", "broken" or "fit".
Sorry, we couldn't find any existing answers that matched.Try using some different or simpler keywords, or submit your new question by using the "Ask a Question" button above!
Alfred
February 4, 2018
Can you just buy coil?

Hi Alfred, Thank you for the question. This kit is only sold as 2 coils, insulators and coil supports. The coil is not sold on its own. Hope this helps!
2 people found this helpful.
Was this helpful?
Thank you for voting!
Tracy
March 4, 2018
My dryer has 11 coil insulators. This part appears to only come with 6. Can i order an additional 5 insulators individually?
For model number db-dcxr463

Hi Tracy,
Thank you for your question. Unfortunately no. They either come on the whole heating element itself or in the amount that is in this kit. I hope that helps. Good luck with your repair.
1 person found this helpful.
Was this helpful?
Thank you for voting!
John
November 21, 2019
Is there a higher wattage heating element available for the GE profile electric dryer?
For model number DPGT650EHMG

Hi John,
Thank you for your question. The only heater assembly listed for your model is part number PS2322398. I hope this helps. Thank you and have a great day!
Was this helpful?
Thank you for voting!
Melissa
October 8, 2022
Under my model it provides a heating element and housing. Under that product it has "related parts" with the coil kit. However, when you click it, my model # isn't listed as compatible. I just need a heating element coil. Is this compatible or do I have to purchase the whole heating element and housing?
For model number dbsr453eb2ww

Hello Melissa, thank you for contacting us. The heating element and housing, part number FIX265565, is compatible with your model. The coils are not sold separately, replacing the whole heating element is the solution. Please watch the attached video for installation instructions. Customer service is always available to help you place an order if you are having trouble doing so. Good luck with your repair.

Was this helpful?
Thank you for voting!
Related Parts:
✖
Ask a Question
Ask our experts a question on this part and we'll respond as soon as we can.
Something went wrong. Please try again later.
Your Question Has Been Submitted!
Our experts will send you an email as soon as your question has been answered.
Customer Repair Stories
Average Repair Rating: 2.3 / 5.0, 5 reviews.
What's this?
Search filter:
Clear Filter
Your search term must have 3 or more characters.
Keep searches simple. Use keywords, e.g. "leaking", "pump", "broken" or "fit".
Sorry, we couldn't find any existing installation instruction that matched.
Dryer would run, but did not produce heat
I confirmed the dryer wasn't making any heat by running it for a few minutes, then opening the door. The air was cool, so I knew it wasn't making heat. I searched on Google and discovered that it could be the thermostat control or heating element. I began by unplugging the dryer from the 220 plug and moving it into the garage. I then unscrewed the top four Torx screws that hold the control panel in place. I immediately started to take lots of pictures of the wiring with my digital camera because I have no idea how to read a wiring diagram and knew I would never be able to remember which wire plugged into the appropriate control. Trust me, this is the smartest thing I've ever done. I unplugged all connections and draped the wires out of the way. Then removed the control panel completely and put it on my workbench. Then I unscrewed the top panel which exposes the drum. I was really surprised to learn how simple a dryer really is. I then unscrewed the front panel with the door. There are 3 or 4 wires that you will need to disconnect on the left side of the door. You can then remove the front door panel and set it up against a wall or whatever. At this point the front of the drum is NOT supported so it will rest on the small bottom panel in the front. Then you have to release the tension of the belt around the drum, which is easy enough to do. Just reach through the front, under the drum and pull the tension toward the right side of the dryer. This will release the tension and you should be able to slide the belt off of the roller. You may also have to unscrew the sides of the dryer panels in the front so that you can pull the drum out. It's fairly lightweight, just big and awkward. Once the drum was out, I could clearly see that both heating coils were burnt in two. There are some wires you'll need to disconnect on the element housing then there are 4 screws that hold the housing to the back of the dryer. Unscrew these and pull the element out. From there, I just followed the directions that came with the heating coil parts and reinstalled new coils. Once the coils are in place, just work backward putting things back together. Now, when you take the dryer apart, it's a GREAT idea use compressed air or a vacuum to blow or suck out all of the lint inside. I also blew out the electric motor and got everything all nice and clean inside. I also vented my dryer directly into my garage. It's an electric dryer so no dangerous fumes. Plus side to this is that I'll have heat in my garage during the winter months. Also, instead of the dryer venting 50+ feet out the side of the house, it now vents 3 feet to the garage. The dryer will now dry a full load of clothes on MEDIUM heat in 50 minutes. It used to take 80 minutes on high heat. This is a difficult fix, but if you take your time and lots of pictures, you can do it and save yourself a ton of money.
-
Terry from Columbus, IN
-
Difficulty Level:Difficult
-
Total Repair Time:More than 2 hours
-
Tools:Nutdriver, Pliers, Screw drivers
68 of 75 people
found this instruction helpful.
Was this instruction helpful to you?
Thank you for voting!
dryer would not heat up, took to long to dry clothes
removed 2 screws inside front door, then remove two screws holding front on unit. took belt off and removed dryer drum. remove wire(label them), remove heater element, removed heater coils. pull new heater coils to correct length and install in heater elements. reinstall parts that were removed. there was instructions with new heater element coils.
Other Parts Used:
-
Don from Epworth, IA
-
Difficulty Level:A Bit Difficult
-
Total Repair Time:30 - 60 mins
-
Tools:Pliers, Screw drivers
49 of 74 people
found this instruction helpful.
Was this instruction helpful to you?
Thank you for voting!
No Heat
Dryer would not heat. I found some troubleshooting tips on the internet and dug in. I had to remove the control panel, top, and then the drum. I was going to test the thermostats, but noticed right away that the heater coils were both broken. I thought I needed the whole heater assembly, but found out through parts-select that you could get just the coils and "re-string" it. I also noticed the drum slides were wore out. I ordered a new coil kit and slides and they arrived in two days. Took the heater assembly out of the dryer to re-string it. Was fairly straight forward if you just use common sense. You have to stretch the new coils pretty far and my arms were not long enough so my daughter helped me with that part. Re-strung it, re-assembled the dryer (after giving it a good thorough cleaning of the lint), put the new slides on, and fired it up. Works like a champ again. The instructions included were OK. But if you just looked at what you were doing you'd be fine. I would suggest to anyone that does not know or understand dryer wiring, to take a digital picture of the connections BEFORE you take them apart, as you do have to unhook three thermostats with multiple wires each, to get the heater assembly out.
Other Parts Used:
-
Jason from Rogers City, MI
-
Difficulty Level:A Bit Difficult
-
Total Repair Time:1- 2 hours
-
Tools:Nutdriver, Pliers, Screw drivers
20 of 23 people
found this instruction helpful.
Was this instruction helpful to you?
Thank you for voting!
Only 1 of 2 elements come on when drying.
Replaced the elements. Found anouther problem with the motor. The centrifigual switch will not release when motor is turned off so elements stay on all the time the timer is turned on. The only way to get the elements off is to turn the timer off.
-
Daniel from Omaha, NE
-
Difficulty Level:A Bit Difficult
-
Total Repair Time:1- 2 hours
-
Tools:Nutdriver, Screw drivers
11 of 17 people
found this instruction helpful.
Was this instruction helpful to you?
Thank you for voting!
Dryer was not heating properly and it was taking twice the time to dry a load of clothes.
I replaced the heater coil. The video was easy to follow. If you can use a screwdriver then you can accomplish this project.
-
Chris from ELK GROVE, CA
-
Difficulty Level:Easy
-
Total Repair Time:30 - 60 mins
-
Tools:Pliers, Screw drivers
5 of 5 people
found this instruction helpful.
Was this instruction helpful to you?
Thank you for voting!
Customer Reviews
Filter By Rating:
Search filter:
Clear Filter
Your search term must have 3 or more characters.
Keep searches simple. Use keywords, e.g. "leaking", "pump", "broken" or "fit".
Sorry, we couldn't find any existing reviews that matched. Try using some different or simpler keywords.
Andrew M - February 27, 2018

Easy repair
This is an easy repair. I considered purchasing the whole piece that has the heat coils and deflector for a 120 some dollars until i realized that its the same amount of work and disassembly to just replace the coils. The coil kit was $42 after shipping and going this route was worth the $80 savings. There is a detailed step by step video on partselect.com and detailed instructions with the kit you receive.
Model Cross Reference
This part works with the following models:
PartSelect Number: PS265605
Manufacturer Part Number: WE11X10007
Brand
Model Number
Description