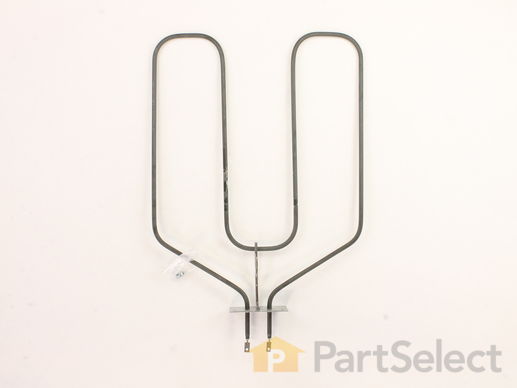
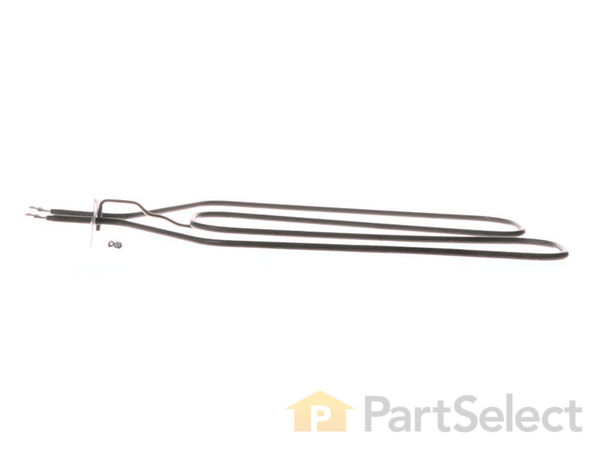
The broil element is located at the top of the oven and gives off heat in order to bake evenly. If you notice that the element is not heating up or is not cooking evenly it could be because it is broken or burnt out. The depth of the screw-on terminals is 2-3/4 inches and they are 1-1/4 inches apart. Does not include mounting bracket. All you need for this simple repair is small screwdriver. To complete this repair, you will need to first turn the oven off (or shut off the house circuit breaker), remove the two screws that are holding the old element in place, remove the two wires from the old part, and then connect them to the new part and screw back into place.
How Buying OEM Parts Can Save You Time and Money
Troubleshooting
This part fixes the following symptoms:
Little to no heat when broiling | Element will not heat | Little to no heat when baking | Oven not heating evenly
Keep searches simple. Use keywords, e.g. "leaking", "pump", "broken" or "fit".
Sorry, we couldn't find any existing reviews that matched. Try using some different or simpler keywords.
★★★★★
★★★★★
Jack A - January 11, 2024
Verified Purchase
Easy to order came in three days.
Part was boxed so as to not get damaged in shipping, it was an exact match to the old one. And most of all I cant believe that the part was available for my 1983 oven.
★★★★★
★★★★★
Raymond S - January 5, 2023
Verified Purchase
Quick and easy
The part was exactly correct and went in without a hassle. Why should I ever pay for a repair person again. As long as I know how to use a screwdriver and a few minor tools, I'll never pay for repairs again and will get a great deal of satisfaction doing it!
Ray
★★★★★
★★★★★
Joe S - September 27, 2021
Verified Purchase
Easy repair for younger people a little difficult fo seniors 80+
Part arrived on schedule. Installation was a little difficult due to the age of the installer. A younger person would have done it in half the time. Over all we are very pleased.
★★★★★
★★★★★
Tammy S - December 8, 2020
Verified Purchase
Easy order
The part I ordered was easy to install. My son and I had it done in 20 mins. Just in time to cook Thanksgiving dinner.
★★★★★
★★★★★
Katherine B - June 2, 2020
Verified Purchase
Great fit!
The part came in great condition. Now my appliance is working again. Thanks guys for your great service
★★★★★
★★★★★
Stephanie M - May 28, 2020
Verified Purchase
Broil element
Broil element Received in a few days and easy to fix thank you
★★★★★
★★★★★
Alvin B - May 26, 2020
Verified Purchase
EASY REPAIR WITH EXCEPTION HAD TO REDRILL SOME HOLES
PART WORKS GREAT
★★★★★
★★★★★
Dean B - April 28, 2020
Verified Purchase
I am Broiling! Look at me know.
Great part that was impossible to find. The part shipped fast and was the perfect part. The installation for straight forward and very easy.
I boiled some fish and the heating element worked flawlessly.
I highly recommend this product.
Dean B.
Dallas
★★★★★
★★★★★
Robert T - March 12, 2020
Verified Purchase
element replacement
the part works great. the instructions in the email were precise and made removal/installation
a breeze.
★★★★★
★★★★★
Greig L - September 6, 2019
Verified Purchase
Replacement broil element.
It’s silvery grey, a sort of ‘c’ shape and when you run electricity through it, you can broil food with it.
< Prev
1
2
3
Next >
Customer Repair Stories
Average Repair Rating: 3.6 / 5.0, 45 reviews.
What's this?
Sort by:
< Prev
1
2
3
Next >
Search filter:
Clear Filter
Your search term must have 3 or more characters.
Keep searches simple. Use keywords, e.g. "leaking", "pump", "broken" or "fit".
Sorry, we couldn't find any existing installation instruction that matched.
broil element burn into
turn off electricity to stove and simply remove the screws from the heating element and put new element back in place .put screws in and turn power back on and test.
wayne from GARLAND, TX
Difficulty Level:
Easy
Total Repair Time:
30 - 60 mins
Tools:
Nutdriver, Screw drivers
3 of 3 peoplefound this instruction helpful.
Was this instruction helpful to you?
Thank you for voting!
broiler element was broken
I looked on Youtube for a how to video. It was accurate but the screws in my oven were NOT phillips head screws, they turned out to be sheet metal screws. I used pliers at first which was a PAIN but then I borrowed a socket wrench from the neighbor that was MUCH better!! I had wanted to do it myself to prove to my husband and son that I c
... Read moreould but I ended up needing their help because the screws were so tight.... But we did the repair ourselves!!!
Read less
Milli from AURORA, CO
Difficulty Level:
Difficult
Total Repair Time:
More than 2 hours
Tools:
Pliers, Screw drivers, Socket set
2 of 2 peoplefound this instruction helpful.
Was this instruction helpful to you?
Thank you for voting!
burned-out broiler element
turn off breaker in electrical panel....remove stove socket from outlet....remove rear panel from stove....undo wire connectios from broiler element....inside the oven, gently move thermostat wire out of the way....unbolt broiler plate from rear wall....remove broiler hanger and then broiler element....reverse procedure and you're all set
... Read more.
Read less
William from Carmel, NY
Difficulty Level:
Easy
Total Repair Time:
1- 2 hours
Tools:
Nutdriver, Pliers, Screw drivers
2 of 4 peoplefound this instruction helpful.
Was this instruction helpful to you?
Thank you for voting!
Replaced Oven Broiler Element
Removed old, burned out element, and replaced with a new element. The worst part of the entire job was getting the oven door assembled back on to the oven.
Bill from Langhorne, PA
Difficulty Level:
Easy
Total Repair Time:
15 - 30 mins
Tools:
Nutdriver, Screw drivers
0 of 1 peoplefound this instruction helpful.
Was this instruction helpful to you?
Thank you for voting!
Replace cracked broiler element
Unplugged Stove, pulled away from wall. With smaller wrenches, took the two screw-nuts off the inside back and above that hold the broiler element in place. Since it is an older stove...took the back panel off the stove with philips screw-driver which consisted of 10 screws. Once that was removed was able to unscrew the broiler element fr
... Read moreom the two wires that provide the electricity. Used the flash light when I had to unfasten the screw-nuts inside the stove because kitchen lighting wasn't strong enough.
Read less
Deborah from Middletown, CT
Difficulty Level:
Easy
Total Repair Time:
30 - 60 mins
Tools:
Screw drivers, Wrench set
1 of 2 peoplefound this instruction helpful.
Was this instruction helpful to you?
Thank you for voting!
Broken broiler element
Replacing the part was fairly simple. Do not forget to dis-connect the element from the back.
Michael from Medford, NY
Difficulty Level:
Easy
Total Repair Time:
15 - 30 mins
Tools:
Nutdriver, Screw drivers
1 of 2 peoplefound this instruction helpful.
Was this instruction helpful to you?
Thank you for voting!
broiler element wa burned out
I shut down the electric to the oven at the circuit breaker. Then i loosened the mounting screws and pulled the element from the back wall of oven. Then i disconnected the two leads to the element with a phillips screwdriver and removed element. Installation was done in reverse order.
joan from coram, NY
Difficulty Level:
Really Easy
Total Repair Time:
15 - 30 mins
Tools:
Nutdriver, Screw drivers
0 of 1 peoplefound this instruction helpful.
Was this instruction helpful to you?
Thank you for voting!
Burned out heating elements
Repair went well. Intent of this submission is to give PartSelect a pat on the back. Diagrams of parts on their website made it easy to identify which parts were required. Order arrived promptly, ordered Tuesday night, arrived Friday. Good Job!
Piece of cake to repair. I took both both heating elements off. I sprayed oven cleaner everywhere to soften the grime. I waited 10 minutes and wiped up the softened baking grime. Installation took 5 minutes for each element and about 15 minutes to clean the oven while both elements were removed.
Turned power off to oven. Unscrewed back plate exposing wires connected to heating element. It was difficult to unscrew the connections between them as it was hard to reach in because the oven door was in the way, but i finally succeeded. Unscrewed the bracket holding the burned out element and then attached the wires to the new element.
... Read moreAttached the bracket and I turned on the power. I then tested the oven and it worked.
Read less
Fred from Porter Ranch, CA
Difficulty Level:
A Bit Difficult
Total Repair Time:
30 - 60 mins
Tools:
Screw drivers, Socket set
1 of 3 peoplefound this instruction helpful.
Was this instruction helpful to you?
Thank you for voting!
< Prev
1
2
3
Next >
Questions and Answers
We're sorry, but our Q&A experts are temporarily unavailable.
Please check back later if you still haven't found the answer you need.
25 questions answered by our experts.
Sort by:
< Prev
1
2
3
Next >
Search filter:
Clear Filter
Your search term must have 3 or more characters.
Keep searches simple. Use keywords, e.g. "leaking", "pump", "broken" or "fit".
Sorry, we couldn't find any existing answers that matched.Try using some different or simpler keywords, or submit your new question by using the "Ask a Question" button above!
James
October 21, 2017
When the broiling element wires slip back into the back of the oven ( this is a wall oven ) how do you retreave the wires to connect the broiling element?
For model number RJ734GP1
Hi James,
Thank you for your question. You would have to remove your appliance from the wall to be able to get to the wires and push them back through the opening. Good luck with your repair.
7 people found this helpful.
Was this helpful?
Thank you for voting!
Derry
March 1, 2018
Hi, I need a top element (broil) for my GE oven model number jkp07006ad. It looks very similar to part #wb44x173 are they compatible or should I be looking at another part number? Thanks!
For model number JKP07006AD
Hello Derry, Thank you for contacting us. I have researched the model you have provided and have found the part you’re looking for is PartSelect Number PS249411. Hope this helps!
3 people found this helpful.
Was this helpful?
Thank you for voting!
Brett
March 7, 2018
I can find model numbers t6 & t7, but not t4. Will your part number ps249411 be the correct part number to replace broil element in the t4 model?
For model number R J742G0T4
Hello Brett, thank you for your question. The broil element part number WB44X173 is an compatible match with your T4 model as well! This part will work with your unit! Good luck with your repair!
3 people found this helpful.
Was this helpful?
Thank you for voting!
ROBERT
January 24, 2019
Im needing upper and lower oven elments
For model number J BS27G V1WH
Hello Robert, thank you for your question. The broil element is PartSelect Number: PS249411 and the bake element is PartSelect Number: PS249466 for your unit. Please enter the part number into the site for current price and availability. Good luck with your repair!
My broil element burnt in two and I'm searching for the correct part but the numbers I have on my range do not match any of these numbers on here. Could you please help me find the right part? Serial # zr113753g, model # jbc27gw1wh
For model number JBC27GW1WH
Hello Kayla, thank you for inquiring. This Broil Element part PS249411 is the correct replacement for your model.
2 people found this helpful.
Was this helpful?
Thank you for voting!
Corey
February 17, 2020
How many watts is this?
Hello and thank you for writing.
This element is 3400 watts. We hope this helps. Please contact us anytime if you require further assistance.
2 people found this helpful.
Was this helpful?
Thank you for voting!
Timothy
March 17, 2020
I ordered part number wb44x173 but then found the recommended part was ps249284. Will wb44x173 work or do i need to return it and order the other element?
For model number jbp78wb4ww
Hi Timothy,
Thank you for your question. Part number WB44X173 will not work on your model. You will need to order part number PS249284. We hope this helps. Thank you and have a great day.
2 people found this helpful.
Was this helpful?
Thank you for voting!
James
December 26, 2019
I have an older model GE double wall unit (~1980). The bottom heating element in both ovens is out. These elements have a different shape than the broiler unit at the top and the terminals are approximately 1 " apart. Do you have the parts, the lower heating element, for this model oven?
For model number JKP36G005BG
Hello James, Thank you for contacting us. I have researched the model you have provided and have found the part you are looking for is PartSelect Number PS249424. Hope this helps!
We have a very, very old GE wall oven that we love (J R17001HT) that needs a new broiler coil. This part looks like it will be compatible with our old model but is there a way to know for sure before purchasing?
For model number J R17001HT
Hi Collin, thank you for reaching out. The broiler element, part number PS249411, that you have mentioned, is compatible with your model. We hope this helps.
1 person found this helpful.
Was this helpful?
Thank you for voting!
Lester
March 2, 2018
I have a GE range that i need to replace the top broiler element. If you need the serial number is vl279256g. On another part site i was given part #ap2031021. The rep researched part number to make sure before we ordered and said it was not a match. Can you help with the correct number for this part. The appliance does date back to 1983. It was in the home we purchased.
For model number JBP24G005AD
Hello Lester, Thank you for contacting us. I have researched the model you have provided and have found the part you’re looking for is Part Number: PS249411. Hope this helps!
Item is in stock and will ship today if your order is placed before 4:00 PM Eastern Standard Time.
If your order is placed after 4:00 PM EST, the in stock items will ship on the next business day.
On Order
Item is not in stock and usually ships 3-5 business days from the time you place your order.
Special Order
Item is not in stock and usually ships 10-15 business days from the time you place your order.
NLA - No Longer Available
This item is no longer being made by the manufacturer, and cannot be added to your shopping cart.
[{"position":0,"name":"Home","title":"Home","url":"/"},{"position":1,"name":"Range","title":"Range","url":"/Range-Parts.htm"},{"position":2,"name":"Element or Burner","title":"Element or Burner","url":"/Range-Elements-and-Burners.htm"},{"position":3,"name":"WB44X173","title":"WB44X173","url":""}]
You added 1 item to your cart
✖
$
Qty:
Total item(s) in cart:
Order Subtotal
$
*Taxes and shipping will be applied during checkout