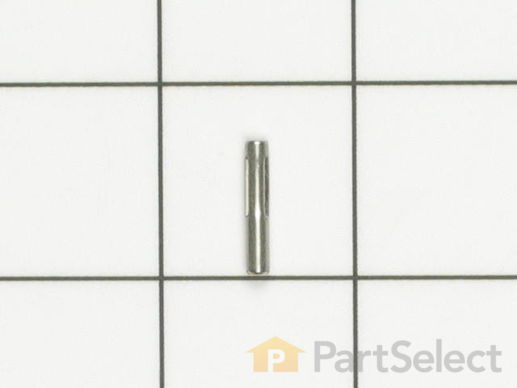
Short Dispenser Door Retaining Pin
$
5.76
In Stock


Get this part fast! Average delivery time for in-stock parts via standard shipping: 1.8 days.
PartSelect Number PS11757600
Manufacturer Part Number WPY912679
Manufactured by
Whirlpool
You May Also Need?
Product Description
Short Dispenser Door Retaining Pin Specifications
The short dispenser door retaining pin latches your washing machine door to the hinge. If you find that your washing machine will not dispense detergent, or the lid will not latch properly, you may need to replace the short dispenser door retaining pin. This pin is less than one inch in diameter, and is the shorter of the two hinge pins. To find the larger hinge pin, search WP6-912678. This part is cylindrical and is made of metal. The short dispenser door retaining pin is sold individually. This is an OEM part sourced directly from the manufacturer.

How Buying OEM Parts Can Save You Time and Money
Troubleshooting
This part fixes the following symptoms:
Will not dispense detergent | Door latch failure | Lid or door won’t close
This part works with the following products:
Dishwasher, Washer.
This part works with the following products:
Maytag, Jenn-Air, Magic Chef, Amana.
Part# WPY912679 replaces these:
AP6024249, 912679, Y912679
Questions and Answers
Be the first to ask our experts a question about this part!
✖
Ask a Question
Ask our experts a question on this part and we'll respond as soon as we can.
Something went wrong. Please try again later.
Your Question Has Been Submitted!
Our experts will send you an email as soon as your question has been answered.
Customer Repair Stories
Average Repair Rating: 3.7 / 5.0, 13 reviews.
What's this?
Search filter:
Clear Filter
Your search term must have 3 or more characters.
Keep searches simple. Use keywords, e.g. "leaking", "pump", "broken" or "fit".
Sorry, we couldn't find any existing installation instruction that matched.
Drains but doesn't spin, door lock does not engage.
Door locked light did not come on and did not have 120 VAC across the Wax Motor. Also the Wax Motor did not extend out to make contact with the Door Lock, Spin Enable Switch. General guidance is to replace drive belt and to replace Wax Motor along with the Door Lock, Spin Enable Switches (total of two limit switches). This did not correct the problem. Checked for power and traced loss of power back to the Control Board where resistor R11 was found to be burnt out. Replaced Resistor with new Carbon Film unit, rating of 3.9 K-ohms, 1/4 W and 5%. As a prcaution, replace the Triac (manufactue part number NTE5657), component identified as Q6, rating of 0.8 Amp, 600 VAC. Semiconductor parts must be obtained from somewhere other than Parts Select (unable to find in the small town I live in, I located on the internet at Mouser.com). Unit works great now.
Other Parts Used:
-
richard from austin, MN
-
Difficulty Level:Difficult
-
Total Repair Time:More than 2 hours
-
Tools:Nutdriver, Screw drivers, Socket set
101 of 142 people
found this instruction helpful.
Was this instruction helpful to you?
Thank you for voting!
the soap dispenser door broke off, I lost the pins and the spring.
The repair is fairly simple except that the diagram on the web site has an error - it reverses the positions of the long hinge pin and the short pin. I kept trying to do it as the diagram showed and of course it didn't work. Then I followed my instincts! The only other difficult part was figuring out which way to insert the spring but there are only a few options so trial and error was the simplest way.
Other Parts Used:
-
Bonnie from South Orange, NJ
-
Difficulty Level:A Bit Difficult
-
Total Repair Time:Less than 15 mins
9 of 15 people
found this instruction helpful.
Was this instruction helpful to you?
Thank you for voting!
The pins on the soap dispenser somehow became disengaged and lost in a wash cycle.
It was difficult to use the guide provided online to determine what position to place the spring in. Finally I realized that the spring had to be placed with the tip that sticks out against the wall of the dishwasher to make the spring action work. The long and short pins were not a problem. How to place the spring was the main problem, but I finally figured it out. I did not need any special tools to accomplish this. I just used a kitchen knife to push the short pin into place.
Other Parts Used:
-
Coralie from Centennial, CO
-
Difficulty Level:A Bit Difficult
-
Total Repair Time:15 - 30 mins
6 of 9 people
found this instruction helpful.
Was this instruction helpful to you?
Thank you for voting!
bad pump
I took off the rear panel and removed the hose clamps and electrical terminals, slid pump out of slot in bottom pan of washing machine. It only took minutes, this was part of a major overhaul. I replaced this as a precautionary measure. Great prices and quick service,
Other Parts Used:
-
Brandon from Berea, OH
-
Difficulty Level:Really Easy
-
Total Repair Time:15 - 30 mins
-
Tools:Nutdriver, Screw drivers
6 of 11 people
found this instruction helpful.
Was this instruction helpful to you?
Thank you for voting!
The repair went really quick. My husband was able to do it in about 5 minutes. Also the service was amazing. We ordered the part and we got it 3 days later. I have no complaints about ordering from this company and am sure that If I need to get new parts in the future this is where I will get them.
There was 4 screws that held the bevel in that still needed to be removed from the old broken one. Once we removed those we were able to place the new bevel and lid in the correct sport, replace the screws and viola, perfect.
Other Parts Used:
-
Sarah from Ephraim, UT
-
Difficulty Level:Really Easy
-
Total Repair Time:Less than 15 mins
-
Tools:Screw drivers
2 of 3 people
found this instruction helpful.
Was this instruction helpful to you?
Thank you for voting!
fabric softner, and bleach dispenser not working
First off, unplug the machine.
Next remove the existing screws in the plastic dispenser. Then remove the door, there are two screws holding the door on connecting two brackets which need to be lifted to get them to release.
That gives you the access to the remove the front panel, which is done by pulling on the panel itself.
Once that is done you need to remove the two screws that are in the corners upper left, and right that are holding the brackets that hold down the top of the machine. Remove the brackets by gently turning them.
Once done the lid should easily lift up.
The dispenser can then be disconnected by removing the 2 rubber hoses on top and the the larger rubber hose on the bottom along with the electrical connections under the unit. Keep track of which wire goes to which lead.
After removing the dispenser just do everything in reverse.
The machine is like new, and the repair took about 45min and saved me at least $200 dollars.
Other Parts Used:
-
anne from gaston, OR
-
Difficulty Level:Easy
-
Total Repair Time:30 - 60 mins
-
Tools:Nutdriver, Pliers, Screw drivers
2 of 4 people
found this instruction helpful.
Was this instruction helpful to you?
Thank you for voting!
The detergent lid and pins came loose and the small parts were lost
Went on line to find the part numbers, ordered complete replacement. Simply put the stuff together and replaced the whole cup lid.
Other Parts Used:
-
Alan from Burien, WA
-
Difficulty Level:Really Easy
-
Total Repair Time:Less than 15 mins
2 of 5 people
found this instruction helpful.
Was this instruction helpful to you?
Thank you for voting!
The door to the soap dish on the door of the dishwasher had come off and the parts were lost during the wash cycle.
It was a hassle. We didn't have sufficient information in the user's guide to figure out how to attach the soap dish door which had come off back onto the door of the dishwasher, so when we bought the parts, a long pin, a short pin, and a spring (hinge pin), we could only guess how to put it together. The first two times we tried, the pins and spring came off in the dishwasher during a washing cycle and disappeared down the drain. We had to call someone out who just ordered the parts again and said it would cost us $146 to fix, which I thought was ridiculous, so when the parts came, I tried again. This time I figured it out by using a screw driver and hammer to knock the short pin into place while holding the door in place. The door appears to work fine now but, I have yet to use the dishwasher to know for sure.
Other Parts Used:
-
Diane from Lindenhurst, IL
-
Difficulty Level:A Bit Difficult
-
Total Repair Time:15 - 30 mins
-
Tools:Screw drivers
2 of 5 people
found this instruction helpful.
Was this instruction helpful to you?
Thank you for voting!
Door lock wasn't working
There were two parts to the repair - the Dispenser Lid and Bezel was easy - I did it myself.
My wife, who normally would try to do the repair of the door lock herself has been very busy with her condo rental business. It took six weeks to get her to order the parts and then they sat in the box for two weeks before I convinced her to call her appliance repair company she uses for the renatl condos. They did a quality job for only $79.00. When my wife saw what he had to be do to repair the locking mechanism, she was convinced we made the right decision. The Maytag washer is working like new after weeks of manually adjusting the door latch, sometimes a dozen times, before it would lock and do a high speed spin.
Other Parts Used:
-
Carolyn from Panama City Beach, FL
-
Difficulty Level:Really Easy
-
Total Repair Time:30 - 60 mins
-
Tools:Screw drivers
2 of 32 people
found this instruction helpful.
Was this instruction helpful to you?
Thank you for voting!
Dispenser Bezel broken around screws
Removed 2 of 4 the screws that were holding the Dispenser Bezel in place. Removed the broken Dispenser Bezel and the other 2 screws. Cleaned the 4 screws (remove the detergent) cleaned the inside of the Dispenser area. Assembled the Dispenser lid /bezel assy. Secured the lid / bezel assy to washer with the 4 screws. Installed the syphon cup and syphon cap.
Other Parts Used:
-
Richard from Watauga, TX
-
Difficulty Level:Really Easy
-
Total Repair Time:15 - 30 mins
-
Tools:Nutdriver, Screw drivers
1 of 3 people
found this instruction helpful.
Was this instruction helpful to you?
Thank you for voting!
Customer Reviews
Filter By Rating:
Search filter:
Clear Filter
Your search term must have 3 or more characters.
Keep searches simple. Use keywords, e.g. "leaking", "pump", "broken" or "fit".
Sorry, we couldn't find any existing reviews that matched. Try using some different or simpler keywords.
Radak S - March 17, 2018

Repair kit for soap door
Easy replacement and fully repaired.
Albert C - March 10, 2018

fsat and great
great and fast
Model Cross Reference
This part works with the following models:
PartSelect Number: PS11757600
Manufacturer Part Number: WPY912679
Brand
Model Number
Description
Amana
ADW662EAB-PADW662EAB0
Dishwasher
- Amana Dishwasher Model ADW662EAB-PADW662EAB0 (ADW662EABPADW662EAB0, ADW662EAB PADW662EAB0) Parts
Amana
ADW662EAC-PADW662EAC0
Dishwasher
- Amana Dishwasher Model ADW662EAC-PADW662EAC0 (ADW662EACPADW662EAC0, ADW662EAC PADW662EAC0) Parts
Amana
ADW662EAW-PADW662EAW0
Dishwasher
- Amana Dishwasher Model ADW662EAW-PADW662EAW0 (ADW662EAWPADW662EAW0, ADW662EAW PADW662EAW0) Parts