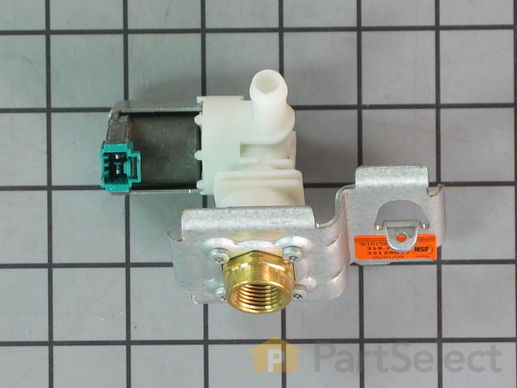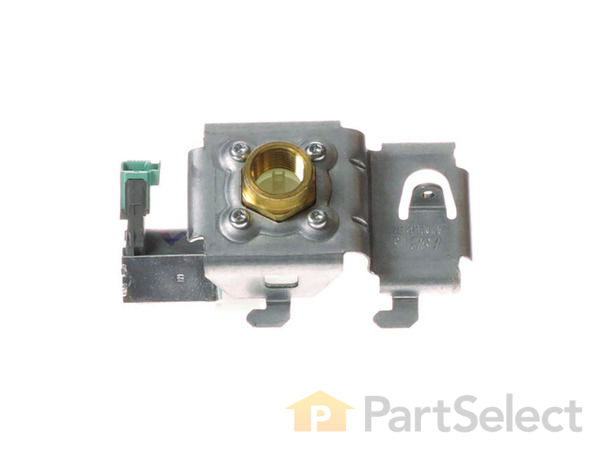
Water Inlet Valve WPW10158389
Rated by 25 customers
Easy
30 - 60 mins
Ratings submitted by customers like you who bought this part.
Get this part fast! Average delivery time for in-stock parts via standard shipping: 1.8 days.
Water Inlet Valve Specifications

How Buying OEM Parts Can Save You Time and Money
Replacing your KitchenAid Dishwasher Water Inlet Valve

-
5 Stars 48
-
4 Stars 5
-
3 Stars 1
-
2 Stars 1
-
1 Star 0
- < Prev
- 1
- 2
- 3
- Next >
- < Prev
- 1
- 2
- 3
- Next >
- < Prev
- 1
- 2
- 3
- Next >
-
Anthony from AIKEN, SC
-
Difficulty Level:A Bit Difficult
-
Total Repair Time:1- 2 hours
-
Tools:Nutdriver, Pliers, Wrench (Adjustable), Wrench set
-
Kelly from Afton, WY
-
Difficulty Level:Really Easy
-
Total Repair Time:30 - 60 mins
-
Tools:Socket set
-
Robert from BOYNTON BEACH, FL
-
Difficulty Level:Really Easy
-
Total Repair Time:30 - 60 mins
-
Tools:Pliers, Screw drivers, Wrench (Adjustable)
-
Steve from BOULDER, CO
-
Difficulty Level:Easy
-
Total Repair Time:1- 2 hours
-
Tools:Nutdriver, Pliers, Screw drivers, Wrench (Adjustable), Wrench set
Turn off the water.
If your washed is hard wired, turn off the breaker. If plugged into an outlet, unplug it. When the water line is disconnected there will be a little water from the hose. Not good to get eater in any connectors.
Remove the door covering using the star d ... Read more rive. The only way to get to the valve. To remove the door covering: Open the door and remove the side screws and the two at the top on either side of the door latch. You will need to set the door on something so that it is not in the way of access to under the washer. Be careful that you don't pull the wire tape and break the connector.
Remove the the base plate and other plate with the insulation using a 1/4 inch socket or nut driver.
I removed the valve from the mounting. Remove the mounting screw ( 1/4 nut driver or socket ). You can position the valve to make it easier to disconnect the supply line and pull the discharge hose off of the fitting and remove the wire connector.
In my case, the water line was soft copper screwed into a brass fitting, and over the last 17 years the nut had seized to the 90 degree fitting. Made me say bad things trying to break it loose while trying to fit my hands and wrenches under the washer.
This is important!! Make sure to note the angle of the 90 degree fitting that the water line fits into. If your water line is plastic tubing you will be able to move it around to align it to the fitting but if your water line is copper, the 90 degree fitting must be perfectly aligned or the nut will not start and you will say bad things trying to get it to work.
Slide the hose clamp up the discharge hose a couple of inches, using the plyers to squeeze the end of the clamp to open it. Remove the hose by twisting it back and forth until it moves then pull it off of the fitting.
Remove the valve and remove the 90 degree fitting positioning it in the new valve exactly as it was in the old valve. I have a bench mounted vice that made it easier tighten the Teflon tape coated threads to the right position.
Install the discharge hose and make sure the clamp is near the bottom of the hose to provide a good seal below the bulge in the fitting. Connect the the wire plug and water line, install the valve into the mounting slots and install the mounting screw.
Turn the water on and check for leaks.
Install the base plates and secure with the two 1/4" screws.
Install the door by cocking the bottom in and the top out to let the bottom fit into the bracket. Hold the door square with the washer and install the screws to keep the door square.
Run the machine and keep your fingers crossed.
-
Charles from GREEN VALLEY, AZ
-
Difficulty Level:A Bit Difficult
-
Total Repair Time:More than 2 hours
-
Tools:Nutdriver, Pliers, Socket set, Wrench set
-
Ellen from WELLS RIVER, VT
-
Difficulty Level:Easy
-
Total Repair Time:30 - 60 mins
-
Tools:Nutdriver, Pliers, Screw drivers, Wrench (Adjustable)
-
Charles from CORP CHRISTI, TX
-
Difficulty Level:A Bit Difficult
-
Total Repair Time:30 - 60 mins
-
Tools:Nutdriver, Screw drivers, Wrench (Adjustable), Wrench set
Once the flooring was replaced it was very easy to follow the u-tube directions from your website to replace the valve. It took the handtools you recommended and about 30 mins.
... Read more />Everything is working as it should. I feel I saved myself a couple of hundred of dollars by doing it myself. Thank you for your expert help.
-
Clarence from BREMERTON, WA
-
Difficulty Level:Easy
-
Total Repair Time:30 - 60 mins
-
Tools:Nutdriver, Pliers, Wrench (Adjustable)
-
Alfred from Virginia Beach, VA
-
Difficulty Level:Easy
-
Total Repair Time:30 - 60 mins
-
Tools:Pliers, Socket set, Wrench (Adjustable)
-
David from TIBURON, CA
-
Difficulty Level:Easy
-
Total Repair Time:30 - 60 mins
-
Tools:Pliers, Screw drivers, Socket set, Wrench (Adjustable)
- < Prev
- 1
- 2
- 3
- Next >
Ask our experts a question about this part and we'll get back to you as soon as possible!
- < Prev
- 1
- 2
- Next >

13 people found this helpful.

13 people found this helpful.

12 people found this helpful.

7 people found this helpful.

6 people found this helpful.

5 people found this helpful.

5 people found this helpful.

4 people found this helpful.

4 people found this helpful.

3 people found this helpful.
- < Prev
- 1
- 2
- Next >
Manufacturer Part Number: WPW10158389

Item is in stock and will ship today if your order is placed before 4:00 PM Eastern Standard Time.
If your order is placed after 4:00 PM EST, the in stock items will ship on the next business day.
Item is not in stock and usually ships 3-5 business days from the time you place your order.
Item is not in stock and usually ships 10-15 business days from the time you place your order.
This item is no longer being made by the manufacturer, and cannot be added to your shopping cart.


