


Models
>
1244
1244 - Overview
Models starting with 1244
Click on the best match to narrow your results.
- 12440-1 General Electric Range
- 12441-1 General Electric Range
- 124430-0118-01 Briggs and Stratton Engine (Engine)
- 124432 (8001) Briggs and Stratton Engine (Engine)
- 124432-0110-E1 Briggs and Stratton Engine (Engine)
- 124432-0111-E1 Briggs and Stratton Engine (Engine)
- 124432-0115-E1 Briggs and Stratton Engine (Engine)
- 124432-0116-E1 Briggs and Stratton Engine (Engine)
- 124432-0117-E1 Briggs and Stratton Engine (Engine)
- 124432-0119-E1 Briggs and Stratton Engine (Engine)
- 124432-0120-E1 Briggs and Stratton Engine (Engine)
- 124432-0121-E1 Briggs and Stratton Engine (Engine)
- 124432-0150-E1 Briggs and Stratton Engine (Engine)
- 124435 (8101) Briggs and Stratton Engine (Engine)
- 12448-1 General Electric Range
Exact Part matches for your search term
[Viewing 2 of 2]
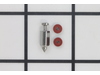
Roll Pin, 1/8 x 1
This part number matches the current model number 1244
PartSelect #: PS8855716
Manufacturer #: 1244
No Longer Available
Trim
This part number matches the current model number 1244
PartSelect #: PS12183914
Manufacturer #: 1244
No Longer Available
Keep searches simple, eg. "belt" or "pump".

Filter- A/C Cartridge
PartSelect #: PS8987387
Manufacturer #: 491588S
This is a replacement air filter/AC cartridge for your small engine. The air filter prevents dirt and debris from entering the engine. Over time, the air filter can become clogged or damaged, and this...
$7.06
In Stock


Starter Pawl-Ratchet
PartSelect #: PS8942598
Manufacturer #: 281505S
The manufacturer-approved Ratchet Pawl (Starter Pawl) comes in a set of two (2). This part attaches inside the recoil assembly, and is used to engage the flywheel. if broken due to wear/damage it will...
$3.99
In Stock

Kit-Needle/Seat
PartSelect #: PS8963322
Manufacturer #: 398188
This needle and seat kit, also known as a float valve, is found in many types of liquid-fueled lawn equipment, such as carburetors. The valve regulates the flow of fuel into the float bowl. The needle...
$6.91
In Stock


Porcelain Burner Drip Bowl - 8"
PartSelect #: PS220981
Manufacturer #: PM32X5041
No Longer Available


Common Symptoms of models starting with 1244
[Viewing 2 of 2]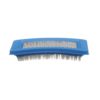
Keep searches simple. Use keywords, e.g. "leaking", "pump", "broken" or "fit".
The gasket needed to be replaced in top oven, it was brittle and broken.
We took out the philips screws on the right and left side of inside of the oven and two hex head screws on the clip on the top of the oven in the front. Then using a slot screw driver pryed the oven liner out enough to remove old gasket and replace the new gasket. We did see in some online directions that we were suppose to remove enti
... Read more
re oven from cabinet and loosen bolts in the back. But, we were able to get enough space to get the old gasket out and new one installed. We did use a 1/4" thick piece of wood on face of oven to prevent any denting of oven when prying out the liner of the oven.
Read less
Parts Used:

-
JoAnn from Auburn, WA
-
Difficulty Level:Easy
-
Total Repair Time:15 - 30 mins
-
Tools:Screw drivers
19 of 27 people
found this instruction helpful.
Was this instruction helpful to you?
Thank you for voting!
Oven Gasket Worn and Brittle
Took oven door off. Removed screws that were holding oven insert. Pulled out oven insert. Removed old gasket. Installed new gasket. Push oven insert back. Installed screws. Replaced oven door.
Parts Used:
-
Karen from Yakima, WA
-
Difficulty Level:Really Easy
-
Total Repair Time:15 - 30 mins
-
Tools:Screw drivers
7 of 7 people
found this instruction helpful.
Was this instruction helpful to you?
Thank you for voting!
Gasket around rim of oven broke while cleaning
Son-in-law unscrewed oven compartment; broken gasket was easy enough to remove and new gasket easy to replace; only problem was oven door would not shut tight. Tried shoving gasket harder into groove, tried turning on oven and heating new gasket to see if it would soften. Finally got it to close by pushing hard on left side of oven and
... Read more
inside light would at least go off and stay off.
Read less
Parts Used:
-
Dorothy from Santa Rosa, CA
-
Difficulty Level:A Bit Difficult
-
Total Repair Time:15 - 30 mins
-
Tools:Screw drivers
6 of 9 people
found this instruction helpful.
Was this instruction helpful to you?
Thank you for voting!