


Dehumidifier Maintenance Checklist
Your dehumidifier needs regular maintenance for it to run efficiently. You will need to inspect the air filter, coils, ventilation system, water reservoir, and drain line, as these parts are critical to the performance of your dehumidifier. If you've noticed lower performance, visible dirt on your unit, unpleasant odors, or water leakages then this guide is for you. From prolonging the lifespan of your dehumidifier to improving indoor air quality and reducing energy consumption, proper maintenance practices provide many benefits for both your home and your health.
Signs that Your Dehumidifier Needs Maintenance
- Visible Dust or Dirt: If you see visible dust or dirt on the exterior of the dehumidifier or around the intake and exhaust grilles, it's a good indication that the unit needs cleaning. When dust and debris accumulate on the surface of the unit, this can obstruct airflow and hinder the dehumidifier's performance.
- Foul Odors: A musty or unpleasant odor coming from the dehumidifier can indicate the presence of mold or mildew. Mold and mildew can develop on the coils, filters, or inside the water reservoir if they are not cleaned regularly. Cleaning the unit thoroughly can help eliminate these odors.
- Water Leakage: If you notice water leakage from the dehumidifier, it could be due to a clogged drain hose, or a faulty water reservoir. You'll need to inspect the unit for any signs of leakage and address the issue promptly to prevent water damage.
- Ice Formation: If you see ice forming on the coils of your dehumidifier, it may indicate that the unit is operating in a room that is too cold or that the airflow is restricted. Dehumidifiers do not perform well under 41 degrees Fahrenheit or 5 degrees Celsius. Ice formation can reduce the efficiency of the dehumidifier and potentially damage the coils. Ensure proper room temperature and ventilation to prevent ice buildup.
Items You'll Need For Dehumidifier Maintenance
- Gloves
- Vacuum Cleaner
- Soft Cloth
- Soft-bristled Brush
- Spray Bottle
- Pipe Cleaner/Plumbing Snake
- Mild Detergent
- Coil Cleaner
- Water and Vinegar Solution
Clean the Dehumidifier Filter
The filter is designed to capture particles such as dust, pet dander, and other pollutants as air passes through the unit. The filter helps improve indoor air quality by trapping these particles and preventing them from recirculating back into the room. Regular cleaning or replacement of the filter is typically recommended to maintain the efficiency and effectiveness of the dehumidifier. It is recommended to clean the filter at least once a month.
- Before cleaning your dehumidifier's filter, make sure the unit is turned off and unplugged from the power source to avoid any electrical hazards.
- You can find the filter typically behind a removable cover or grille on the front or side of the dehumidifier. You can consult your dehumidifier's manual if you're unsure where the filter is located.
- Remove the filter and handle it carefully to prevent any damage.
- Start by vacuuming the surface of the filter, then carefully vacuum between the filter's fins to ensure thorough cleaning.
- If your dehumidifier's filter is washable, rinse it under lukewarm water to remove stubborn dirt and residue and gently scrub with a sponge or soft brush. Avoid using hot water, as it can damage the filter.
- After washing, shake off excess water from the filter and allow it to air dry completely before reinstalling it in the dehumidifier.
- Once the filter is dry, slide it back into place. Ensure it is properly seated and secured to maintain proper airflow and filtration.
- Cleaning the filter should be part of your regular maintenance routine. Depending on usage and environmental factors, you may need to clean the filter every few weeks to once a month for optimal performance.
- If your dehumidifier's filter is not washable or if it's damaged or worn out, you will need to replace it with a new one. You can browse our list of genuine OEM dehumidifier filters to find the right one for your unit.
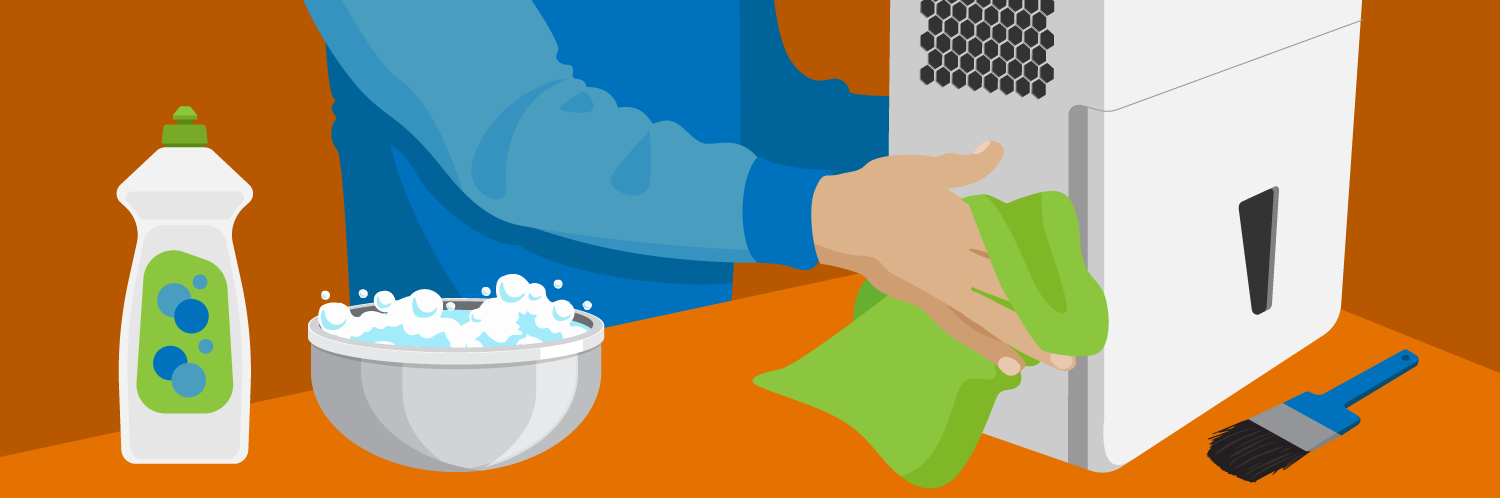
Clean the Dehumidifier Exterior
The outer casing of the dehumidifier encloses all the internal components of the unit. The exterior surface can accumulate dust, dirt, and other debris over time, leading to reduced airflow and lower performance. It is important to regularly clean this outer casing to keep your dehumidifier running efficiently. This also helps maintain its appearance and keeps it looking clean and presentable. You should clean the exterior at least once a month.
- Always start by unplugging the dehumidifier from the power source to avoid any electrical accidents.
- Use a soft-bristled brush to gently remove dust, dirt, and debris from the exterior surfaces of the dehumidifier. Pay attention to areas around vents, grilles, and controls where dust tends to accumulate.
- Wipe down the exterior surfaces of the unit, including the housing, control panel, and handles. Be careful not to let any liquid drip into the internal components of the dehumidifier. You can use a mixture of water and vinegar or a mild detergent.
- Use a clean, damp cloth to remove any soap residue. Then, use a dry cloth to thoroughly dry the exterior surfaces of the dehumidifier. Make sure there is no moisture left, especially around the controls and electrical components, to prevent any potential damage.
- If your dehumidifier has casters or feet, make sure to clean them as well. Wipe them down with a damp cloth to remove any dirt or grime that may have accumulated.
- Once the exterior is clean and dry, reassemble any removable parts, and plug the dehumidifier back into the power source.
Clean the Dehumidifier Drain Line
Many dehumidifiers offer a continuous drainage option, which allows you to connect a drain line to the unit instead of manually emptying the water reservoir. This is particularly useful if you're using the dehumidifier in a basement or other area where humidity levels are consistently high. The drain line is connected to the dehumidifier on one end, and to a floor drain, or sink at the other end. If the drain line is kinked or becomes blocked, water will be unable to flow out as needed, resulting in leakages and potential water damage.
- Always disconnect the dehumidifier from the power source before performing any maintenance to avoid electrical accidents.
- The drain line is typically a small tube or hose attached to the back or bottom of the dehumidifier.
- Check the drain line for any visible blockages, such as dirt, debris, or mold buildup. Use a flashlight if necessary to get a better view of the inside of the drain line.
- If the blockage is minor, you can try using a pipe cleaner, flexible brush, or a small plumbing snake to gently remove the obstruction from the drain line. Be careful not to damage the line.
- To guard against mold or mildew growth, use a turkey baster, funnel, or a small container to pour a mixture of warm water and vinegar into the drain line. This can help dislodge any debris or mold buildup.
- If the blockage is stubborn, you can use compressed air to blow out the obstruction from the drain line. Be sure to use low-pressure air to avoid damaging the line.
- Once you've cleared the blockage, reconnect the dehumidifier to the power source and let it run. Check to see if water is draining properly from the drain line. You can place a container under the drain line to catch any water and ensure it's flowing freely.
Clean the Dehumidifier Coils
The coils are located inside the dehumidifier and are responsible for absorbing moisture from the air. As warm, moist air is drawn into the dehumidifier, it passes over the cool surface of the evaporator coils. The temperature difference causes the moisture in the air to condense on the coil, forming water droplets. The condenser coils are responsible for heating up the collected water and turning it back into vapor or steam. This vapor is then expelled from the dehumidifier as warm air, leaving the water behind to be collected in a reservoir or drained away.
- Always make sure the dehumidifier is disconnected from the power source before cleaning.
- The coils are usually found behind the air intake grille or on the back of the unit. You will likely need to remove the filter to access the coils.
- Start by using a vacuum cleaner with a brush attachment to remove any loose dust, dirt, or debris from the coils. Gently brush along the coils to dislodge the buildup.
- Use a coil cleaner or a solution of equal parts water and vinegar. Dampen a soft cloth or sponge with the solution, then gently wipe down the coils. Avoid using harsh chemicals or abrasive materials, as they could damage the coils.
- After cleaning, use a different wet cloth or sponge to rinse away any soap residue from the coils.
- Let the coils air dry completely before reassembling the dehumidifier. This usually takes a few hours, but you can speed up the process by using a fan or hairdryer on a low, cool setting.
- Once the coils are dry, replace the air filter and any other parts you removed during the cleaning process.
- Finally, plug the dehumidifier back in and turn it on to make sure it's working properly. Check for any unusual noises or odors that may indicate a problem.
Clean the Dehumidifier Water Reservoir
The water reservoir or condensate bucket is a removable container located within the dehumidifier where the condensed water accumulates as moisture is removed from the air. It serves as a temporary storage space for the collected water until it needs to be emptied manually or drained through a continuous drainage option. It is common for mold to grow and foul odors to develop in the water reservoir if it is not regularly emptied and cleaned.
- Unplug the dehumidifier from the power source before cleaning to avoid any electrical accidents.
- Detach the reservoir and empty out the old water.
- Mix a solution of mild detergent with warm water in a bucket or sink and use a brush to thoroughly scrub the inside of the reservoir.
- After cleaning, rinse the reservoir thoroughly with clean water to remove any soap residue.
- Mix equal parts water and vinegar inside a spray bottle and spray the interior of the reservoir with the solution. Allow this to sit for a while to get rid of mold or mildew.
- Rinse the reservoir and allow it to air dry completely before reassembling the dehumidifier. Make sure there is no moisture left, as any remaining moisture can promote mold growth again.
- Once the reservoir is completely dry, place it back into the dehumidifier.
- Plug the dehumidifier back into the power source and test it to ensure it's working correctly.
- To prevent the reservoir from getting dirty too quickly, you should clean it every 1 - 2 weeks, especially if you notice any signs of mold or mildew.
Clean the Dehumidifier Intake and Exhaust Grilles
The intake grille is where humid air from the room enters the dehumidifier. It is usually located on the front or side of the dehumidifier. The exhaust grille is where dehumidified air exits the unit and is released back into the room. The exhaust grille is usually located on the back or top of the dehumidifier. It's important to keep the intake and exhaust grilles clear of any obstructions, such as dust, dirt, or debris, to ensure proper ventilation and optimal performance of the dehumidifier. Inspect the grilles at least once a month for best performance.
- Before you start cleaning, always turn off the dehumidifier and unplug it from the power outlet to ensure safety.
- Some dehumidifiers allow you to remove the grilles for easier cleaning. Check the user manual for instructions on how to remove the grilles safely. If they are removable, gently pull or unscrew them from the unit.
- Use a vacuum cleaner with a brush attachment to remove any dust, dirt, or debris from the intake and exhaust grilles. Pay close attention to the grille openings and the surrounding areas.
- For stubborn dirt or debris, use a soft-bristled brush to loosen and dislodge it from the grilles. Be gentle to avoid damaging the grilles or the unit.
- Dampen a cloth with a mild detergent solution and wipe down the grilles thoroughly to remove any remaining dirt or residue. Ensure the cloth is not too wet to prevent water from entering the dehumidifier.
- Once cleaned, allow the grilles to air dry completely before reattaching them to the dehumidifier. Make sure there is no moisture left on the grilles or the unit.
- If you removed the grilles, carefully reattach them to the dehumidifier following the manufacturer's instructions. Ensure they are securely in place to prevent any gaps or loose fittings.
- After cleaning and reattaching the grilles, plug in the dehumidifier and turn it on to ensure it's working correctly. Check for any unusual noises or changes in airflow.
How to Get Rid of Mold in Your Dehumidifier
Dehumidifiers are designed to remove moisture from the air, however, moisture can accumulate inside the unit, creating a perfect environment for mold growth. As mentioned above, mold will most likely grow in the drain line and water reservoir inside your dehumidifier as moisture tends to collect in these parts. That is why emptying the reservoir every 1 - 2 days is important. If the unit isn't cleaned frequently or thoroughly, mold can develop on other internal components in the unit.
- Mix equal parts water with white distilled vinegar to prepare a cleaning solution.
- Place the solution in a spray bottle and spray all the surfaces inside the dehumidifier. Pay close attention to areas where mold is visible or water tends to accumulate.
- Let the solution sit for an hour and then use a soft brush or cloth to scrub all the surfaces.
- Rinse all parts thoroughly with clean water to remove any remaining cleaning solution and mold residue.
- Allow everything to air dry completely before reassembling the dehumidifier and plugging it back in. Make sure there is no moisture remaining, as it can promote mold growth.
Like any other household appliance, dehumidifiers require regular maintenance to ensure they operate efficiently and effectively over time. By following these dehumidifier maintenance guidelines, you can maximize the performance and longevity of your dehumidifier while minimizing problems like reduced efficiency, foul odors, water leakage, and mold growth.


Keep your house cool, and your energy bill low with these handy tips for ai...

Don't be scared by superstition. Let us prove (or disprove) some of the mos...

Take 10 minutes out of your schedule to try these 10 appliance maintenance ...
