


How To Fix A Refrigerator That's Not Making Ice

Click a Part Below to Start Your Repair:
Water Fill Tubes Water Inlet Valve Ice & Water Filter Ice Maker Assembly & Replacement Ice MakerAbout this repair:
- Rated as EASY
- 3458 repair stories
- 23 step by step videos
Water Fill Tubes
Inspect the ice maker mold to see if there are ice cubes present. If there are no cubes or very small cubes, then you should look for issues with the water fill system.
How to inspect your refrigerator’s water fill tubes:
- Before beginning, disconnect both the power and water source from your refrigerator.
- At the back of the icemaker, inspect the fill tube and the fill cup area at the back of the ice maker to make sure that they are not frozen. If there is an ice buildup in that area, confirm no foreign objects have disrupted the flow of water into the fill cup.
- Inspect the outlet tubing from the fill valve to the ice maker fill tube for any signs of restrictions.
- If you find any issues while performing the checks above, you will need replacement water fill tubes.


Water Inlet Valve
Some water inlet valves may have a screen to filter debris before it can enter the valve. If the screen is plugged, water flow will be restricted, and the result will be small or layered ice cubes. Remove and clean the screen if it is clogged. If dirt has gotten into the valve it may not shut off completely and will continuously drip water into the ice maker fill tube and will eventually freeze up. Low household water pressure or a restriction at the manual shut off valve will also cause the water inlet valve to not shut off completely and create this same condition. Self piercing saddle valves are the most common shut off valve to cause this problem as the hole that is pierced in the water line is often too small and will more easily become restricted.
How to check the water inlet valve in a refrigerator with a multi-meter:
- Disconnect your appliance from the power and water source before beginning.
- Remove the rear access panel and locate your water inlet valve, it is usually found near the bottom.
- Before removing the inlet valve, look for any signs of leaks or loose connectors in the valve inlet supply. If no issues are found, inspect the valve body for any cracks or damage.
- Inspect the outlet tubing for any brittle tubing, abrasions, cracks, or any other damage.
- If you do not locate any leaks, disconnect the water inlet valve and remove it from the refrigerator to test it
- Set your multi-meter to the Rx1 setting and touch the terminals with the probes. You are testing for continuity and should receive a reading of 200 to 500 ohms.
- If you receive any other reading, you need a replacement water inlet valve.


Ice & Water Filter
If equipped, the Ice and Water filter in your refrigerator is responsible for removing any debris or contaminants from your water that may remain after local water treatment. Most filters contain and are made up of carbon and fabric filter. Over time, the filter may become restricted and reduce the water flow to the ice maker, causing a symptom of little or no ice. Most manufacturers recommend replacing the filter every 6 months, but local water conditions may require that you replace more frequently.
How to inspect your refrigerator’s ice and water filter:
- Determine when you last replaced your water filter. Replacement frequency varies by model and local water quality, but you should never go longer than 12 months without replacing your water filter.
- Locate your water filter. Location varies by model and brand, but it is often found inside the unit attached to the ceiling or back corner, behind the base grill, or in the water line leading to the fridge. If your filter is in the water line, you will need to turn off the water supply before removing the filter.
- Due to the variety of filters and placements we suggest you follow brand specific install instructions or refer to manufacturer guidelines. Before installing the new filter note the install date on the filter or on your calendar.
- If it has been longer than the manufacturer recommended guidelines, or you filter is damaged, you will need a replacement ice and water filter.


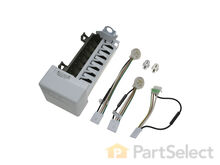
Ice Maker Assembly & Replacement Ice Maker
If there are no ice buildup issues or suspected problems with the water supply, then you may have a problem with the ice maker control. The most common type of ice maker used in modern refrigerators is the heat release ice maker. The testing procedure for the heat release ice maker involves a live voltage test, consequently it should only be performed by a qualified professional. However, the issue may also be related to the water fill system or the ice maker assembly.
How to inspect your refrigerator’s ice maker assembly:
- Begin by disconnecting the water source and unplugging your refrigerator.
- Open the freezer door in order to inspect the fill cup area and the fill tube itself for any signs of damage, wear, or freezing.
- Inspect the outlet tubing from the fill valve to the ice maker fill tube for any signs of restrictions.
- If there is an ice buildup in either area, confirm no foreign objects have disrupted the flow of water into the fill cup, and allow the freezer to defrost to see if that resolves the issue.
- If any issues are found while performing the checks above & defrosting the freezer did not solve the issue, you will need a replacement ice maker assembly. If nothing obvious has caused the ice buildup, then suspect the inlet valve or tubing.


More Repair Parts
Still not sure which part is broken? We can offer you custom troubleshooting help if you search with your model number.