Appliance Parts
- Accessories
- Dishwasher
- Dryer
- Stove / Oven
- Microwave
- Refrigerator
- Washer
- See more... See less...
Lawn Equipment Parts
- Lawn Mower
- Chainsaw
- Blower
- Generator
- Air Compressor
- Lawn Tractor
- Pressure Washer
- See more... See less...
How To Fix Leaking Refrigerator

About this repair:
- Rated as EASY
- 3265 repair stories
- 18 step by step videos
Door Gaskets Or Seals
Door gaskets or seals are found along the outside of the refrigerator’s doors. They are normally made from a vinyl material and will typically have a flexible magnetic strip inside to adhere to the cabinet when the door is closed to create an airtight seal. If there is moisture along the edge of the door then inspect the gaskets for distortion or damage. Air leakage through a defective gasket will create excessive moisture in the refrigerator, possibly resulting in defrost issues and potential water leaks.
How to inspect refrigerator door gaskets or seals:
- After unplugging your refrigerator, open the fridge and freezer doors to inspect the door gaskets or seals.
- You are looking for any discoloration, mold, wear, missing pieces, or anything else that may prevent a proper seal.
- If you find any of the above, you will need replacement gaskets or seals.
Water Inlet Valve
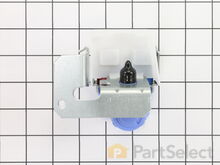
The water inlet valve is a solenoid-operated device that connects your household water supply line to your refrigerator if you have an ice maker or water dispenser. When activated, it diverts water from the supply line to the dispenser or to fill your ice maker.
How to check the water inlet valve in a refrigerator with a multi-meter:
- Unplug your refrigerator, disconnect the water supply and locate your water inlet valve. It is usually on the rear of the fridge, near the bottom. You will need to remove the rear panel to access it.
- Inspect the valve inlet supply connections for leaks and tighten or replace the connectors. You should also inspect the valve body for any cracks or damage. Check the outlet tubing for cracks or abrasions that may also create a leak and replace any cracked or brittle tubing and connectors.
- If none of the above appear to be the cause of the leak, remove the water inlet valve from the unit.
- Using a multi-meter on the Rx1 setting, test your valve for conitniuty by placing the probes on the valve’s terminals. You should receive a reading of 200 to 500 ohms.
- If you receive any other reading, you need a replacement water inlet valve.
Ice Maker Assembly
If your fridge is leaking water from in or around the ice maker, you’re probably also experiencing problems with the ice distribution itself. The cubes may be too small, one solid block of ice or not being produced at all. Inspect the ice maker mold to see if there are ice cubes present. If there are no cubes or very small cubes, then you should look for issues with the water fill system.
How to inspect a refrigerator’s ice maker assembly:
- Disconnect your appliance from both the power source and water source.
- Inspect the fill tube and the fill cup area at the back of the icemaker to make sure that they are not frozen. If there is an ice buildup in that area, confirm no foreign objects have disrupted the flow of water into the fill cup.
- Inspect the outlet tubing from the fill valve to the ice maker fill tube for any signs of restrictions.
- If any issues are found while performing the checks above, you will may a replacement ice maker assembly. If nothing obvious has caused the ice buildup, then suspect the inlet valve or tubing.
More Repair Parts
Still not sure which part is broken? We can offer you custom troubleshooting help if you search with your model number.


