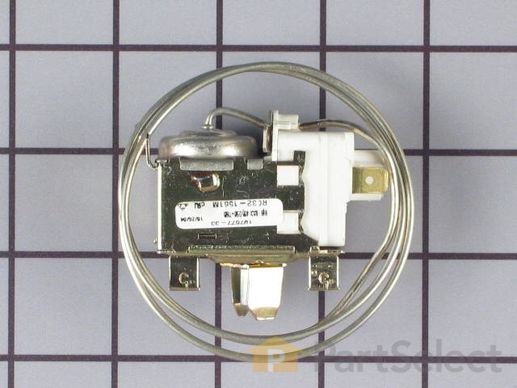
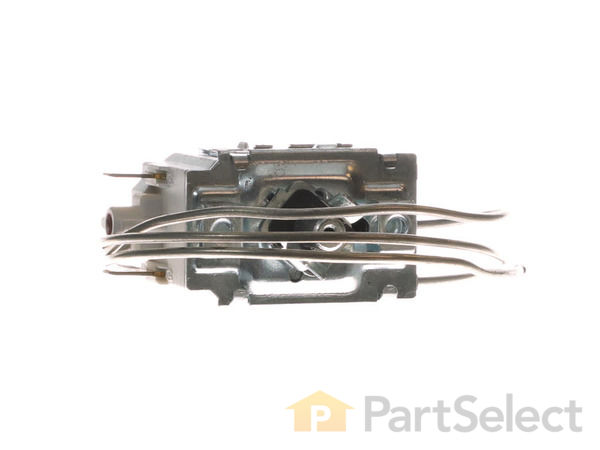
Temperature Control Thermostat
$
108.91
In Stock
Get this part fast! Average delivery time for in-stock parts via standard shipping: 1.8 days.
PartSelect Number PS470790
Manufacturer Part Number 5304404821
Manufactured by
Frigidaire

Check if this fits your product and find model diagrams
Need help finding your model number?
Product Description
Temperature Control Thermostat Specifications
This part helps maintain a constant temperature within the appliance.

How Buying OEM Parts Can Save You Time and Money
Troubleshooting
This part fixes the following symptoms:
Fridge too cold | Fridge runs too long | Fridge too warm
This part works with the following products:
Refrigerator.
This part works with the following products:
Frigidaire, Kenmore, Gibson, Uni.
Part# 5304404821 replaces these:
AP2150703, 638759, 5303321453, 5303323457, 5304401169, 5304403736, 5304404260
Questions and Answers
Ask our experts a question about this part and we'll get back to you as soon as possible!
- < Prev
- 1
- Next >
Sort by:
Search filter:
Clear Filter
Your search term must have 3 or more characters.
Keep searches simple. Use keywords, e.g. "leaking", "pump", "broken" or "fit".
Sorry, we couldn't find any existing answers that matched.Try using some different or simpler keywords, or submit your new question by using the "Ask a Question" button above!
Mary
December 15, 2021
need a temperature controller thermostat, for Frigidaire refrigerator
model #ffhs26119f7
For model number FFHS2611PF7

Hi Mary,
Thank you for your question. The temperature for your refrigerator is controlled by an electronic control board located inside the refrigerator. The part number listed under your model number for the electronic control board is PS10060580. If you would like to place an order for it, you may order it either online or by calling our customer service line and anyone will be happy to assist you. We hope this helps! If you have any questions, please let us know.
Was this helpful?
Thank you for voting!
Related Parts:
- < Prev
- 1
- Next >
✖
Ask a Question
Ask our experts a question on this part and we'll respond as soon as we can.
Something went wrong. Please try again later.
Your Question Has Been Submitted!
Our experts will send you an email as soon as your question has been answered.
Part Videos
Replacing your Frigidaire Refrigerator Temperature Control Thermostat

Customer Repair Stories
Average Repair Rating: 3.5 / 5.0, 7 reviews.
What's this?
- < Prev
- 1
- Next >
Sort by:
Search filter:
Clear Filter
Your search term must have 3 or more characters.
Keep searches simple. Use keywords, e.g. "leaking", "pump", "broken" or "fit".
Sorry, we couldn't find any existing installation instruction that matched.
refrigerator run won;t shut off
verifed temp cntrol by putting element in ice bath removed box and replaced both time and control
Other Parts Used:
-
Ronald from Bridgeport, CT
-
Difficulty Level:Easy
-
Total Repair Time:15 - 30 mins
-
Tools:Nutdriver, Pliers, Screw drivers
40 of 61 people
found this instruction helpful.
Was this instruction helpful to you?
Thank you for voting!
Refrigerator won't cycle up
There are 3 parts that actually control cooling cycle: Temperature Thermostat, Defrost Timer and sensor/relay on the back side of the appliance. If fridge cycles up after you turn small knob on defrost time (you'll hear click, problem lies between first two components.
Replacing them is really easy. Make sure you handle thermostat wire carefully. Check for connectors holding firm.
Use schematic diagrams you may find at this site.
Good luck.
Replacing them is really easy. Make sure you handle thermostat wire carefully. Check for connectors holding firm.
Use schematic diagrams you may find at this site.
Good luck.
Other Parts Used:
-
Branislav from Denver, CO
-
Difficulty Level:Easy
-
Total Repair Time:15 - 30 mins
-
Tools:Pliers, Screw drivers
19 of 27 people
found this instruction helpful.
Was this instruction helpful to you?
Thank you for voting!
Thermostat Control contacts burnt up
The Roper part was no longer available and a substitute was not recommended. But because of the excellant descriptions and photos on Part Select I was able to find a Fridgedaire part that looked exactly like the one I needed to replace. I it fit perfectly... I am impressed and have bookmarked your site for later purchases.
The thermostat is located at the top of the refridgerator compartmennt under the freezer. Remove light bulb to access the screw at the back of the thermostat/defrost timer housing. Remove screw and slide the assembly to the back to release the 2 tabs holding the front. Remove the temperature control knob on the thermostat, remove the 3 wires connected to the thermostat noting where which wire goes for re-assembly. Using a philips #2 screwdriver, remove the 2 screws under the temperature control knob and remove the thermostat. Do not lose the screws, the new thermostat does not have mounting hardware. Piece of cake, Ice cream cake if you get the freezer working again.
-
Marvin from Underwood, ND
-
Difficulty Level:Really Easy
-
Total Repair Time:Less than 15 mins
-
Tools:Screw drivers
15 of 18 people
found this instruction helpful.
Was this instruction helpful to you?
Thank you for voting!
Refrigerator was constantly running and freezing
I removed the screw holding the assembly to the roof of the refrigerator and pulled it dow. I took out the two screws holding the Temp control, removed the three wires and reversed the process to reassemble. Works great now!
-
Daniel from Rancho Cordova, CA
-
Difficulty Level:Easy
-
Total Repair Time:15 - 30 mins
-
Tools:Screw drivers
15 of 20 people
found this instruction helpful.
Was this instruction helpful to you?
Thank you for voting!
Fridge Will Not Start
Tapping on the thermostat control would start the compressor, but after cycle was complete it would not start again on it's own. Seemed like a slam-dunk that the control contacts were worn out. PS had the right part in stock, and it arrived quickly. Nearly identical to the original part, it installed without any problems. One minor glitch, though - the mounting tabs are tapped for #6 screws, but the original screws were #4. Since no hardware was included, I had to dig up larger screws to make it work. Not a big deal at all - but it would be handy to include these screws. Works just like the original, maintains inside temp just fine. A no-brainer for 65 bucks. This fridge is 15+ years old, and now serves as a beer cave. Cold beers for everyone!
-
John W from Gaylord, MI
-
Difficulty Level:Really Easy
-
Total Repair Time:30 - 60 mins
-
Tools:Nutdriver, Screw drivers
9 of 9 people
found this instruction helpful.
Was this instruction helpful to you?
Thank you for voting!
Refrigerator keeps running only turns off very seldomly
Problems. Two screws holding temperature control module to the plastic case did not fit the holes in temperature controler were too big. So I used gorilla glue to help secure but it was still loose a little bit with all the connections made i turned it on but it did not work
-
Scott from Canton, OH
-
Difficulty Level:Easy
-
Total Repair Time:30 - 60 mins
-
Tools:Nutdriver, Screw drivers
1 person
found this instruction helpful.
Was this instruction helpful to you?
Thank you for voting!
Dryer would not heat , only cold air
After realizing the engineering on this dryer was different, I was able to access the temperature control thermostat through the front, along the side of the heating element. Several philips screws hold the front on, removing them allows you to take front panel off. At that point the heating element is below. I took a picture of the wires, so that when I started removing them, it would be easy to reconnect. Two screws hold the heating element in place, upon removing the heating element housing pulls gently forward and out, be careful of the wires, the thermostat is the second thing connected to the housing of the heating element. Two more philips screws hold the housing to the bottom of the dryer. Two wires are removed from thermostat, which is also held in place by two philips screws. Remove wires, one at a time and place on thermostat exactly as they were on old thermostat. Hold new thermostat in place with the two Philip screws, and reassemble in reverse order. And enjoy your working dryer once more, hopefully for years to come.
-
Joseph from BUFORD, GA
-
Difficulty Level:A Bit Difficult
-
Total Repair Time:1- 2 hours
-
Tools:Nutdriver, Screw drivers
1 person
found this instruction helpful.
Was this instruction helpful to you?
Thank you for voting!
- < Prev
- 1
- Next >
Customer Reviews
Filter By Rating:
- < Prev
- 1
- Next >
Sort by:
Search filter:
Clear Filter
Your search term must have 3 or more characters.
Keep searches simple. Use keywords, e.g. "leaking", "pump", "broken" or "fit".
Sorry, we couldn't find any existing reviews that matched. Try using some different or simpler keywords.
Joseph T - August 29, 2020
Verified Purchase
Easy repair, refrigerator is like new again
This new thermostat was the last of four parts I replaced on a 30 year old Tappan. Problem was the old thermostat had the whole refrigerator running like a Freezer. I had prior replaced the sensor on the freezer coil, the relay on the compressor and the other part (sorry I can’t pull the name of it out of my head) located next to the thermostat. This new thermostat finally fixed the trusty old Tappan completely. My only complaint is the original screws on original thermostat are smaller in size than the new replacement one. As such I could not secure the thermo as it should be. So it sits loose, but the control knob holds it in place.
Max F - February 6, 2019
Verified Purchase
what i needed
the right part fast shipping will use again.max
Lucas F - March 20, 2018
Verified Purchase
Fixed the problem
Part was correct and easy to install however the screw holes were oversized and I had to squeeze the sides of the extruded holes in order to make the original screws fit tight. It would be great if the screws intended for the threaded holes on the part were included with the part.
- < Prev
- 1
- Next >
You May Also Need?
Model Cross Reference
This part works with the following models:
PartSelect Number: PS470790
Manufacturer Part Number: 5304404821
Brand
Model Number
Description