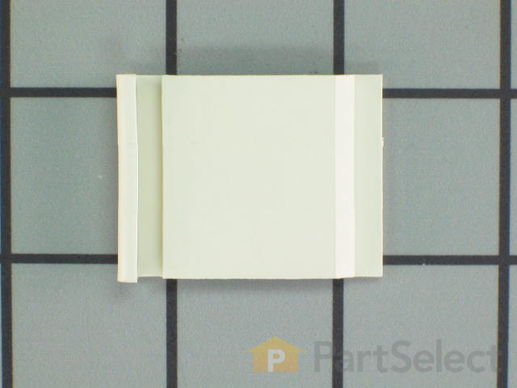
Part Location Diagram of 98010184 Whirlpool Lower Door Trim - Bisque
See part 16 in the diagram
( Grid squares measure 1x1 inch )
Customer Service Representative

Get in touch, we're here to help!

Daily 8am - 9pm EST

customerservice@partselect.com

Lower Door Trim - Bisque 98010184

 Fits your SF310PEKW0 Range!
★★★★★
★★★★★
1 Review

Rated by 5 customers 

Really Easy 

Less than 15 mins 

Ratings submitted by customers like you who bought this part.

$ 42.39
  In Stock
Get FREE EconoShip on orders over $100! T&C apply

Get this part fast! Average delivery time for in-stock parts via standard shipping: 1.8 days.

 Fits your SF310PEKW0 Range!
PartSelect Number PS404451
Manufacturer Part Number 98010184
Manufactured by Whirlpool
Product Description

Lower Door Trim - Bisque Specifications

Sold individually.
How Buying OEM Parts Can Save You Time and Money

How Buying OEM Parts Can Save You Time and Money

Troubleshooting
This part works with the following products:
Range.
This part works with the following products:
Whirlpool, Estate.
Part# 98010184 replaces these:
AP3129421, 923228, 98010184
Back to Top
Customer Reviews
Average Rating:
★★★★★
★★★★★
1 Review
5.0
Filter By Rating:
  • 5 Stars
    1
  • 4 Stars
    0
  • 3 Stars
    0
  • 2 Stars
    0
  • 1 Star
    0
Sort by:
  • 1
Sorry, we couldn't find any existing reviews that matched. Try using some different or simpler keywords.
  • 1
Customer Repair Stories
 Average Repair Rating: 4.5 / 5.0, 5 reviews. What's this?
Sort by:
  • 1
Sorry, we couldn't find any existing installation instruction that matched.
Oven door glass not secured at bottom; when opened, glass swings out and catches against broiler drawer, preventing oven door from fully opening.
1. Make sure oven is off and completely cool.
2. Remove any towels, potholders, etc from handle or oven face.
3. Lay out large bath towel or blanket flat on floor nearby.
4. Open oven door partially (45° angle or less).
5. Remove 3 screws securing oven door upper trim. These screws also go through the side trim pieces. Set the screws and the upper trim aside.
6. Push tops of side trim pieces out just far enough that they are not against the side of the oven door glass. Do NOT fully remove the side trim.
5. Remove 2 screws securing handle and glass from the rest of the door. Set these aside, separate from the oven door upper trim and screws.
6. CAREFULLY lift glass (handle still attached) vertically from door assembly and place on large bath towel, preferably handle side against the towel to keep towel fibers out of oven door interior.
7. Close oven door.
8. Place clip(s) in lower door edge slots (this part is fairly straightforward, as the clips only fit one way, with the u channel facing upright and outward).
9. Retrieve oven door glass and place bottom edge of glass into the u channel of the chips.
10. Carefully open oven door. You can brace the handle with your knee to keep everything aligned as you secure the handle screws back in place.
11. Move the side trim pieces back against the glass sides.
12. Realign the oven door upper trim and secure it with its screws. The outer screws will go through the side trim pieces as well.
  • Star from ROUND ROCK, TX
  • Difficulty Level:
    Really Easy
  • Total Repair Time:
    Less than 15 mins
  • Tools:
    Screw drivers
1 person found this instruction helpful.
Was this instruction helpful to you?
Thank you for voting!
Clip on bottom of glass door broken
At the top of the oven door, lossen the door handle. The handle also holds the top of the glass. One side at a time. Pull the bottom of the glass out far enough to see where the clip mounts. Insert clip. Wiggle the glass into it. Do the same on the other side. You may have to take the screw all the way out so be sure and hold on to the glass securely. Retighten top screws.
  • Carolyn from Bixby, OK
  • Difficulty Level:
    Easy
  • Total Repair Time:
    15 - 30 mins
  • Tools:
    Screw drivers
0 of 1 people found this instruction helpful.
Was this instruction helpful to you?
Thank you for voting!
lower trim broke
The same part was selling for almost $30 each so I was glad to find in on Parts Select. It only took a few minutes to put on and my oven is back to working condition. Thank you Parts Select
  • Robert from Riverside, CA
  • Difficulty Level:
    Really Easy
  • Total Repair Time:
    Less than 15 mins
  • Tools:
    Screw drivers
0 of 3 people found this instruction helpful.
Was this instruction helpful to you?
Thank you for voting!
Broken Door Handle and Holding Trim
The repair was/is a simple process only I didn't have all the parts. I assumed for the $12 price that I would be getting a PAIR of the very small door trims but there was only one so I had to order yet another to finish the job... It required 2 people, one to hold the glass door while being attached but overall it was a very easy fix.
Other Parts Used:
Lower Door Trim - Bisque Door Handle Kit - White
  • STACI from LOS ANGELES, CA
  • Difficulty Level:
    Easy
  • Total Repair Time:
    15 - 30 mins
4 of 6 people found this instruction helpful.
Was this instruction helpful to you?
Thank you for voting!
One bottom clip on the oven door had broken off and the handle for the door had lost it's screws.
I snapped the clip in place and replaced the front of the oven door. The door handle had completely come off so I had to screw the new one on. It took me longer to clean the door than it did to fix it.
Other Parts Used:
Lower Door Trim - Bisque Door Handle Kit - White
  • Timothy from Vermontville, MI
  • Difficulty Level:
    Really Easy
  • Total Repair Time:
    Less than 15 mins
  • Tools:
    Screw drivers
4 of 7 people found this instruction helpful.
Was this instruction helpful to you?
Thank you for voting!
  • 1
Questions and Answers

Be the first to ask our experts a question about this part!

You May Also Need ?
Model Cross Reference
This part works with the following models:
PartSelect Number: PS404451
Manufacturer Part Number: 98010184
Brand
Model Number
Description
Whirlpool
SF114PXSB0
Range - Freestanding, Gas
Whirlpool
SF114PXSB1
Range - Freestanding, Gas
Whirlpool
SF114PXSB2
Range - Freestanding, Gas
Whirlpool
SF114PXSQ0
Range - Freestanding, Gas
Whirlpool
SF114PXSQ1
Range - Freestanding, Gas
Whirlpool
SF114PXSQ2
Range - Freestanding, Gas
Whirlpool
SF114PXST0
Range - Freestanding, Gas
Whirlpool
SF114PXST1
Range - Freestanding, Gas
Whirlpool
SF114PXST2
Range - Freestanding, Gas
Whirlpool
SF114PXSW0
Range - Freestanding, Gas
Whirlpool
SF114PXSW1
Range - Freestanding, Gas
Whirlpool
SF114PXSW2
Range - Freestanding, Gas
Whirlpool
SF303PEKQ0
Range - Freestanding, Gas
Whirlpool
SF303PEKQ1
Range - Freestanding, Gas
Whirlpool
SF303PEKT0
Range - Freestanding, Gas
Whirlpool
SF303PEKT1
Range - Freestanding, Gas
Whirlpool
SF303PEKW0
Range - Freestanding, Gas
Whirlpool
SF303PEKW1
Range - Freestanding, Gas
Whirlpool
SF310PEKN0
Range - Freestanding, Gas
Whirlpool
SF310PEKN1
Range - Freestanding, Gas
Whirlpool
SF310PEKQ0
Range - Freestanding, Gas
Whirlpool
SF310PEKQ1
Range - Freestanding, Gas
Whirlpool
SF310PEKT0
Range - Freestanding, Gas
Whirlpool
SF310PEKT1
Range - Freestanding, Gas
Whirlpool
SF310PEKV0
Range
Whirlpool
SF310PEKW0
Range - Freestanding, Gas
Whirlpool
SF310PEKW1
Range - Freestanding, Gas
Whirlpool
SF315PEKB0
Range
Whirlpool
SF315PEKB1
Range - Freestanding, Gas
Whirlpool
SF315PEKQ0
Range - Freestanding, Gas
Customer Service Representative

Get in touch, we're here to help!

Daily 8am - 9pm EST

Contact Customer Service