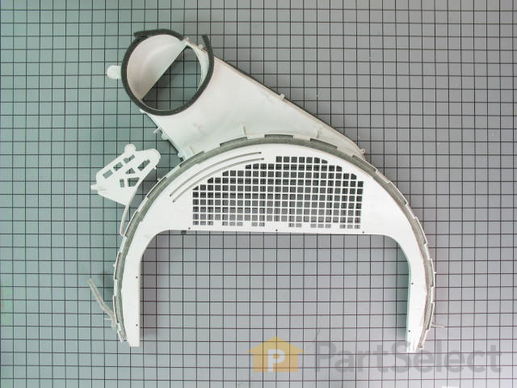
Part Location Diagram of WE14X25080 GE Dryer Lint Chute Assembly
See part 311 in the diagram
Replacing your General Electric Dryer Dryer Lint Chute Assembly
( Grid squares measure 1x1 inch )
Customer Service Representative

Get in touch, we're here to help!

Open until 12am EST

customerservice@partselect.com

Dryer Lint Chute Assembly

 Fits your HTDX100EM8WW!
★★★★★
★★★★★
17 Reviews

Rated by 21 customers 

Really Easy 

30 - 60 mins 

Ratings submitted by customers like you who bought this part.

$ 106.07
  In Stock

Get this part fast! Average delivery time for in-stock parts via standard shipping: 1.8 days.

 Fits your HTDX100EM8WW!
PartSelect Number PS11763093
Manufacturer Part Number WE14X25080
Manufactured by GE
Customer Service Representative

Get in touch, we're here to help!

Open until 12am EST

customerservice@partselect.com

Check if this fits your product and find model diagrams

Need help finding your model number?
Product Description

Dryer Lint Chute Assembly Specifications

The lint chute assembly houses the lint filter and channels exhaust air from the drum to the blower wheel.
How Buying OEM Parts Can Save You Time and Money

How Buying OEM Parts Can Save You Time and Money

Troubleshooting
This part fixes the following symptoms:
Noisy | Marks left on clothes
This part works with the following products:
Dryer.
This part works with the following products:
General Electric, Hotpoint.
Part# WE14X25080 replaces these:
AP6032647, WE14M0076, WE14M0079, WE14M0092, WE14M76, WE14M79, WE14M92, WE14X20425, WE14X21334
Back to Top
Questions and Answers

We're sorry, but our Q&A experts are temporarily unavailable.
Please check back later if you still haven't found the answer you need.

Part Videos

Replacing your General Electric Dryer Dryer Lint Chute Assembly

Replacing your General Electric Dryer Dryer Lint Chute Assembly
Customer Repair Stories
 Average Repair Rating: 3.6 / 5.0, 21 reviews. What's this?
  • 1
  • 2
  • 3
Sort by:
Sorry, we couldn't find any existing installation instruction that matched.
original duct was broken
Dear PartSelect.com,

My repair went off without a hitch.

2 screws removed to remove top.
4 screws removed from inside to remove front panel w/ door.
4 screws removed from top of control panel, loosed and popped top right off.
Flathead screwdriver to pop off old plastic panel.
Removed old wire chase (plastic, approx 3” long).
Removed built-up lint, wiped down area for new duct.
Snapped new duct on.
Dryer works like new!!
Took about 35 minutes, most of time spent cleaning up inside of dryer from lint due to broken duct.

One problem was that salesperson sold me on a new felt strip to go with new duct. That felt comes already installed on the new duct so I did not need it. Cost me a few extra dollars I did not need to spend.

Other than that, easy ordering, fast shipment, and parts are as close to original as possible.

Thanks for all your help!
Other Parts Used:
FELT TRAP DUCT
  • Chad from Gilbert, SC
  • Difficulty Level:
    Easy
  • Total Repair Time:
    30 - 60 mins
  • Tools:
    Screw drivers
139 of 158 people found this instruction helpful.
Was this instruction helpful to you?
Thank you for voting!
Noisy and took too long to dry clothes
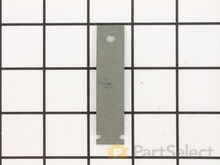
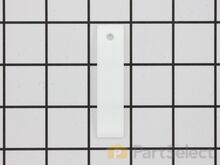
Easy repair. Removed top of dryer and removed two screws to front panel and door assembly. Old front air duct assembly was worn and broken, so it literally fell off the panel. I cleaned the front panel and door assembly of all the lint and dirt, and snapped the new parts into place. The new parts came with the gasket and felt drum seal already installed, to all that had to be done was to snap it into place. Installing the drum slides was a breeze. I simply had to slide one end in the slot, position the hole over the pin, and slide the other end in. I put everything back together, and ran a full cycle for test. Dryer works like new, and run quiet.
Other Parts Used:
FELT TRAP DUCT Front Drum Bearing Foam Seal Drum Bearing Slide - White
  • Bruno from Somerdale, NJ
  • Difficulty Level:
    Really Easy
  • Total Repair Time:
    15 - 30 mins
  • Tools:
    Screw drivers
54 of 65 people found this instruction helpful.
Was this instruction helpful to you?
Thank you for voting!
noise from the drum in the dryer
The weight of the front section of the drum in the dryer rides on 4 slim pieces of plastic. remove the screws that hold down the top of the dryer are in the front door at the top at each corner. remove the top, then remove 2 screws that hold down the front of the control panel to the cabinet at the base. remove the 2 screws at the of the front corners of the cabinet to separate the front door section from the rest of the dryer.Watch out for the wires the connect the door to the rest of the dryer. if you replace the bearing at the back of the dryer you need to take two screws out at the base of the cabinet one from each corner to let the sides of the cabinet to spread out and let the drum pass though the front of the dryer cabinet. the belt has to come off the motor by lifting it up an sticking your hand in under the drum and working it off the end of the motor. replaced the parts ad the dryer works like new.
Other Parts Used:
Front Drum Bearing Rear Drum Bearing Kit Drum Bearing Slide - Green Drum Bearing Slide - White
  • William from Blue Springs, MO
  • Difficulty Level:
    Easy
  • Total Repair Time:
    30 - 60 mins
  • Tools:
    Screw drivers
52 of 81 people found this instruction helpful.
Was this instruction helpful to you?
Thank you for voting!
The dryer began squeeking very loudly progressively getting worse
A very easy fix. Opening the front door to the dryer locate two chrome phillips head screws in the upper part of the door opening which hold on the top of the dryer. (I think in the older dryers the top simply was held on with keepers and you could simply pry it off. Not the case here)Lifting up on the front of the top it comes away from the back control panel. I would recommed that the control panel be removed as it is necessary to remove it to put the dryer top back on due to three clips that wont allow you to put the top back down with the control panel in place. It takes a star wrence to remove it. Once the top is off ther are two phillips screws holding the front of the dryer on (one on each side) remove them and the whole fron lifts up and off. The drum rides on a plastic schroud attached to the dryer inside front. Mine was so worn it required the purchase of the entire assembly which comes in two parts. The upper part had worn away so badly the drum was riding on the metal causing the noise. I ordered both the upper and lower assembly and both just simply snap off and the new ones snap right back on. No tools. I was a bit dissapointed as I assumed that the felt which is located in the lower assembly would come with the new part however it did not nor did some plastic tabs which the drum rides on in the upper assembly comes with the replacement part. It takes four of those tabs so order appropriately. Went back together easily and the whole job was done in about 40 minutes.
Other Parts Used:
Front Drum Bearing Drum Bearing Slide - White
  • Michael from Sioux City, IA
  • Difficulty Level:
    Really Easy
  • Total Repair Time:
    30 - 60 mins
  • Tools:
    Screw drivers
36 of 55 people found this instruction helpful.
Was this instruction helpful to you?
Thank you for voting!
Horrible screeching noise when the dryer drum was in motion, cracked pieces were tangling and ripping the drying clothes.
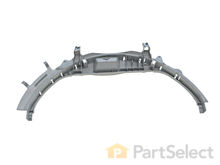
I removed the top of the dryer (unscrewed from the inside to release the top). Removed interior screws to pull open the front of the dryer. Once inside, it was really visible that the old parts (front air duct top and bottom) were in bad shape. They were cracked and broken. I removed the old pieces (they pretty much cracked and crumbled right off). I snapped in the new pieces careful to avoid damaging the electrical connections and wires. Once snapped into place (top and bottom), I careful put the front back into place making sure that the dryer drum rested on the new pieces. All screws back in place and all done! Dryer is now working as new!!!
Other Parts Used:
Lint Filter - White Frame
  • MonaLisa from Bronx, NY
  • Difficulty Level:
    A Bit Difficult
  • Total Repair Time:
    15 - 30 mins
  • Tools:
    Screw drivers
28 of 49 people found this instruction helpful.
Was this instruction helpful to you?
Thank you for voting!
Terrible squeak and slow drying
Open it up. Try to fix with duct tape. Test. Fail. Order parts.

Put slides on, open it up, put parts on door, align drum, close it up.

Start, smile and BRAG!!!!

Works faster, fluffer clothes and I'm a happy Mom because now I can run whenever and there is less wrinkles.
Other Parts Used:
Drum Bearing Slide - Green Foam Seal Drum Bearing Slide - White
  • Cindy from St. Charles, MO
  • Difficulty Level:
    A Bit Difficult
  • Total Repair Time:
    Less than 15 mins
  • Tools:
    Screw drivers
14 of 23 people found this instruction helpful.
Was this instruction helpful to you?
Thank you for voting!
Catching clothing and reping
Removed that to screws for that top first and door shake top little to that front and I took two screws on that top each side and removed that front and lint trap and install the new
  • Jose from LILBURN, GA
  • Difficulty Level:
    Really Easy
  • Total Repair Time:
    15 - 30 mins
  • Tools:
    Screw drivers
4 of 5 people found this instruction helpful.
Was this instruction helpful to you?
Thank you for voting!
Very noisy operation
Very easy! Removed old parts, and installed new parts in reverse order. Dryer was running, and sounded like a new appliance in 35 minutes!
Other Parts Used:
TOP BEARING FELT TRAP DUCT Drum Glide Bearing - White BEARING SLIDE
  • Larry from LAS VEGAS, NV
  • Difficulty Level:
    Really Easy
  • Total Repair Time:
    30 - 60 mins
  • Tools:
    Screw drivers
3 of 5 people found this instruction helpful.
Was this instruction helpful to you?
Thank you for voting!
a lot
started with replacing the belt and tension pulley which I purchased from another source. I found your videos on line and they are great. easy to follow. Realized I needed the bottom vent assembly and your prices were better than my local supplier. It was easy to replace thanks to your video. It was nice that you included it in the final order status. The only problems. Did not know the duct felt seal was included with the new duct assembly. I ordered the wrong bearing slides, web site showed both green and white for my model. I now realize I should replace the upper bearing housing. Can I return the unused parts, unopened and have that put as a credit to my next order? Thanks
  • Craig from HOPKINS, MI
  • Difficulty Level:
    Very Easy
  • Total Repair Time:
    15 - 30 mins
  • Tools:
    Pliers, Screw drivers
2 of 3 people found this instruction helpful.
Was this instruction helpful to you?
Thank you for voting!
Loud scrapping sqeaks
Diagnostics, ordered front and back bearing. Added the belt because I was there. Parts came quickly. disassembled, shot photos of wire assemblies. Unprepared for element and lint trap housing failure as the heating element was only 1/2 functional, made followup ordered which included the green and white shims. Note, front bearing replacement does not come with wear shims, disappointing. Very inexpensive and should just be part of replacement package. Reassembled in reverse order, tricky part was the belt reinstall. New light made the repair complete.
Other Parts Used:
FELT TRAP DUCT Light Bulb Drum Bearing Slide - Green Heating Element and Housing
  • Matthew from AUBURN, WA
  • Difficulty Level:
    Easy
  • Total Repair Time:
    1- 2 hours
  • Tools:
    Pliers, Screw drivers, Socket set
2 of 2 people found this instruction helpful.
Was this instruction helpful to you?
Thank you for voting!
  • 1
  • 2
  • 3
Customer Reviews
Average Rating:
★★★★★
★★★★★
17 Reviews
4.9
Filter By Rating:
  • 5 Stars
    15
  • 4 Stars
    2
  • 3 Stars
    0
  • 2 Stars
    0
  • 1 Star
    0
  • 1
  • 2
Sort by:
Sorry, we couldn't find any existing reviews that matched. Try using some different or simpler keywords.
  • 1
  • 2
You May Also Need?
Model Cross Reference
This part works with the following models:
PartSelect Number: PS11763093
Manufacturer Part Number: WE14X25080
Brand
Model Number
Description
General Electric
62160T3WB
Dryer
General Electric
62160T5WB
Dryer
General Electric
62261T0WW
Dryer
General Electric
62261T3WW
Dryer
General Electric
633615
Dryer
General Electric
633616
Dryer
General Electric
633617
Dryer
General Electric
63361T0WW
Dryer
General Electric
63361T3WW
Dryer
General Electric
63361T5WW
Dryer
General Electric
65300T0WB
Dryer
General Electric
65300T3WB
Dryer
General Electric
653615
Dryer
General Electric
653616
Dryer
General Electric
653617
Dryer
General Electric
65361T0WW
Dryer
General Electric
65361T3WW
Dryer
General Electric
65361T5WW
Dryer
General Electric
65371T0WW
Dryer
General Electric
65371T3WW
Dryer
General Electric
65371T5WW
Dryer
General Electric
662310
Dryer
General Electric
662311
Dryer
General Electric
662410
Dryer
General Electric
662411
Dryer
General Electric
662412
Dryer
General Electric
663615
Dryer
General Electric
663616
Dryer
General Electric
663617
Dryer
General Electric
66361T3WW
Dryer
Customer Service Representative

Get in touch, we're here to help!

Open until 1am EST

Contact Customer Service