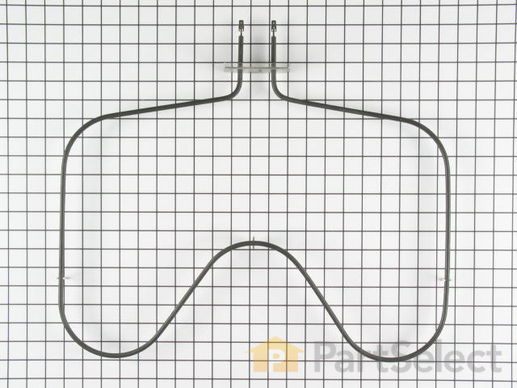
This bake element is located at the bottom of the oven to supply heat and it has push-on terminals. If your baking element is burnt out, the heat is not consistent, or is defective, then replacing the element could be a solution to your appliance problem. The tools needed for this replacement are: a screwdriver and needle-nose pliers. The first step in is to unplug the range or shut off the house circuit breaker before starting. Unscrew the black of the oven cavity to pull out wires from the defective element. Reconnect wires to the new element and screw it back on. Make sure the element is sitting flat.
How Buying OEM Parts Can Save You Time and Money
Troubleshooting
This part fixes the following symptoms:
Little to no heat when baking | Element will not heat | Oven not heating evenly | Will Not Start
We're sorry, but our Q&A experts are temporarily unavailable.
Please check back later if you still haven't found the answer you need.
29 questions answered by our experts.
< Prev
1
2
3
Next >
Sort by:
Search filter:
Clear Filter
Your search term must have 3 or more characters.
Keep searches simple. Use keywords, e.g. "leaking", "pump", "broken" or "fit".
Sorry, we couldn't find any existing answers that matched.Try using some different or simpler keywords, or submit your new question by using the "Ask a Question" button above!
John
December 8, 2017
I got the new baking element, I connected put back the power but element is not working although the tester shows power on attachment connections.
For model number WFE361LVT0
Hi John, Thank you for the question. If the element tested good and it is not turning on, it sounds like an issue with the Electronic Control Board. This board controls the oven operations and might be defective. Hope this helps!
7 people found this helpful.
Was this helpful?
Thank you for voting!
Dave
November 12, 2017
How do you check the bake element to make sure it is bad?
For model number RF265LXTT0
Hi Dave,
Thank you for your question. You will have to remove the element from your appliance. You would test your element with a multi meter to check to see if it is working correctly. This element should show a reading between 0 and 50 ohms of resistance. I hope that helps. Good luck with your repair.
4 people found this helpful.
Was this helpful?
Thank you for voting!
Jennell
November 14, 2019
Will product number wpw10308477 be compatible with rf303pxkq?
For model number RF303PXKQ
Hello Jennell, Thank you for contacting us. I have researched the model you have provided and have found the part you are looking for is Manufacturer Part Number WPW10308477. Hope this helps!
2 people found this helpful.
Was this helpful?
Thank you for voting!
Mary
November 22, 2019
How wide is the element?I
For model number WPW10308477
Hi Mary, it is almost 21 inches wide. Thank you for your question and good luck with your repair!
2 people found this helpful.
Was this helpful?
Thank you for voting!
Josephine
May 20, 2019
My oven has stopped heating completely, neither the bottom element nor the broil element even get warm. Is it possible to repair the problem? Thank you.
For model number 1RE32303
Hello Josephine, thank you for inquiring. For this symptom you will want to replace either the Safety Thermostat part PS11740991 or the Oven Sensor part PS11749737. We hope this helps.
1 person found this helpful.
Was this helpful?
Thank you for voting!
Pat
November 4, 2019
What is the wattage of the bottom oven element of my range?
For model number AER5844VCS0
Hi Pat,
Thank you for your question. The bake element is 2400 Watts. I hope this helps. Thank you and have a great day!
1 person found this helpful.
Was this helpful?
Thank you for voting!
CLIFFORD
November 8, 2019
The lower and upper heating elements will not heat up ! All of the numbers and buttons on the cercuit board seam to work just fine
For model number RF265LXTB3
Hello Clifford, thank you for your question. The most likely issue is a bad electronic control board PartSelect Number: PS11728037. However, we would recommend testing the sensor first, as this could also cause that issue. If the sensor is fine, the board should be replaced. The sensor is PartSelect Number: PS11749737. Testing the temperature sensor probe on your oven is easy. With the sensor at room temperature, measure the resistance between the two prongs at the end of the sensor connector. The resistance of the sensor should read approximately 1080 – 1090 ohms at room temperature. Hope this helps!
1 person found this helpful.
Was this helpful?
Thank you for voting!
Terry
January 21, 2020
This is a Whirlpool baking element h*ow do i attach to my oven
For model number Rf364lxmt0
Hello Terry, thank you for your question. The bake element is PartSelect Number: PS11752501. There is an installation video at the link for this part. Here is the link that will provide the installation instructions.
https://www.partselect.com/PS11752501-Whirlpool-WPW10308477-Oven-Bake-Element.htm?SourceCode=4&SearchTerm=RF364LXMT0&ModelNum=RF364LXMT0
1 person found this helpful.
Was this helpful?
Thank you for voting!
Earl
December 22, 2019
Can this part be picked up in houston,texas today?
For model number Wpw10308477
Hello Earl and thank you for writing.
No, sorry we are selling online only and shipping to customers, we do not have any storefronts. We hope this helps. Please contact us anytime.
1 person found this helpful.
Was this helpful?
Thank you for voting!
Sylvain
April 8, 2022
I need the baking element my stove model is werp4110sb and my element : connection 1.75 inch wide approx. 20.5 inch and depth 16 inch approx. I think the real part number is PS11752501 thanks
For model number WERP4110SB0
Hello Sylvain, Thank you for contacting us. We have researched the model you have provided and have found the part you are looking for is PartSelect Number PS11752501. If you need help placing an order, customer service is open 7 days a week. Please feel free to give us a call. We look forward to hearing from you!
Was this helpful?
Thank you for voting!
< Prev
1
2
3
Next >
Part Videos
Replacing your Whirlpool Range Oven Bake Element
Customer Repair Stories
Average Repair Rating: 4.5 / 5.0, 25 reviews.
What's this?
< Prev
1
2
3
Next >
Sort by:
Search filter:
Clear Filter
Your search term must have 3 or more characters.
Keep searches simple. Use keywords, e.g. "leaking", "pump", "broken" or "fit".
Sorry, we couldn't find any existing installation instruction that matched.
heating element burnt up
first I pulled the stove from the wall. Then unplugged the stove from the wall (electric stove) for safety. then I removed the middle back panel screws(2) and then the panel. I then pulled the wires off the heating element that was bad. I took the screws (2) off the heating element inside the oven. I had to use WD-40 to loosen the screws because with the heat they were really stuck. I removed the heating element and replaced it with the one I got through partselect.com. Put everything back and walla finished. Partselect.com sent me the right part at the right price and fast. No hassles at all.
Esther from San Antonio, TX
Difficulty Level:
Really Easy
Total Repair Time:
15 - 30 mins
Tools:
Nutdriver, Screw drivers
97 of 107 peoplefound this instruction helpful.
Was this instruction helpful to you?
Thank you for voting!
Baking element on stove wouldn't heat
Went online and located the correct part, which I had shipped to me next day. The part arrived I removed the two screws which held the element in place, unclipped the two wire leads, then replaced old element with the new one, reattached wire clips then screwed new element in place. All done 10 min.
Reggie from Piedmont, SC
Difficulty Level:
Really Easy
Total Repair Time:
Less than 15 mins
Tools:
Screw drivers
40 of 44 peoplefound this instruction helpful.
Was this instruction helpful to you?
Thank you for voting!
Lower element went out
I removed the two screws that held the element in place . I think pulled out the element and disconnected the two wires. I put the new element in and connected the two wires. I went to put the element back in and something sparked and burned up the wire. Lesson learned - turn the electricity off first. I had to pay a repair man to come out and replace the wire.
Kimberly from Palestine, TX
Difficulty Level:
Really Easy
Total Repair Time:
Less than 15 mins
Tools:
Screw drivers
17 of 21 peoplefound this instruction helpful.
Was this instruction helpful to you?
Thank you for voting!
Heating element burned up
It was simple. Unscrewed to screws at the back of the oven. Slipped off the wire connectors then attached the wire connectors to the new part, put the screws back in and we were back in business.
Jerry D from Spring Valley, CA
Difficulty Level:
Easy
Total Repair Time:
15 - 30 mins
Tools:
Screw drivers
8 of 10 peoplefound this instruction helpful.
Was this instruction helpful to you?
Thank you for voting!
The heating coil was no longer working.
My husband pulled the oven out and unscrewed the screws(in the back) the heating element came right out. He did everything on his own. The only thing he needed a little help with was for me to keep the heating coil flush to the back wall of the oven, while he screwed the new one in. It was a very quick job. The longest part was pulling the oven out to get behind it and sliding it back in.
Amanda from Midwest City, OK
Difficulty Level:
Really Easy
Total Repair Time:
15 - 30 mins
Tools:
Screw drivers
5 of 6 peoplefound this instruction helpful.
Was this instruction helpful to you?
Thank you for voting!
Bake element was taking time to warm up
Wire connection was damaged, replaced end piece
Jean-Claude from Miami, FL
Difficulty Level:
Really Easy
Total Repair Time:
Less than 15 mins
5 of 6 peoplefound this instruction helpful.
Was this instruction helpful to you?
Thank you for voting!
element went out on the stove
My wife did it! I got home one night and my wife had done it! That's how easy it was! Trust me, he is no handyman (woman) but she did it by herself. The part came fast, the price was better than any one else's
christopher from harrisburg, NC
Difficulty Level:
Really Easy
Total Repair Time:
15 - 30 mins
Tools:
Screw drivers
5 of 7 peoplefound this instruction helpful.
Was this instruction helpful to you?
Thank you for voting!
The oven was blowing a circuit.
Unplugged unit from wall. Unscrewed the two screws on at he back of the oven where the element is attached Removed old element by pulling apart the connectors. Attached new element to the connectors. Replaced cover with the two screws.
Rhonda from Logan, OH
Difficulty Level:
Really Easy
Total Repair Time:
Less than 15 mins
Tools:
Screw drivers
5 of 9 peoplefound this instruction helpful.
Was this instruction helpful to you?
Thank you for voting!
Bake Element Does not Heat
I installed th for a refue Temperature Sensor and that was the fix. I did not need to install the bake element. I returned the bake element
Oven not browning on top. Temp not adequate. Top element not producing heat.
I actually found a loose connection . After receiving parts I removed back cover. Only then did I find a loose connection to the element . I cleaned and repaired the connection and replaced the sensor which was faulty. The element awaits a time review of my decision to not use it.
Keep searches simple. Use keywords, e.g. "leaking", "pump", "broken" or "fit".
Sorry, we couldn't find any existing reviews that matched. Try using some different or simpler keywords.
★★★★★
★★★★★
Larry W - January 16, 2023
Verified Purchase
easy repair
the part was in great condition and got the part fast. it took me about 5 minutes to put it in and know the stove works great again.
★★★★★
★★★★★
Sandra M - December 19, 2022
Verified Purchase
Fixed the problem!
I appreciate the ease in which I was able to resolve the issue of getting the appliance up and running!
Thank you.
★★★★★
★★★★★
Chiquita H - December 17, 2022
Verified Purchase
Easy repair
Fast service
★★★★★
★★★★★
Gwen D - November 26, 2022
Verified Purchase
Fast & accurate delivery/part
Received the part within a couple of days of ordering. Site was very helpful in finding serial # and exact part needed for my oven. Also helpful with the video on installation. Would definitely use this again
★★★★★
★★★★★
E H B - November 22, 2022
Verified Purchase
Easy to Install, Worked Well,
The order was delivered quickly. It was easy to install. It works appropriately.
★★★★★
★★★★★
Daniel D - November 17, 2022
Verified Purchase
Quality part, easy install
Very good price. Easy and quick to install (I used the video here on the PartSelect website product page). Oven back to working like it should.
★★★★★
★★★★★
Kenneth C - November 7, 2022
Verified Purchase
Perfect fit
Site made it easy to order correct part. Arrived on time in perfect condition.
★★★★★
★★★★★
Todd G - September 26, 2022
Verified Purchase
Working great
Came on time and if I remember right. It came early
★★★★★
★★★★★
Nicole T H - September 5, 2022
Verified Purchase
Easy repair-worked as expected. Video was very helpful and easy to follow
The part shipped in a timely manner. Our oven is working again!
★★★★★
★★★★★
Patrick C - July 22, 2022
Verified Purchase
Hot Stuff !
Thank You, it fit perfect..
< Prev
1
2
3
Next >
Model Cross Reference
This part works with the following models:
PartSelect Number: PS11752501
Manufacturer Part Number: WPW10308477
The Fix App makes it easy to manage all your stuff in one place. Just snap a photo and we'll find and store your user manuals, receipts, and product information in one easy-to-find place!
"Like magic. I took a picture of the model number on my refrigerator, and the app identified it right away … Very convenient. I'm impressed." ★★★★★ - Clever Jeff