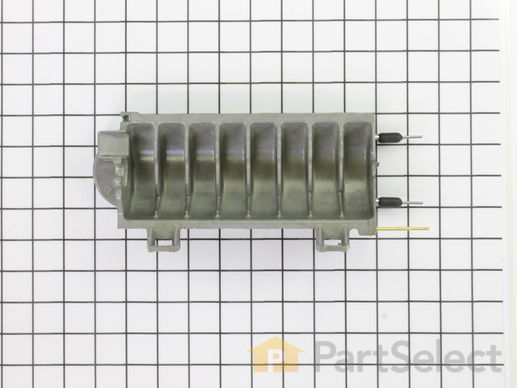
Ice Mold
Get this part fast! Average delivery time for in-stock parts via standard shipping: 1.8 days.

Check if this fits your product and find model diagrams
Need help finding your model number?Ice Mold Specifications

How Buying OEM Parts Can Save You Time and Money
Ask our experts a question about this part and we'll get back to you as soon as possible!
- < Prev
- 1
- Next >

6 people found this helpful.

3 people found this helpful.

1 person found this helpful.

1 person found this helpful.

1 person found this helpful.


- < Prev
- 1
- Next >
Replacing your Kenmore Refrigerator Ice Mold

- < Prev
- 1
- 2
- 3
- Next >
-
Roger from Sunnyvale, CA
-
Difficulty Level:Easy
-
Total Repair Time:30 - 60 mins
-
Tools:Nutdriver, Screw drivers
-
ian from estero, FL
-
Difficulty Level:Easy
-
Total Repair Time:15 - 30 mins
-
Tools:Nutdriver, Pliers, Screw drivers, Wrench set
-
George from Cottage Grove, MN
-
Difficulty Level:Really Easy
-
Total Repair Time:Less than 15 mins
-
Tools:Nutdriver, Screw drivers
-
Andy from Lorena, TX
-
Difficulty Level:Easy
-
Total Repair Time:15 - 30 mins
-
Tools:Screw drivers, Socket set
I set the ice maker on the counter, snapped of the front cover by hand. using a phillips driver, remove two screws near the bottom corners.(they go through the circuit board into the ice mold)
circuit board in one hand, other end of ice mold in the other, slowly pull apart about 1 inch. remove the silver colored "on, off" bar at the end by snapping the retainer out of the ice mold. (the silver bar stays with the circuit board end)
Watch how the ice guide(white fingers stationary on side of ice mold) hooks too the ice mold on each end. swap ice guide to new ice mold, insert three guide pins on end into holes on the circuit board, while holding ice guide onto ice mold, watch rotation bar while inserting into motor.(it only splines one way.) when each piece is lined up, simply push together and reinstall two screws. snap circuit board cover into place. reinstall ice maker into freezer in reverse order.
-
Martin from Shakopee, MN
-
Difficulty Level:Really Easy
-
Total Repair Time:15 - 30 mins
-
Tools:Nutdriver, Screw drivers
Remove the ice maker assembly. 3 small hex screws. Unplug power cord. Disassemble ice maker assembly. Remove ice mold/heater. Replace with new. Reassemble.
-
joe from hilliard, OH
-
Difficulty Level:Really Easy
-
Total Repair Time:15 - 30 mins
-
Tools:Nutdriver
-
timothy from indio, CA
-
Difficulty Level:Easy
-
Total Repair Time:1- 2 hours
-
Tools:Nutdriver, Screw drivers, Socket set
Loosen the two 1/4 inch upper nuts and remove the lower nut to remove the ice maker from the freezer. The hardest part was getting it unplugged. I used a small blade screwdriver to release the catch on the connector and pull it out.
Remove the ice maker front cover. If you have a skinny enough phillips screw driver, there are two deep set screws through two holes on the lower portion of the control module (otherwise, remove the three screws on the controller, unlatch the shut-off arm from the control module, and separate the controller to access the mold screws). Unhook the shut-off wire from the end of the tray. Unscrew the two screws holding the mold and remove the mold.
Remove the plastic hardware from the old mold and install on the new mold.
Attach the new mold on to the control module.
WARNING WARNING WARNING!!! The mold I bought already had the alumilastic on it for the contact point to the thermostat. When I installed it and tightened the screws, the alumilastic was dried out, didn't squash down, and dented the bi-metal thermostat on the controller, ruining it. I had to buy a new thermostat. Be sure to check that the alumilastic is pliable. If not, take it off and buy some fresh to put on there.
Re-install the ice maker. It took a while to get the first batch of ice because the ice maker was at room temperature and I had the freezer door open for several minutes. So the freezer had to get cold and the ice maker had to chill down. Once everything got cold, it started making ice again.
-
Anthony from Billings, MT
-
Difficulty Level:A Bit Difficult
-
Total Repair Time:More than 2 hours
-
Tools:Nutdriver, Screw drivers
For ease of work remove freezer shelve directly below the ice maker. Remove four screws from the bottom of the ice maker assembly, three that secure the ice maker and the other that holds a plastice shroud in place over the ice maker's power plug.
The ice maker is now ready to be removed; it will slide forward by pushing up on left and right side of the ice maker's mounting slide rails. Once the ice maker is moved forward it is easier to disconnect its power plug (depress a locking tab on the side of the connector and pull connector apart and remove ice maker assembly.
Remove and replace motor module by removing three screws and and replace with new unit.
Reverse ice maker removal proceure for installation. Once installation is completed turn on Power to Refrig, Ice making should begin after a few hours.
-
Dennis from Sebastian, FL
-
Difficulty Level:A Bit Difficult
-
Total Repair Time:1- 2 hours
-
Tools:Nutdriver, Screw drivers
-
Matthew from Collegeville, PA
-
Difficulty Level:Easy
-
Total Repair Time:15 - 30 mins
-
Tools:Nutdriver, Screw drivers
- < Prev
- 1
- 2
- 3
- Next >
- < Prev
- 1
- 2
- Next >
- < Prev
- 1
- 2
- Next >
Manufacturer Part Number: WPW10190929